|
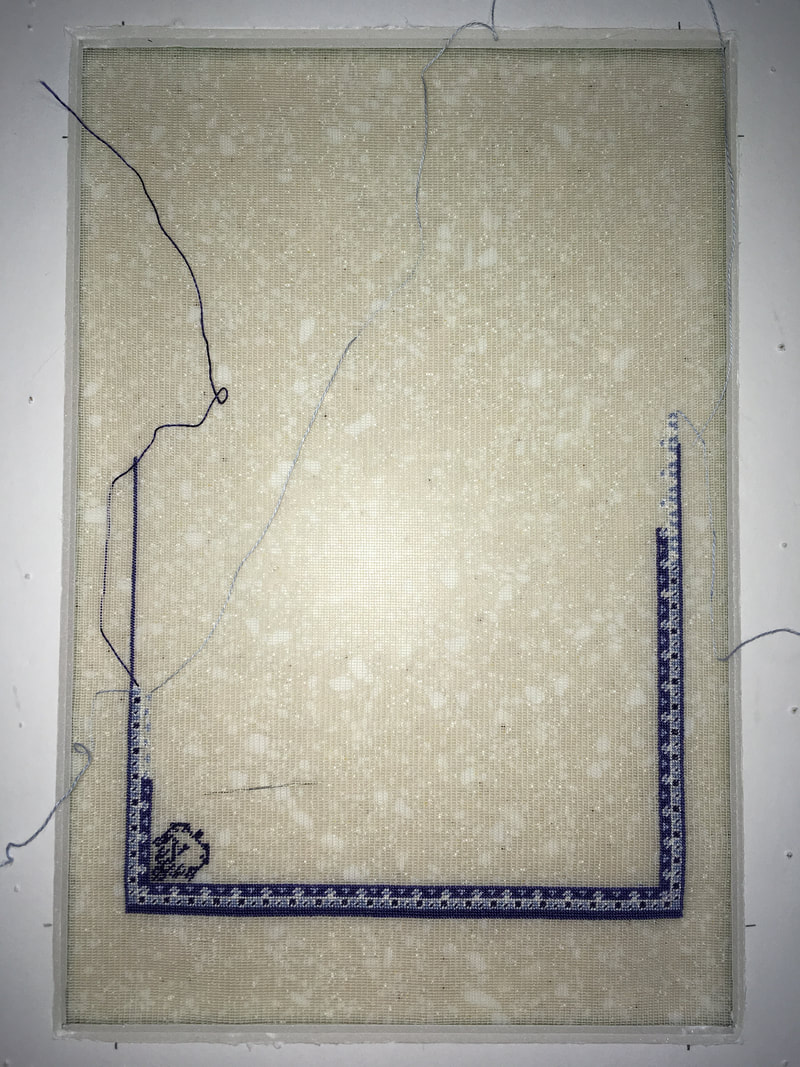
In December of 2019, I began stitching one of my blue and white rug patterns. This one is the Sonja rug and though it comes with several different shades included in the pattern, I wanted to do the blue and white one to eventually go into my Beachfront Mansion that I am in the process of building. This photo was taken on December 10th about 2 days after I started stitching it. There are 5 shades of blue and a winter white in this pattern.
As you can see, there is no pencil grid on this pattern either. I have become confident enough that I don't need the grid anymore. Although the grid was very useful, I wasn't very pleased having to wash it all out and stretch the rug back into shape. It was very time consuming and not something I wish to repeat. This time I only marked the bottom of the rug on the foam core by measuring the distance from the center along the bottom edge and along the sides. This gave me a rough idea where to start stitching. I knew I had plenty of room around the sides in case I was a stitch or so of center. This rug will be 5" x 7" when it is finished and I have left lots of room for a fringe. I am stitching it on 40 count silk gauze.
0 Comments
I am constantly browsing the internet to find new (to me) antique rug styles that I like. These three are all so vastly different but each called to me. So far, I don't think I have found any one style of rug that I like better than another. Often, I will find a picture of an antique rug and use some elements of them and alter others to make them fit the area of the rug better.
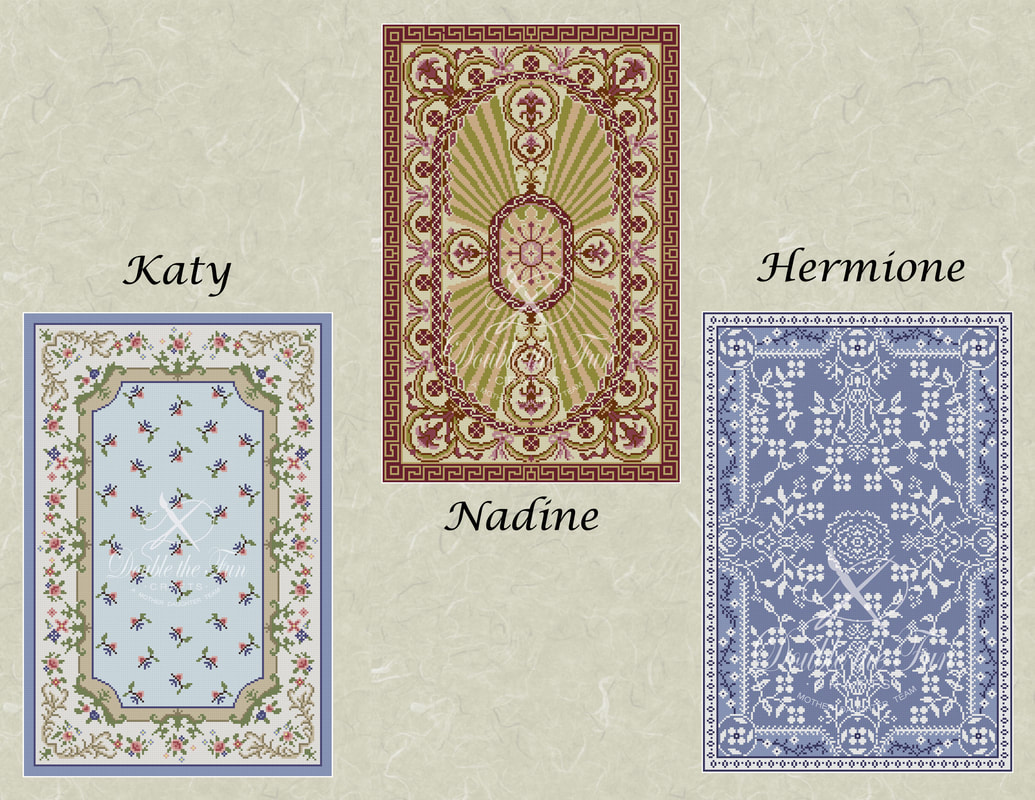
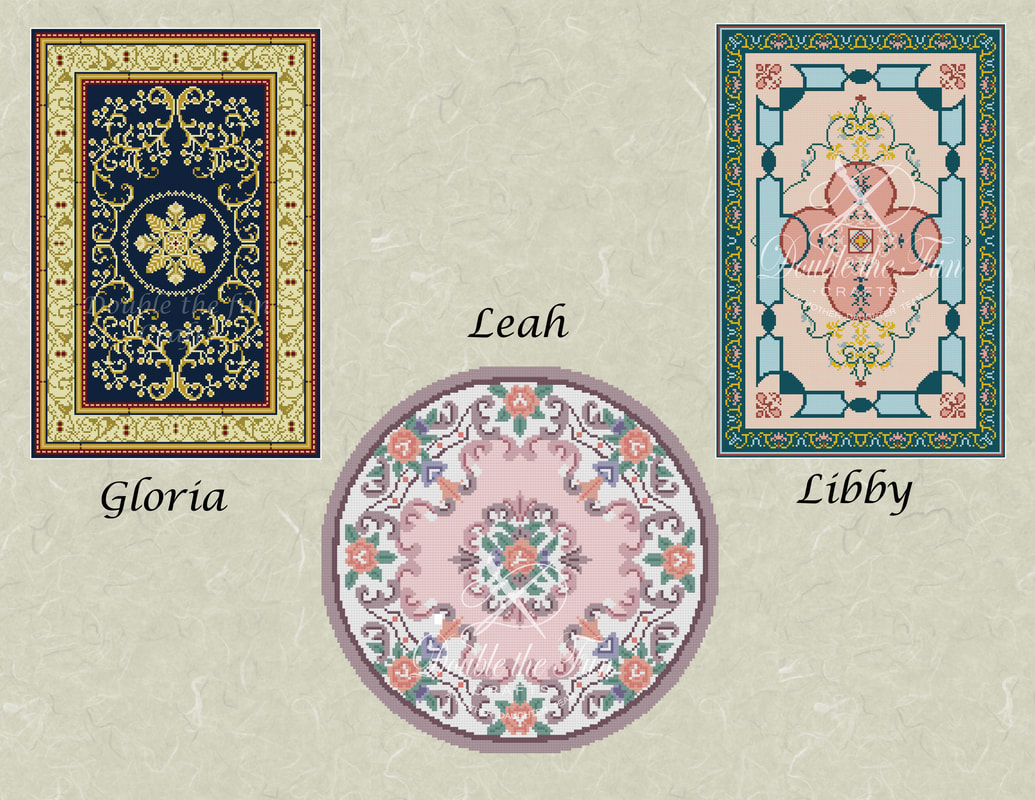
My Katy rug is based on an Aubusson style rug. I embellished the designs quite a bit in this rug and only the basic outline remains of the original antique rug I fashioned this after. I also had difficulty choosing what color scheme I liked the best so I kept them all! I liked the long, diagonal stripes that I saw in the antique rug that inspired my Nadine rug and decided to try my best to work around that design. It, also, was an Aubusson style rug but the border reminded me of Chinese patterns. The original was in shades of brown, but I liked reds and golds for mine. I love blues in a rug for some reason and really liked working on the Hermione rug as it used only shades of blue and white in the design. It is patterned after an antique Chinese rug. Sometimes, the designs are done such that it repeats every quarter of the rug. When this happens, I can simply chart 1/4 of the rug then flip the design into each of the other quarters of the rectangle. This helps me to decide on the final size of the rug. Sometimes I think I will be working on a 4" x 6" rug and by the time I am done, have to add more rows and suddenly it is a 5" x 7" rug. Whatever the size of the rug, each new rug presents new challenges that I love to work out. Sometimes I am inspired to create and it comes together quickly. Other times I have to sit with it for a few days (or weeks) until I am satisfied with the design. Each new rug instills a new excitement in me and I can't wait to see it evolve. When designing my rugs, I often look to various things for my inspiration. It may be an antique rug as was the case with my Gloria design or the covers of books, which was the case with my Libby design. My Leah rug was inspired by circular antique rugs and blended with colors to match my Amanda rug.
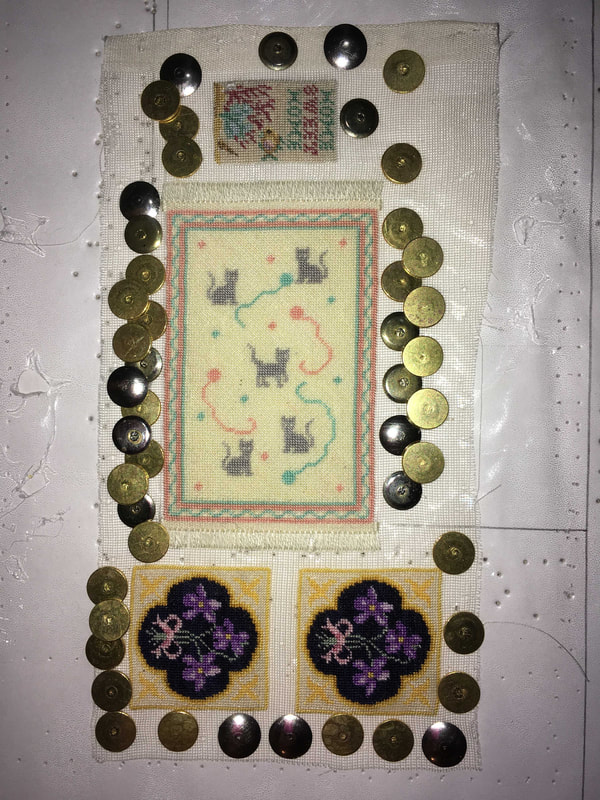
Sometimes, an idea calls to me and I can't wait to design it. My Libby is one of those. I saw the basic design embossed in gold on the cover of a book, then drew the center motif to go with it. The curves of both complemented each other well. The border was inspired by some lace that I had and the motif in the corners reminded me of the fleur-de-lis seen so often in France. Probably, the hardest part of any design, is choosing the colours. All of my patterns are designed with DMC colours so I purchased a DMC color card made with real threads to help me with this. I first choose colours that look good to me on the computer and design with those. Of course, the computer colour never looks like the real thing, so once I am done with the design, I look carefully at them all on my colour card. Often, what looks good together on the computer, also looks good in real-life but sometimes the colours or shades are too close together and get lost beside each other. At times you want this to happen when you are shading something, but many times you don't, so I change the colour to something similar. My daughter, Cheryl, is very good helping me when I get stuck on a colour. I also downloaded a colour wheel to help me choose complimentary colours. I have also found when designing my rugs, that I am more comfortable designing shapes and curves than flowers, so I began focusing on those. I will still do flowers from time to time, but will begin focusing on non-flower rugs for the most part. Once a rug or project is finished it must be blocked. Above is the Jane rug plus a few other projects I stitched to use up the leftover fabric to the best advantage.
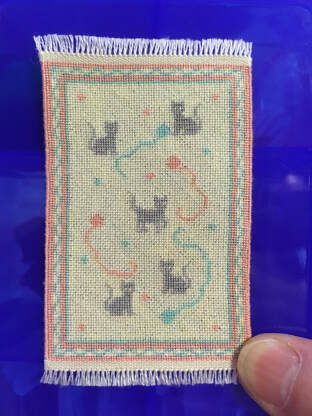
To block a rug, I use a piece of grid paper or a paper with straight lines on it that I have placed inside a clear plastic sleeve. I pin it to a firm background that I had left over from my younger days when I did macrame. It is some sort of firm fibre that holds thumb tacks easily. I start with one edge of the rug and firmly tack it down, using one of the grid lines for a guide. Once the first side is tacked down, I tack one of the ends. All of the tacks are placed on the extra silk gauze that is around the rug, not the rug itself because the tack will create a hole similar to the one you can see near the upper right-hand side of the picture above. While tacking, I stretch the rug a bit, keeping the rug on the line. The next side and end are tacked in the same way, trying to keep it as straight as possible, using the lines as a guide. Once all sides are tacked down, I steam the rug with the steam setting of my iron, without touching the rug. I let the rug dry, then add more tacks to straighten the edges, as needed. I often use a ruler against the edge to make sure I am straight. I repeat this several times until the edges are as straight as I can get them. This process can take several days to weeks depending on how much straightening the project needs. After the blocking, I cut the fringe along the outer edge and fold the gauze under towards the back of the rug. I press the edge down and cut it off short (leaving two rows of gauze). I will put small dots of fabric glue to hold the gauze down and press with the iron. Then I carefully work on the sides. I roll the rug up carefully and turn the long edge under, leaving 2 rows visible. I finish the sides using an overcast stitch and two strands of floss. I overcast over the two rows and through the folded gauze. After the overcast is done on the edge, I cut the gauze as close to the stitching as I can. Here is the finished Jane rug: |
AuthorMy name is Yvette, and I will be writing this blog to tell you about the creative process that has gone into the creation of my Petitpoint patterns along with showing the stitching I have done of some of the rugs. Archives
April 2024
Categories
All
|
|
Thank you so much for visiting our site. We hope you come back soon!
|
We promise not to spam you with emails and will only send out the occasional email. We promise not to share your email address with anyone and it will only be used by Double the Fun Crafts for the purpose of promoting our products or letting you know of a sale.
|

 RSS Feed
