|
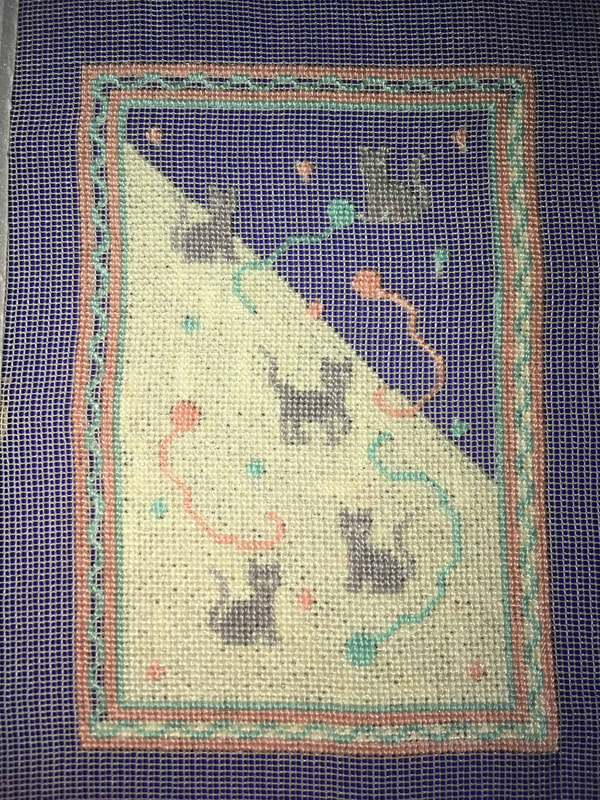
I am always surprised (but shouldn't be) at the length of time it takes to stitch a petitpoint project. I started this rug on November 27th, 2019 so it is almost 2 months so far. Here is my progress picture as of yesterday. I have been spending quite a bit of time working up the left side of the rug. I wanted to get to the top corner so that I could rough in the top of the border. I like to make sure all of my edges match, so I often work from corner to corner and leave sections open until I reach an easier area to count. The worst thing to do (which I have done) is to work a row around the entire border then find out you mis-counted by one stitch! After having done that once, I now work towards the end of the border a bit at a time. Some people like to work from the center outwards and I used to do that all the time. For some reason, I have switched and now like to work from one corner to another. I just measure on the frame and put a little pencil mark where the edges should go. This way, I know I will have enough fabric to stitch the rug without running out. If I am off center by a stitch (or few), it doesn't matter since I make sure the pattern will fit within the area I am using. For the most part, I am now caught up with my last year of stitching and designing so I won't be putting up posts as often, but plan on posting at least once a week to show my progress on each design as I stitch it and will post anytime I have a new rug design to show you. I hope you will continue along this journey with me and will enjoy reading along as I journal about my fun with stitching. If you purchase one of my designs and would like to post a picture of your project when you finish it, please email me at yvettesminis@yahoo.com and I would love to post a picture in our Gallery along with credit to you for stitching it. 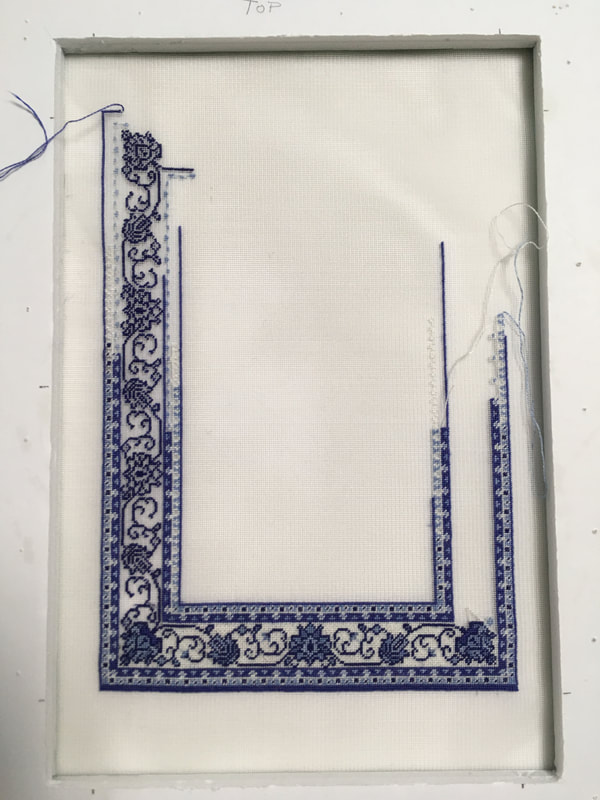
0 Comments
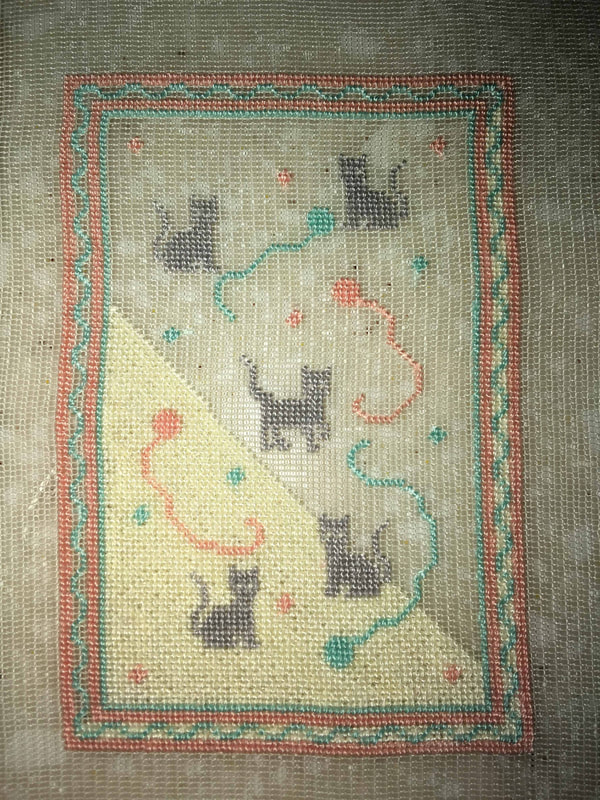
After my first granddaughter was born in January 2019, I designed a little rug that I named after her. I decided it would be perfect for a nursery and began stitching it in July 2019 as a little project that fit perfectly onto a piece of leftover gauze that I had. It stitched up quite quickly and was a great small project to do.
You may notice that the background is being stitched on a diagonal. I used the basketweave stitch (which is done on a diagonal) because it is supposed to help keep the rug square if you use different stitches. I used the tent stitch on the border to be my different stitch. When the background is a solid color this works. However, if the background is going to be done in an overdyed floss (as I used in my Heather rug), you must do the background in the tent stitch so that the "abrash" effect works properly.
I wish to take this moment to wish a Happy New Year to everyone as we say goodbye to this year and usher in a new decade. This past year has been a very exciting one for myself and family and I hope to enjoy many years of stitching and miniatures. Hope you and your loved ones have a wonderful 2020! Once I finished the main stitching on the rug, I turned my attention to the fringe. Here is a closeup of the beginning of the fringe with the Tabby Weave already stitched. I placed the stitches past the edge of the rug by two stitches to leave room for finishing the edge of the rug. After the fringe is finished on both sides, I take the rug off of the frame and block it. I will discuss blocking in a future post as I have a good picture that will show it well. 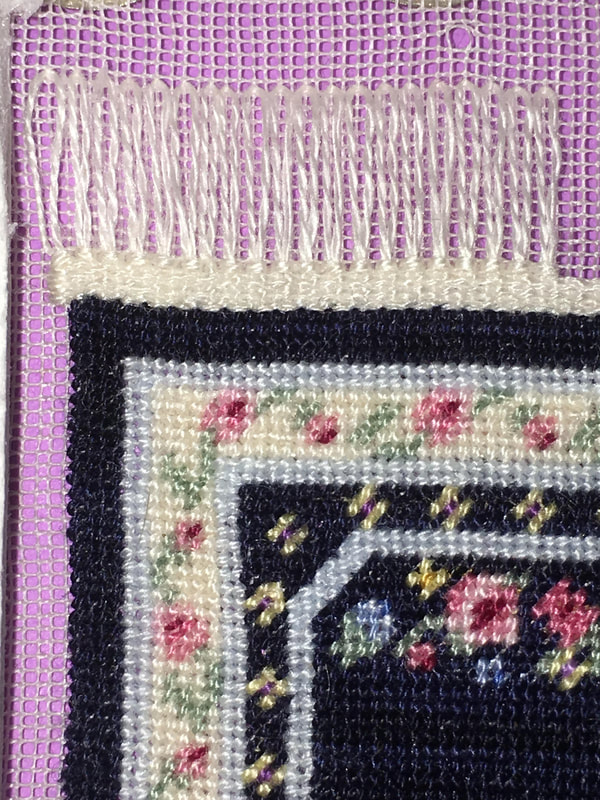 Below is a photo of my finished Heather rug. In this photo, you can see the "Abrash" effect very well. It is my first time using an overdyed thread and I am very pleased with the results. This rug was named after one of my daughters and she loved it when she saw it. She has asked me to make it again life-sized as a hooked rug but I am not sure I will have the patience to hook a rug in this pattern. Only time will tell... 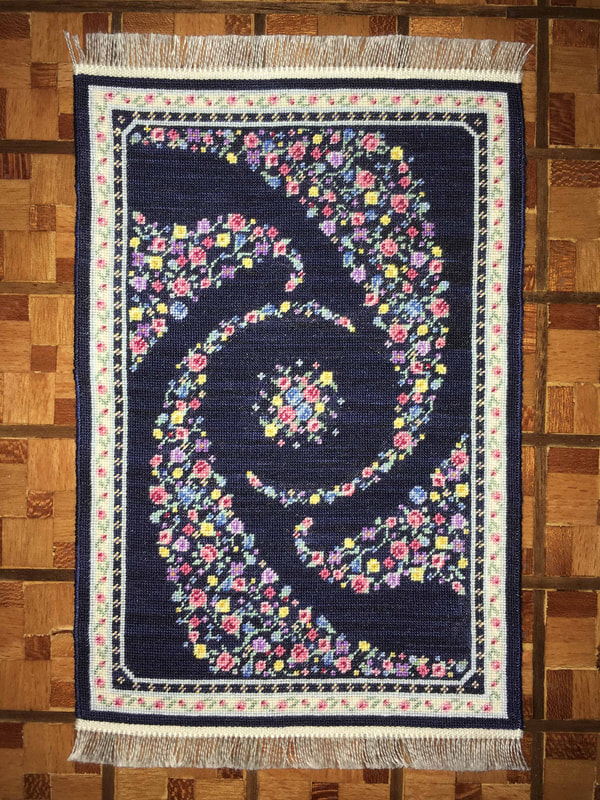 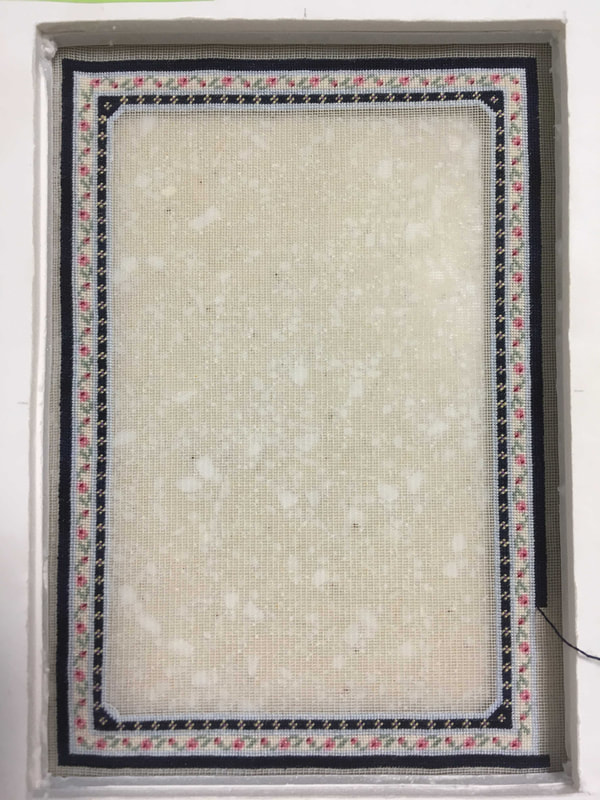 In June of 2019, I began stitching my Heather rug pattern. This one appealed to me because of all of the flowers. I felt it would be a fun challenge to do. You will notice that I don't have the lines penciled in on this gauze. I decided that since I had now stitched a few rugs, I felt confident that I could count my stitches fairly well as long as I don't try to count too far from the last thing stitched. I have found, after trial and error, that dark colors will show through light colors if they are stitched first. Therefore, with this rug, I stitched all of the pale cream first before I stitched the flowers and leaves of the border. It was a little harder to see where I was in the pattern at first, but I got used to it and was able to do it without too many mistakes. Above is a photo of the border started. 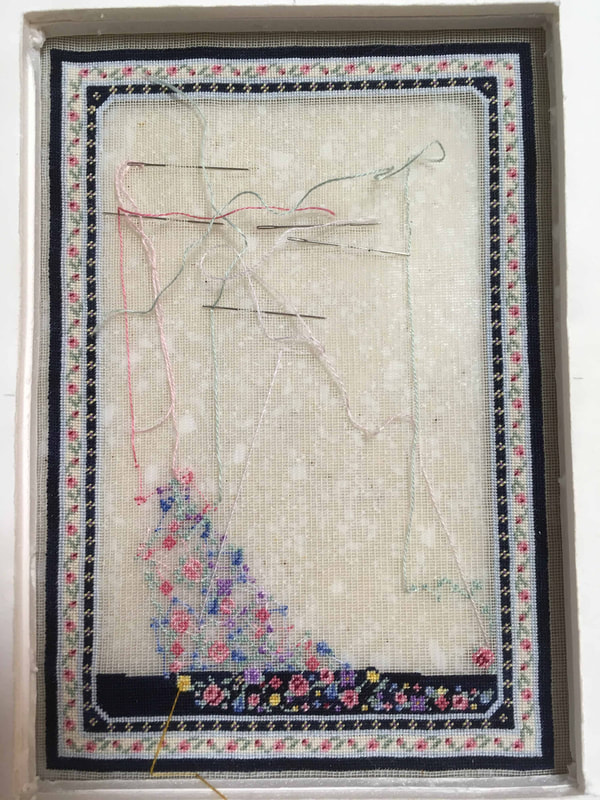 Once I had the borders completed, I started on the flowers. There were many color changes when doing the flowers, so I often stitched for a while with one color then switched to another when I had to count too far. This way I didn't have too many errors. Occasionally, I had to fix an error, but not often. I had many needles on the go so that I could pick up one when I needed it.
In order to keep things interesting, I worked on the background a bit as well. This way I could see how the pattern was progressing. I chose to use an overdyed floss for my background as I wanted to see how it would look with an "abrash" effect. Unfortunately, the effect doesn't show up much in the picture but looks great in real-life. (Abrash coloration in rugs (pronounced ‘uh-brash’) is the differing color patterns, colorations, and various shades or hues within a rug. It is one of the most common and typical characteristics of a genuine oriental rug, and especially among older or 'nomadic' handmade rugs.) For examples of the "abrash" effect, you can see them here: nazmiyalantiquerugs.com/blog/oriental-rugs-with-abrash-color-variations/ I took this rug on holiday with me and my nieces and nephew had a great time watching me stitch this! After completing the Isobel Rose rug, I decided that I simply had to start on the Amanda rug. This rug had been calling to me ever since I designed it and I was so excited to finally be starting it! You will notice that there is a grid on the fabric I am using. The fabric did not come with a grid on it and I felt that it would help me to know immediately if I went wrong when stitching my rug. Many times in the past, I have been happily stitching along, only to find I had made a mistake quite a ways back and had to unpick so much! Not a fun feeling but necessary if you want your project to look right. I added the grid myself using a quilter's pencil (one that says it washes out) and a ruler. I put a line every 10 rows both vertically and horizontally. I like to start stitching in the bottom corner of the rug instead of the center and the grid also helps me to find my starting point. Here is the start of the rug. I learned not to stitch around the entire border after stitching my Butterfly rug because it is very hard to count that many stitches correctly and if you are off even one stitch, your border doesn't line up. When stitching the Colorful Amalgam rug, we didn't get enough of the pattern to stitch the whole border at once and I found this was a much easier way to stitch it. Therefore, I now work from corner to corner across the bottom then work my way up. 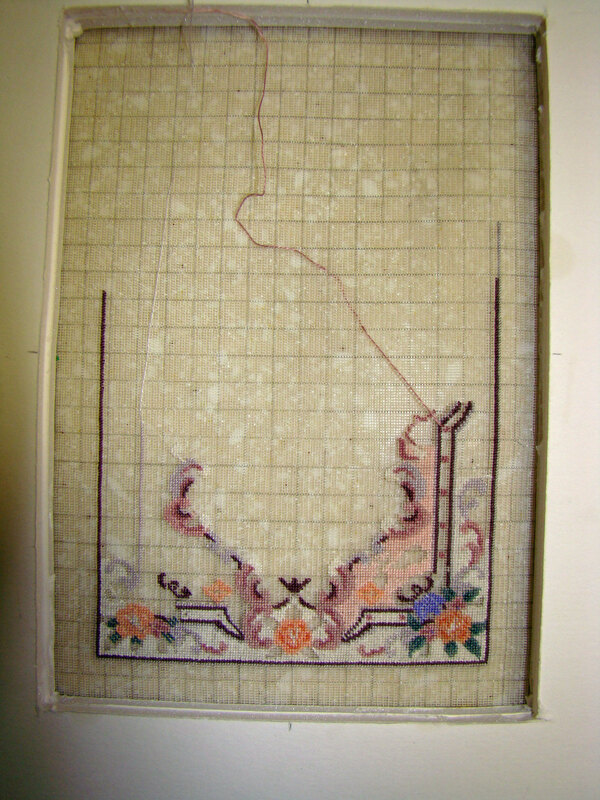 While working on the rug for the Colorful Amalgam competition, I decided to stitch a small rug that I had designed earlier. The Isobel Rose rug was designed in the Aubusson style and was the perfect size for a roombox that I had. As you can likely see in the photo, I now am using a frame that is thicker than I used before. The frame is made up of two layers of foam core glued together. This is because I use thumb tacks to hold the gauze fabric in place. Also, I have mounted the fabric on the back and stitch inside the frame. This method was suggested to me on my petitpoint group because it is much easier to start or finish off a thread without the frame getting in the way. 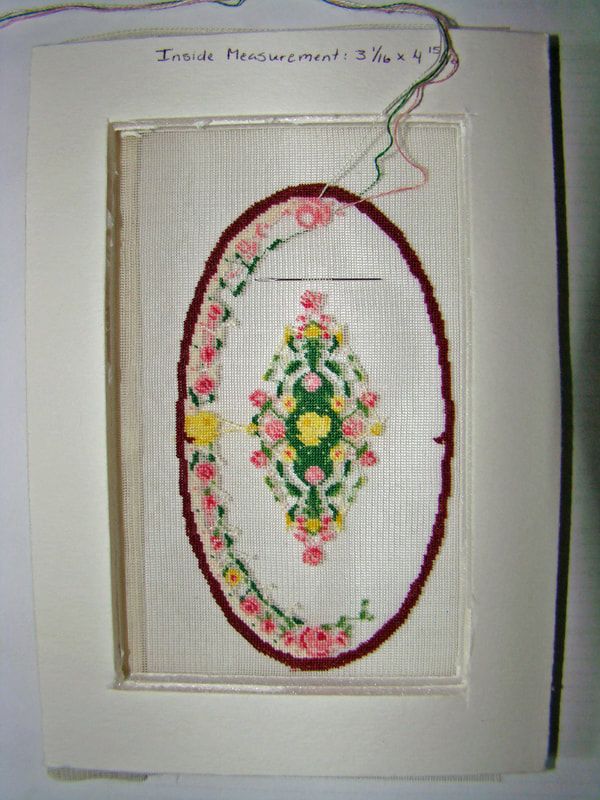 This rug didn't take long to finish and was soon gracing the floor of the roombox that I planned it for. It was a great little project to fill the time while I was waiting for the next installment to be posted for the competition rug. 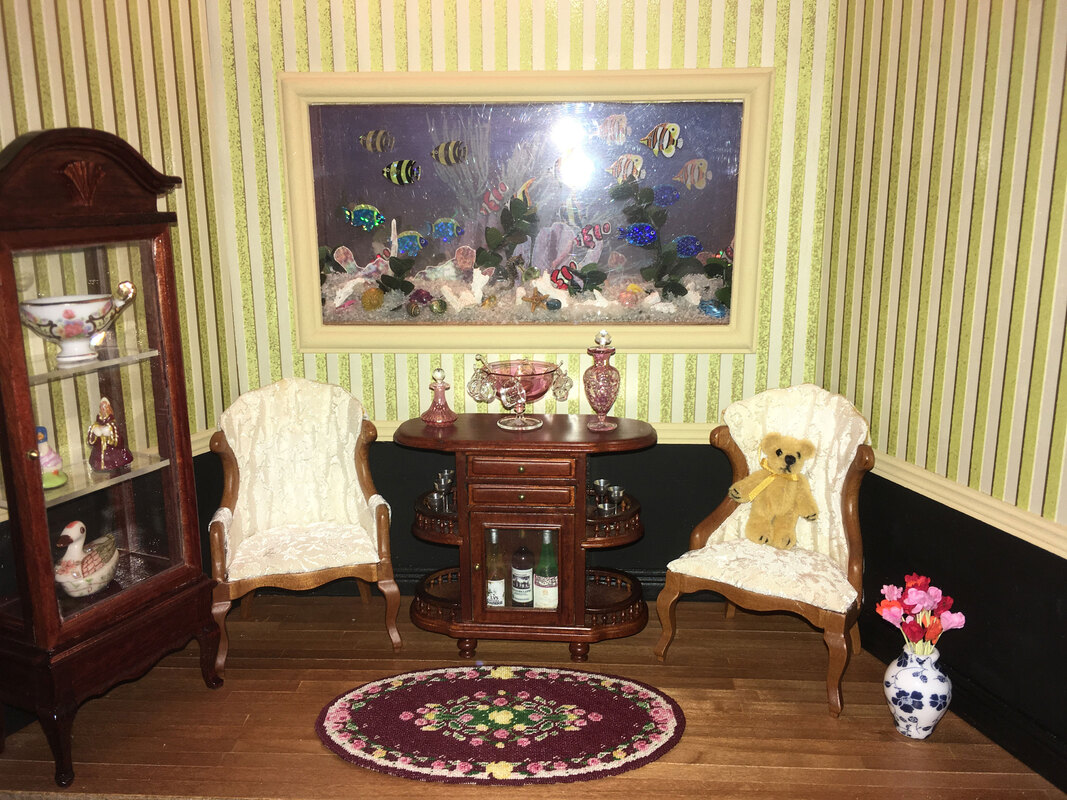 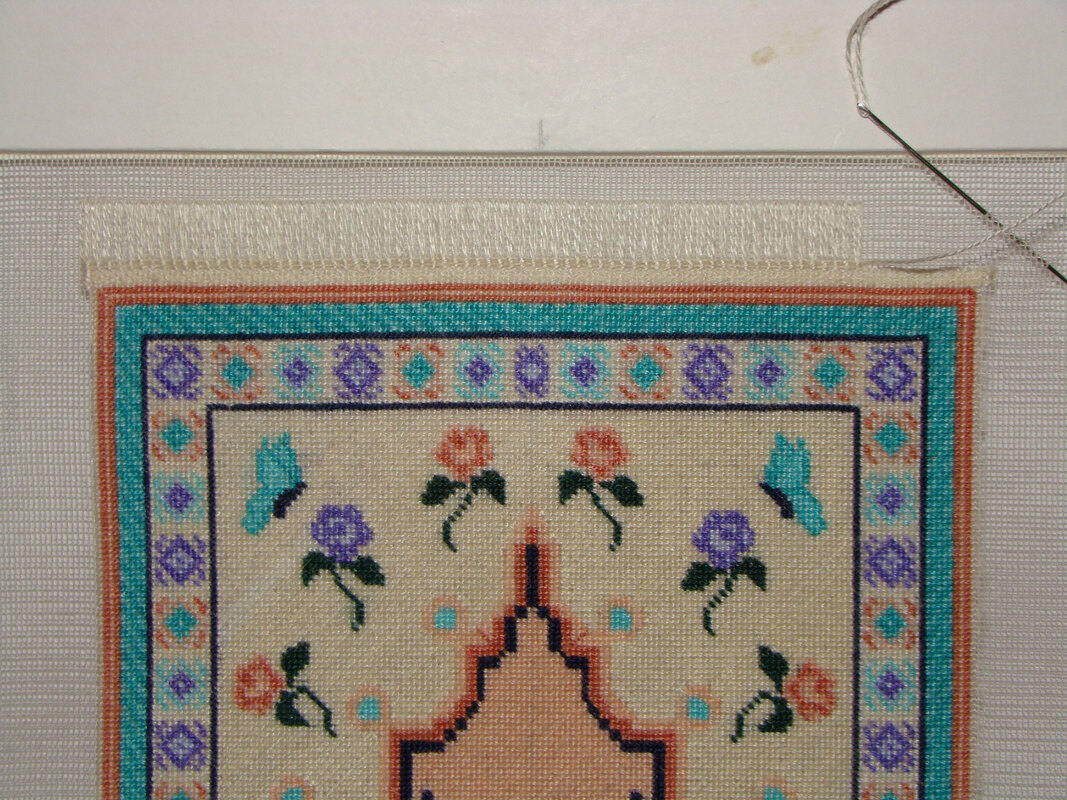 As part of my learning curve in miniature Petitpoint, I decided that this rug needed a fringe. Not all rugs have fringes and it is often at the discretion of the maker to decide if they wish to add a fringe or not. There is a wonderful tutorial on the website of a fellow Petitpointers@groups.io member and designer that I followed to create this fringe. It was easy to follow and my fringe turned out beautifully. Here is a link to the tutorial: petersonpetitpoint.com/index.php?main_page=document_general_info&cPath=10&products_id=129&zenid=b8d7522f81b57ccd4060d5c74de513e9 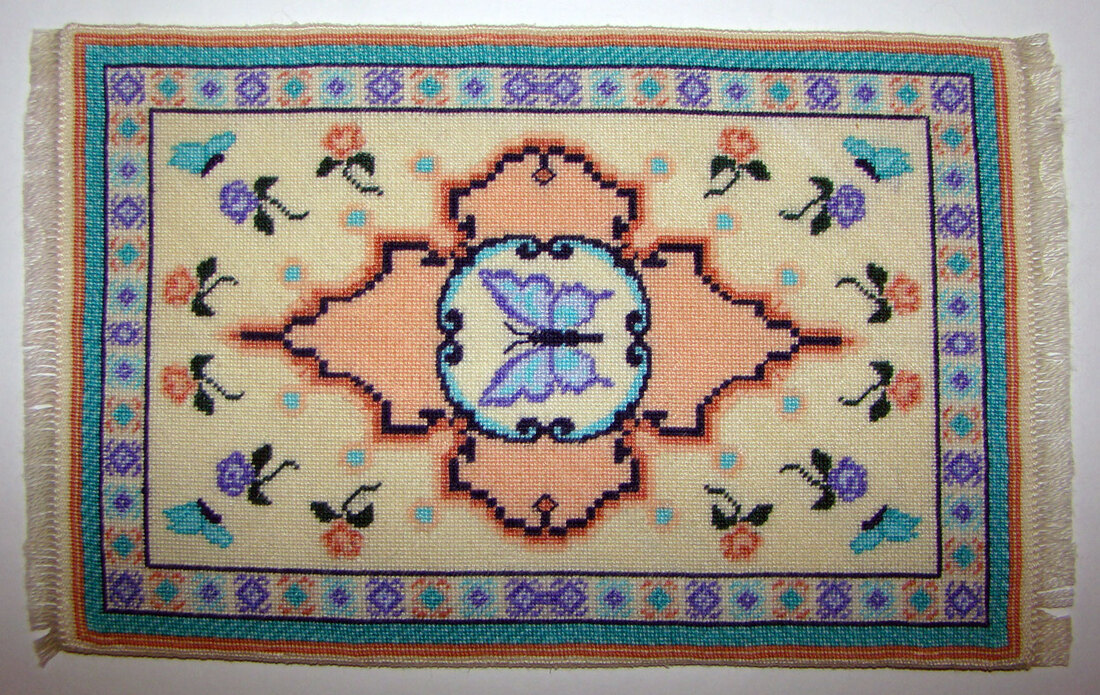 Here is the rug after the fringe was put on and it has been blocked. All rugs should be blocked once it is removed from the frame to help get it perfectly straight. As I look at the picture for this rug, I see that it isn't perfectly straight so I will block longer for my next rugs. A wonderful tutorial regarding blocking a rug is also available at the same website mentioned above. Here is the link: petersonpetitpoint.com/index.php?main_page=document_general_info&cPath=10&products_id=128&zenid=b8d7522f81b57ccd4060d5c74de513e9 After blocking, I finished off the sides of the rug by using an overcast stitch over two threads. Below is a photo of the rug completed and in its place of honor in my dollhouse. Not bad for a first attempt! The members of Petitpointers were very supportive of my learning attempts and were very happy to answer all of my questions. I am extremely grateful for their assistance.  I learned a lot while stitching this rug in regards to the type of stitch to use when doing Petitpoint. The stitch is different than Cross Stitch in that it only slants in one direction on the front instead of forming a cross. There are a few different types of stitches that look the same in the front but are different in the back. I spent some time reading about the different stitches on www.needlepointteacher.com/stitches/ which is a wonderful site that shows many different stitches that are done for needlepoint. The stitches are catalogued alphabetically so are easy to find. The ones that are used primarily in Petitpoint are the Basketweave stitch and the Continental (or Tent) stitch. Tent stitch is often used to stitch lines and small elements, whereas Basketweave is often used to fill in larger areas such as the background. Some people feel that only Tent stitch should be used in petitpoint, while others like a combination of both to help prevent the rug from skewing in the direction of the stitches. Sometimes a half cross stitch is used but it doesn't cover the back of the gauze as well as the others. Below is a photo of the Butterfly rug finished and awaiting the addition of a fringe. 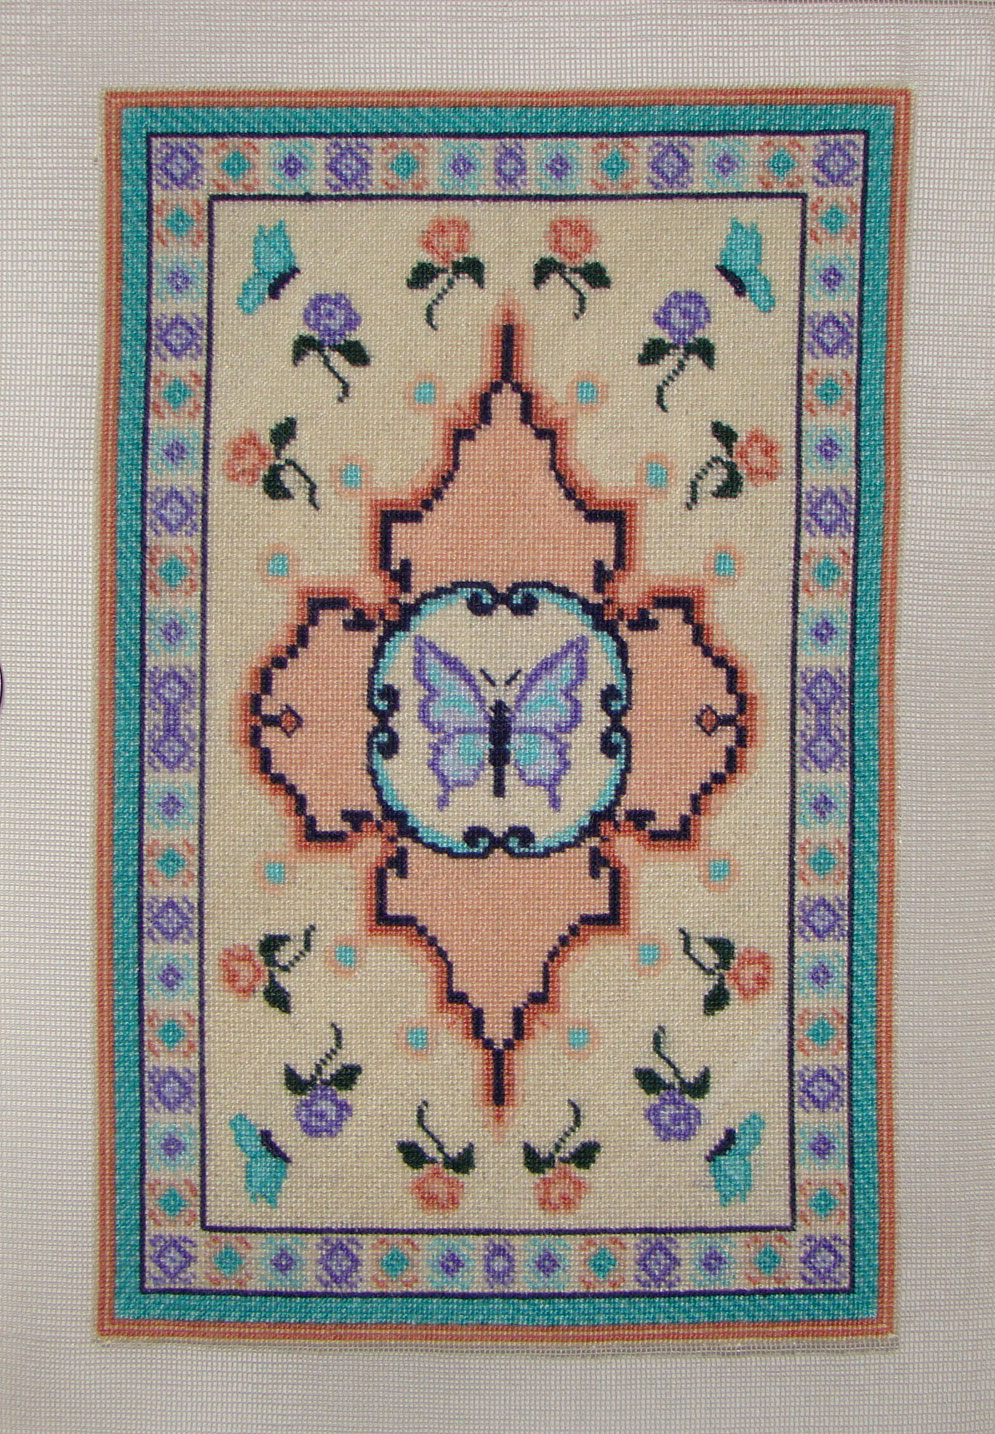 |

AuthorMy name is Yvette, and I will be writing this blog to tell you about the creative process that has gone into the creation of my Petitpoint patterns along with showing the stitching I have done of some of the rugs. Archives
April 2024
Categories
All
|
 RSS Feed
|
Thank you so much for visiting our site. We hope you come back soon!
|
We promise not to spam you with emails and will only send out the occasional email. We promise not to share your email address with anyone and it will only be used by Double the Fun Crafts for the purpose of promoting our products or letting you know of a sale.
|