|
|
|
We have shown this tutorial in long form for you to read on the site and also have a free downloadable PDF version for you to keep for future reference. Please do not copy, sell or post this tutorial on your own website, but you may mention it and link back to it here if you wish.
Tutorial #2: Adding a Tabby Weave and Fringe to a Rug
First of all, I would like to say that this method was not developed by myself and I am only paraphrasing the method as explained to me by Frances Peterson of https://petersonpetitpoint.com/ . I greatly admire Frances’ work and only hope that someday I may be able to design as well as she does.

|
As a bit of background, if you look at life-sized rugs with a fringe on them, the fringe is usually a pale cream or ecru. This is because the fringe is in part developed using the vertical threads on the loom that form the “skeleton” of the rug and are an excellent way of tying off these threads. These threads are not in the colors of the rug but are generally light in color because they are not seen when the rug is finished. These threads are called the “WARP” threads. You can see the warp threads in the photo on the left, running in one direction on the back of this rug.
|
|
Also, just before the fringe starts, there are often a few rows of tightly woven threads that lock in the beginning and end of the rug. This is called the Tabby Weave or Plain Weave and is also the same color as the fringe. |

|
In the following photos, I will explain how I learned to do the Tabby weave and fringe on my rugs. Not every rug needs to have a fringe, the choice is completely up to you. Some of my rugs have been completed without a fringe and look just as good as those with a fringe.
|
Beginning the Tabby Weave:
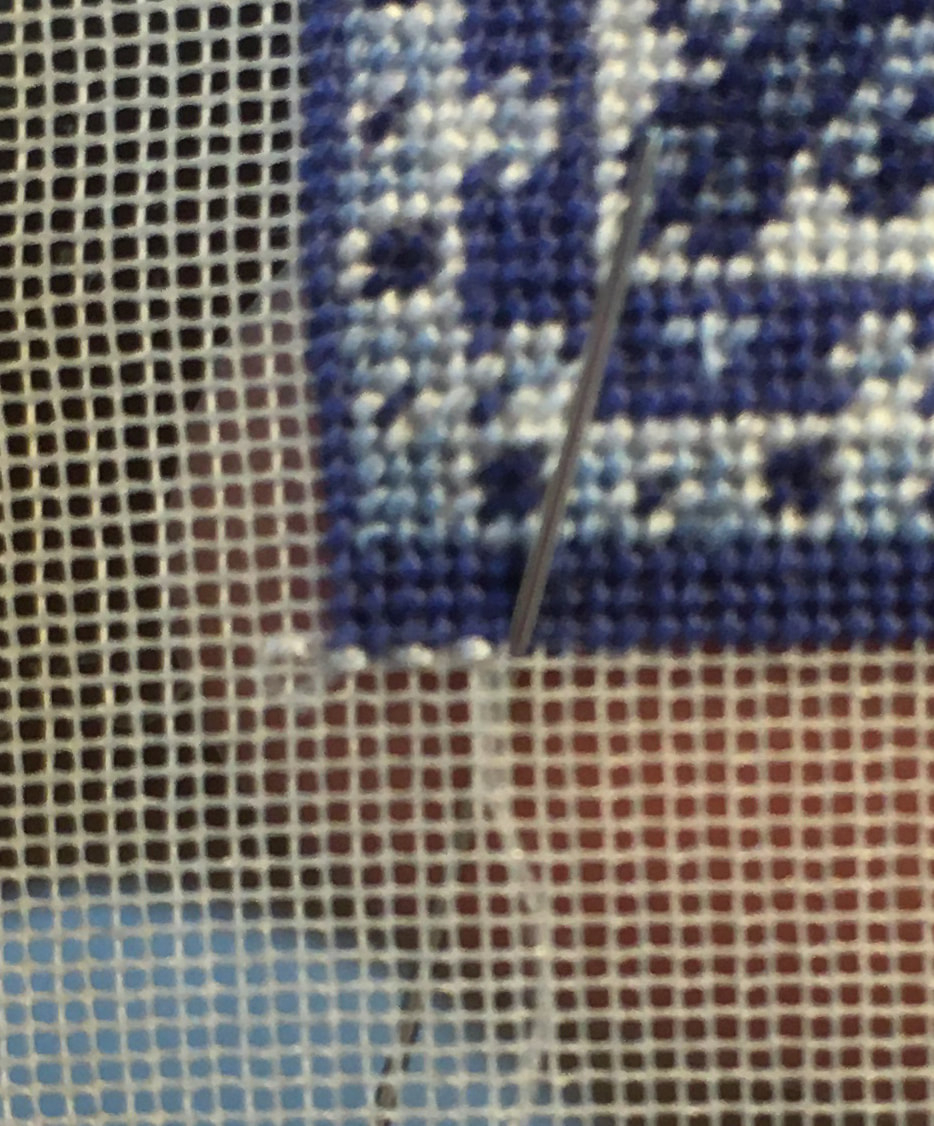
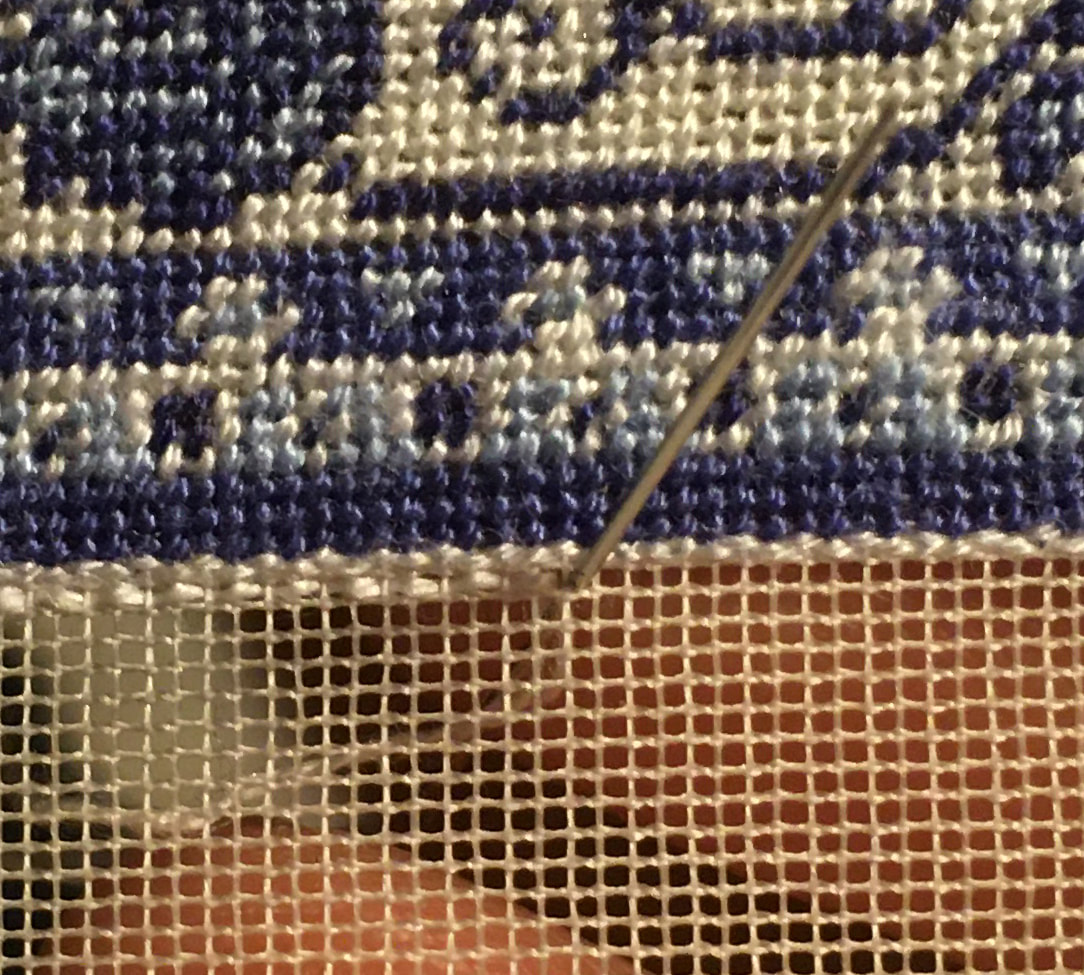
I always create the Tabby Weave and Fringe using DMC floss because it tends to lie better than using silk floss. Also, I do the fringe while my piece is still on the frame - before I block the rug. You will notice in this photo that I have begun my stitching in the second hole to the left of my first rug stitches. This is because, when I finish the sides of the rug, I will be folding my gauze towards the back leaving two vertical threads visible and overstitching along the sides. This will then match up with where I started the Tabby Weave. Note: I am left-handed, thus begin on the left. If you are right-handed, you may wish to begin on the right. To begin the Tabby weave, start in the same row of holes that the first row of your rug starts in. Begin two holes over and go up and down every other hole all the way across to the second hole past the last stitch of the body of your rug. In the photo, you can clearly see the thread going up and down every alternate hole. |
|
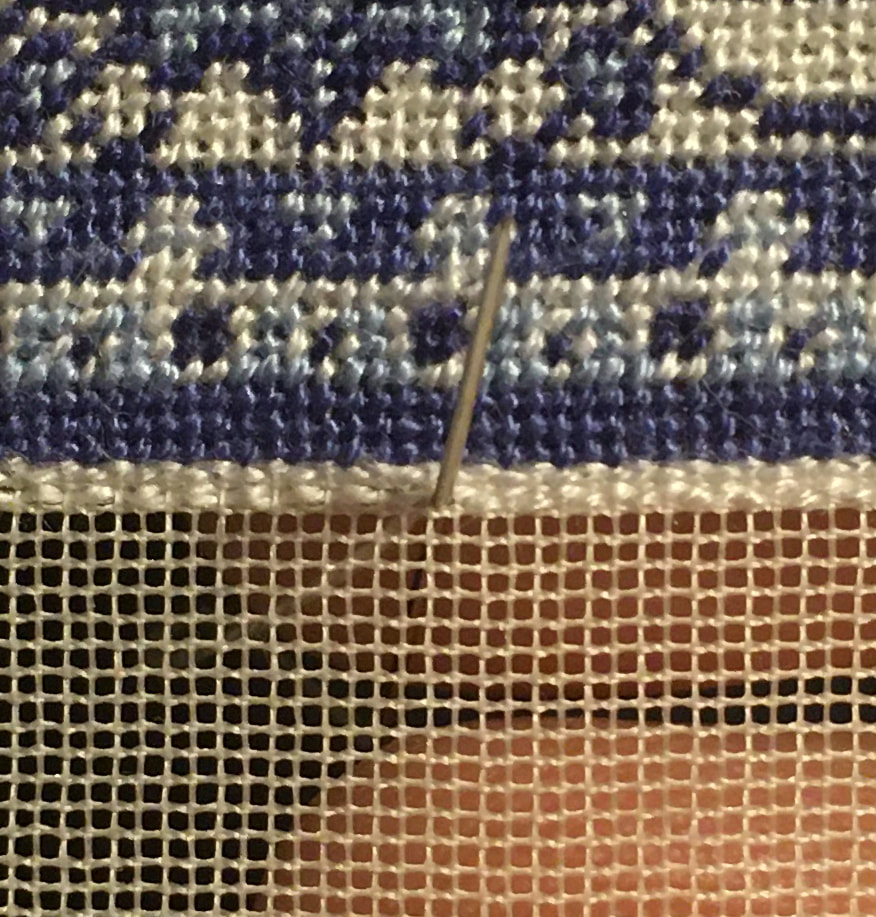
Continue every other stitch across your work. |
|
|
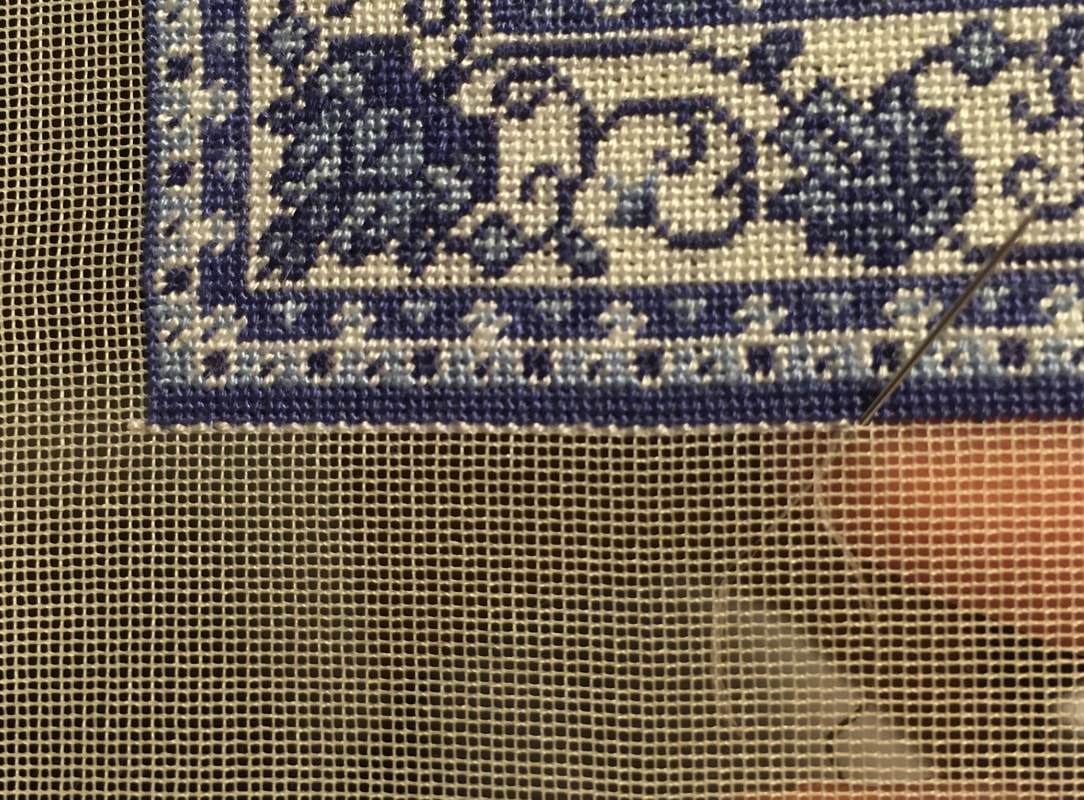
When it is time to come back the other way, work your stitches in the same row as your previous row, but this time, come up and down in the opposite holes as you did before. Each set of tabby weave rows are worked in sets of two rows in the same gauze row. This creates a very tight looking weave and helps to hide the vertical gauze threads. In the picture on the left, you can see I am bringing my needle up where you can see one of the vertical threads visible. I will then go down in the next hole on the left, thus covering the vertical thread. Continue in this fashion until you reach the beginning of your row. |
|
At this time, I do an overcast stitch over the two beginning holes, so that it will eventually match the overcast I will be doing along the sides of the rug. This photo shows the overcast stitches I have done at the end of each set of three rows since I forgot to take a photo of the overcast on the first row only. I like to do three sets of rows for my tabby weave, but you can do more if you wish. |
|
|
When starting the second set of rows for the tabby weave, once you have done the overcast stitch on top of the first two holes you stitched, move down to the next row of holes in the gauze and work your way across the row, stitching every alternate hole as you did previously. When you get to the end of this row, do an overcast stitch running over the last two holes of the previous row so that it matches the first row. |
|
I then begin coming back on the second row and once I have stitched two holes, I overcast them before continuing back. If this doesn’t make sense to you, you can always overcast after you have completed all of your tabby weave rows before you finish coming back for the last time. As you did in the previous set of rows, work your way back along the row in the same row, alternating your stitches. Continue working these two sets of rows as many times as you like. |
|
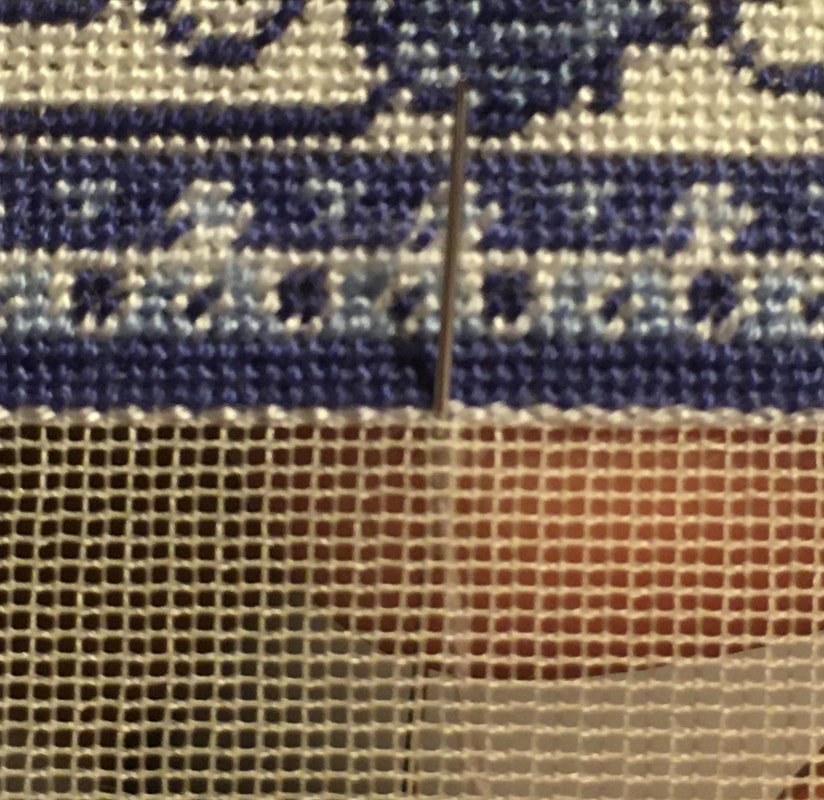
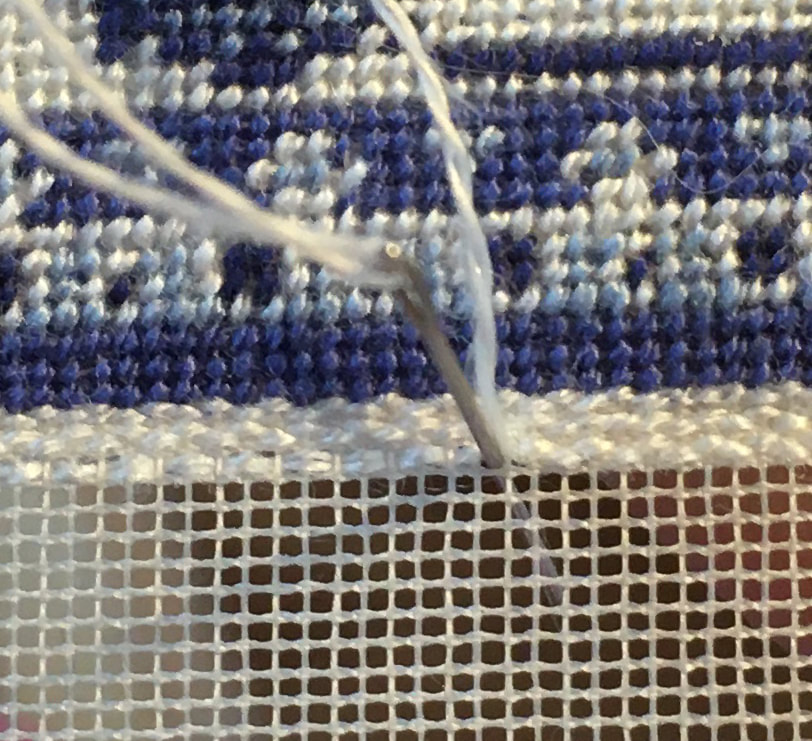
Here is a closeup of my third set of rows. As you can see, doing several sets clearly covers the vertical gauze strands and makes a nice, tight weave.
In this photo, I am working my way back on the third set of rows, thus on the left you can see the vertical gauze threads, and on the right, you cannot. |
|
|
Starting the Fringe:
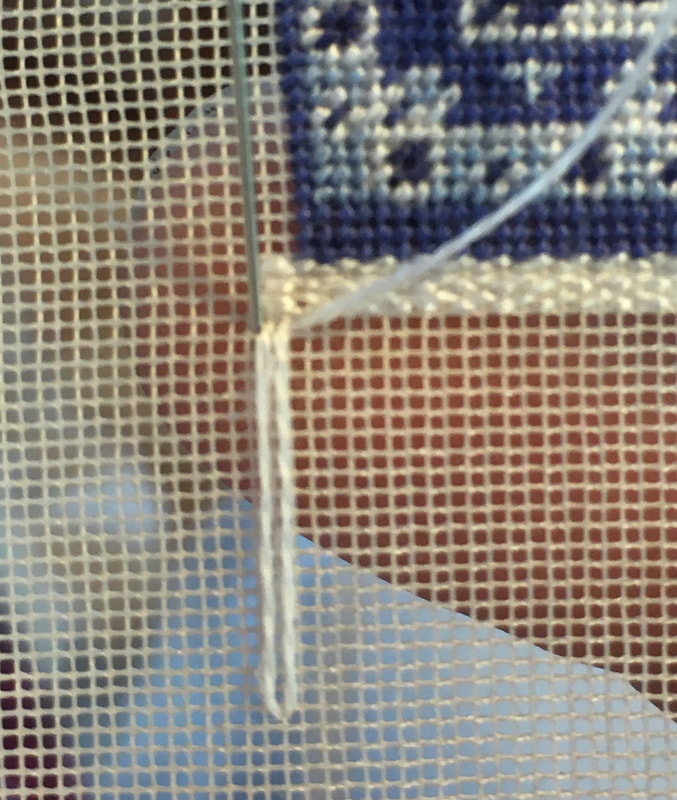
One of the wonderful things about stitching the fringe while it is still on the frame is that you can very easily get all of your fringe strands exactly the same length. Begin the fringe in the horizontal row below your tabby weave in the same vertical row as your tabby weave began. For this fringe, I counted down twenty rows and put my needle down through that hole. Make sure you are putting the needle down in the same vertical row as you started the stitch. You don’t have to count down, you could always choose a length that looks good to you for the final length of the fringe. I wanted my fringe to be approximately ½” long so I counted 20 rows since my gauze is 40 stitches to the inch. Once you have chosen a length for your fringe, bring your needle up in the hole beside the one you went down. This will hold your fringe in place at the length you wish it to be. |
|
Locking your fringe:
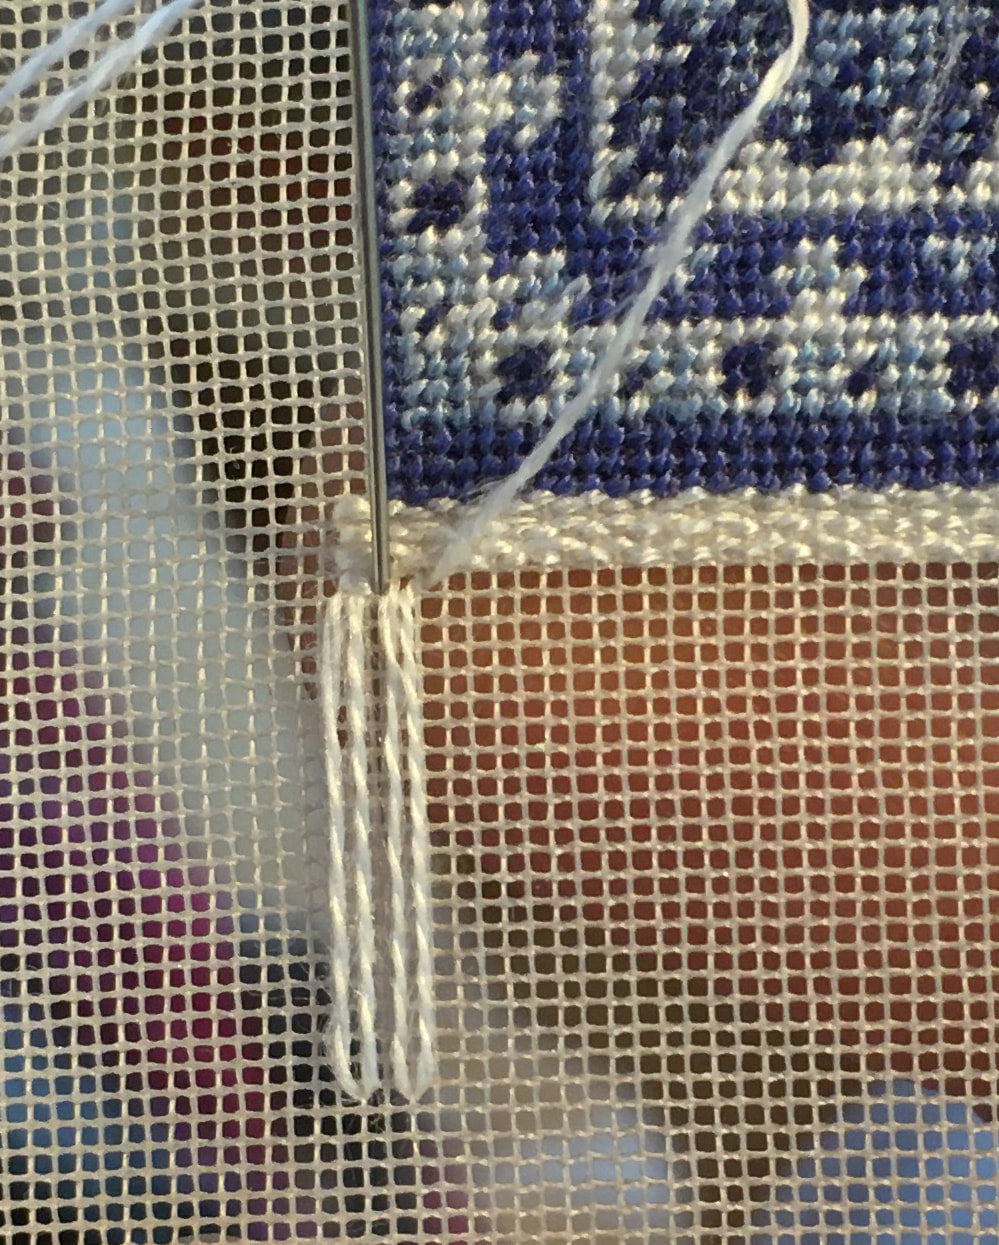
Put your needle down through the hole to the right beside where your fringe first came up, just below the tabby weave, then bring it back up in the hole immediately to the right of that as shown in the picture above. Put your needle back down into the same hole as your fringe first came up (as shown in the photo) and draw it down. This completes the first fringe and lock stitch. |
|
|
For your second fringe, bring your needle up in the same hole that your lock stitch began in (on the right of the first fringe). Take the needle down to the same horizontal row that your first fringe went to and put your needle down in the hole beside the one your first fringe came up in. As you can see at the bottom of this photo, the fringe is beside the last one and there is one vertical thread between them. Bring your needle back to the top of the fringe and put it down through the hole beside the one you came up in. Move your needle to the right one hole and come back up to start your lock stitch. Put your needle back down the same hole as the fringe began in. |
|
|
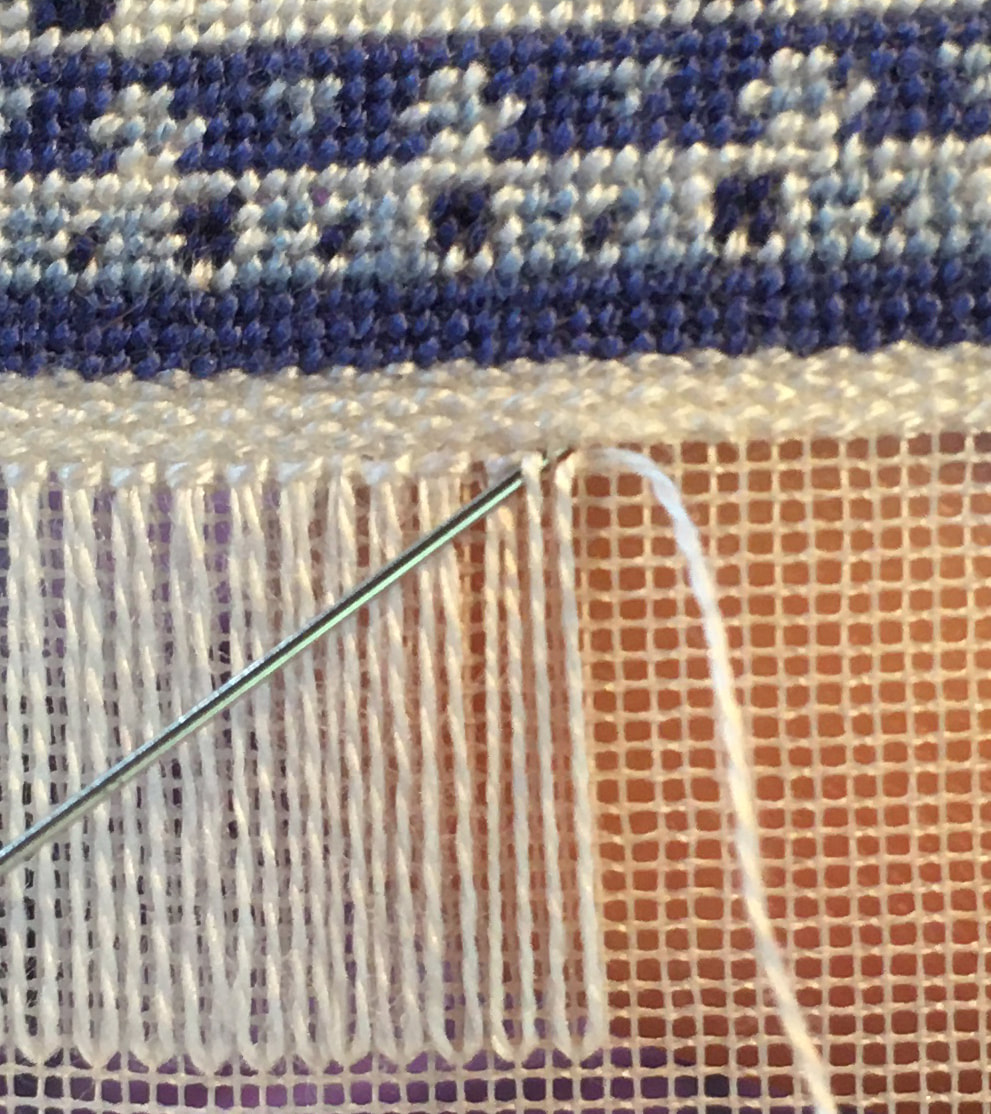
Continue working your fringe all the way across your rug. I find that if I put the needle down vertically through the hole when making the lock stitch, it sometimes does not completely cover the beginning of the stitch. Therefore, I like to tuck the needle under the thread when putting it down through the hole and this helps catch the thread in the lock stitch. This takes a bit of practice but is worth it in the end. |
|
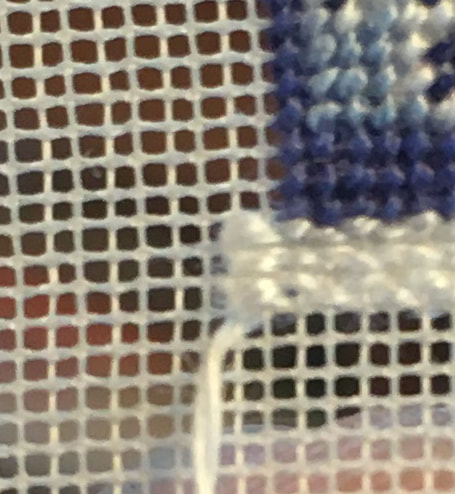
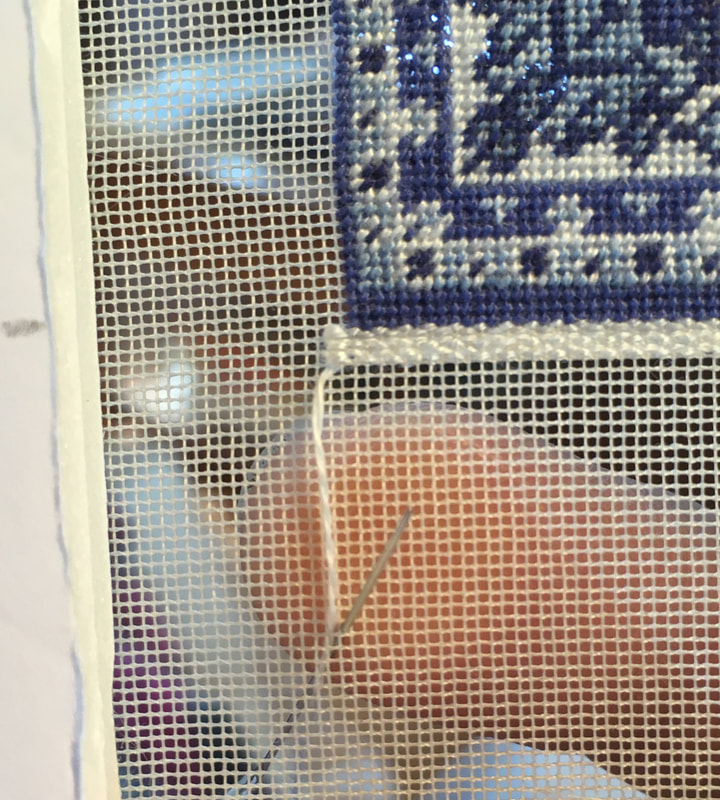
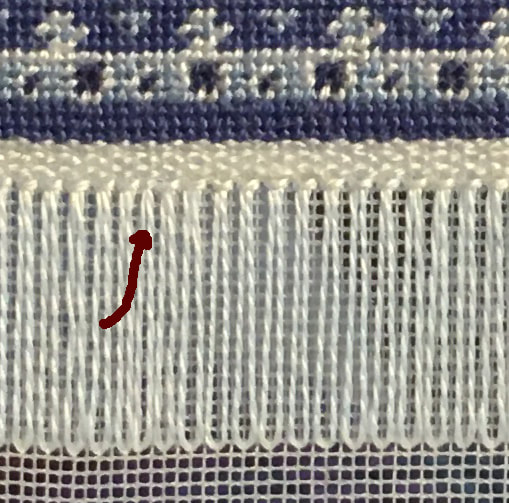
Another tip that was given to me is that when you are making the fringe this way, it always seems to end one column past your tabby weave at the end of the row. Therefore, to fix this, make one fringe anywhere along your row that is only one stitch wide at the tabby weave edge instead of two stitches wide. (Go back down in the same hole as you began the fringe, then begin the lock stitch in the hole to the right as before) It will blend in and you will be hard-pressed to find it when you are finished your rug. The fringes will then end exactly where your tabby weave ended and will look more natural. In the photo on the right, I have made an arrow where my slimmer fringe is. |
|
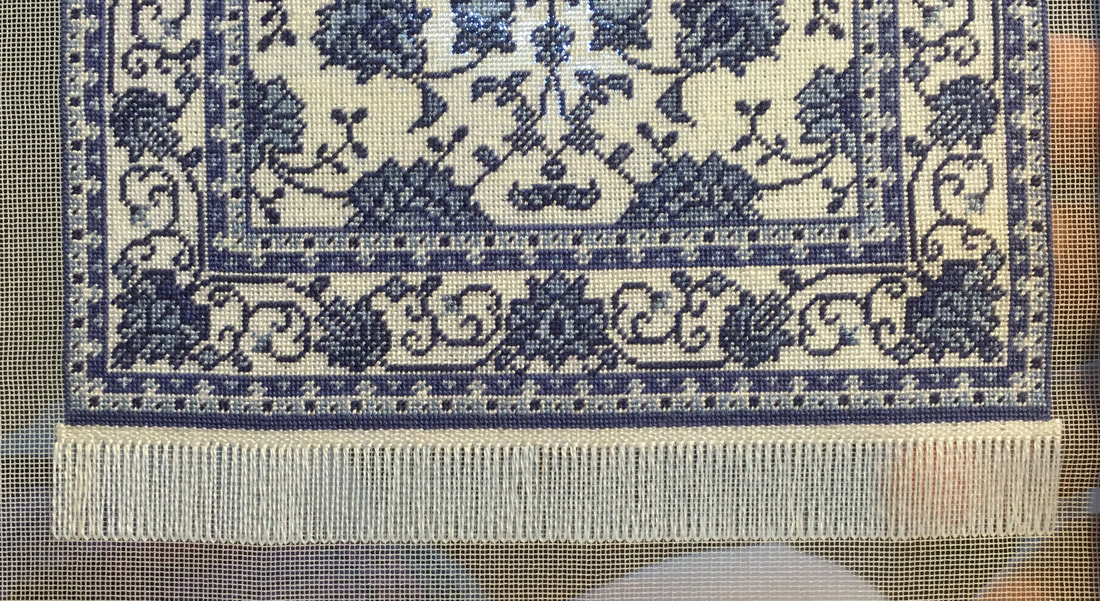
Here is my completed fringe. As you can see, you will have a hard time finding the slimmer fringe. Do the same for the other end of the rug.
Once the fringes are done, remove the rug from the frame and block it. . I have another tutorial detailing blocking directions below this one. There are also blocking directions in my blog https://doublethefuncrafts.weebly.com/yvettes-petitpoint-blog under Rug Finishing tips. Once the blocking is finished, carefully cut your fringe as close to the end of the fringe as possible, then fold the gauze towards the back and iron it to make it lay flat against the back of the tabby weave. I then cut the gauze down so that it is about 1/8” wide and glue it to the tabby weave on the back with a bit of clear fabric glue (like the one you use to make hems without sewing. Some people cut the gauze down very close to the tabby weave without folding it towards the back and it stays in place without unravelling because of the tabby weave, but I haven’t been that brave yet.
Hope this helps explain how I put a fringe on my rugs but if you have any questions, please don’t hesitate to email me at [email protected] and I will attempt to answer them in a more clear fashion.
Below, you will find the free downloadable PDF. Simply select "Download File" then save to your computer.
| adding_a_tabby_weave_and_fringe_to_your_rug.pdf |
This concludes our second tutorial. We hope it was helpful to you and clarified our method for you. If you would like to move to the third tutorial, you may do so using this link.
|
Thank you so much for visiting our site. We hope you come back soon!

|
We promise not to spam you with emails and will only send out the occasional email. We promise not to share your email address with anyone and it will only be used by Double the Fun Crafts for the purpose of promoting our products or letting you know of a sale.
|