|
|
|
We have shown this tutorial in long form for you to read on the site and also have a free downloadable PDF version for you to keep for future reference. Please do not copy, sell or post this tutorial on your own website, but you may mention it and link back to it here if you wish.
Tutorial #7 - Alternate ways to finish a Cushion
Once you have finished stitching your cushion, you will be looking for ways to make it up into a cushion ready for your mini scene. This tutorial is in addition to my Tutorial 4. Here, I will show you 2 alternate ways that I have used to finish mine. Hopefully, this will help you decide on the best way that will work for you.
|
Method 1:
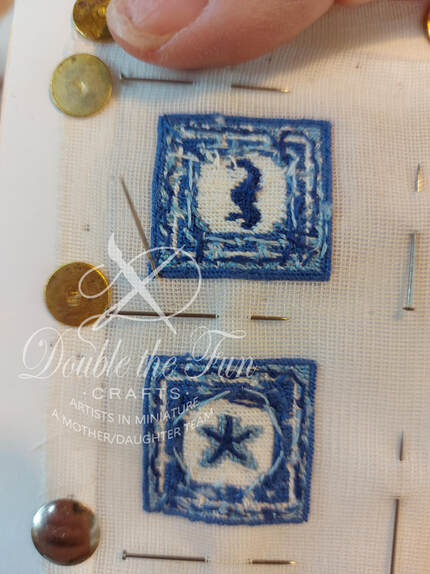
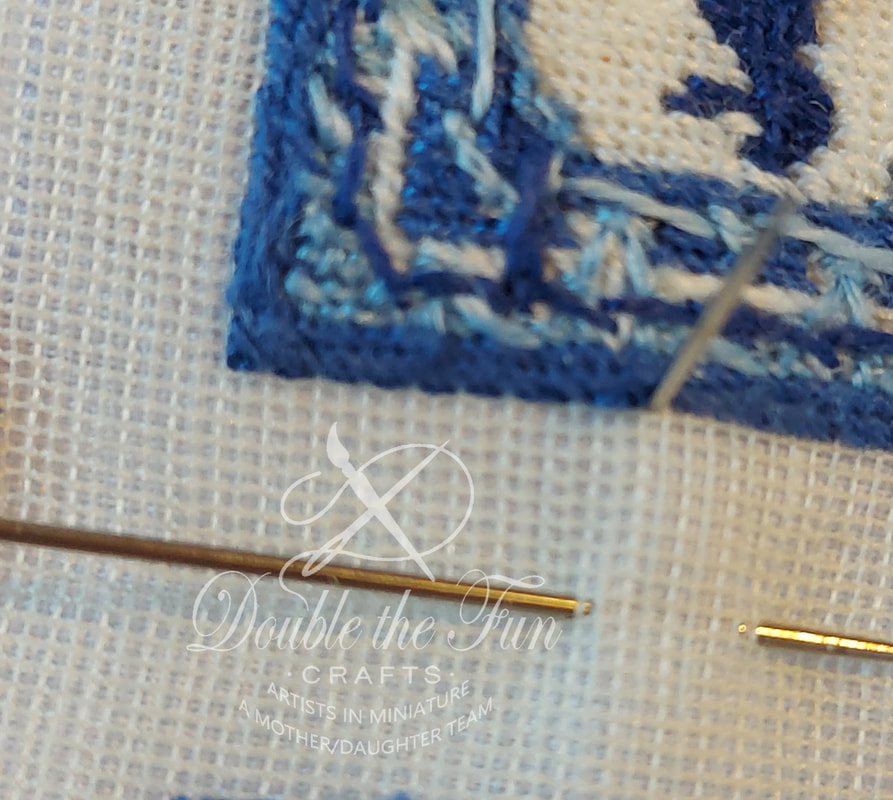
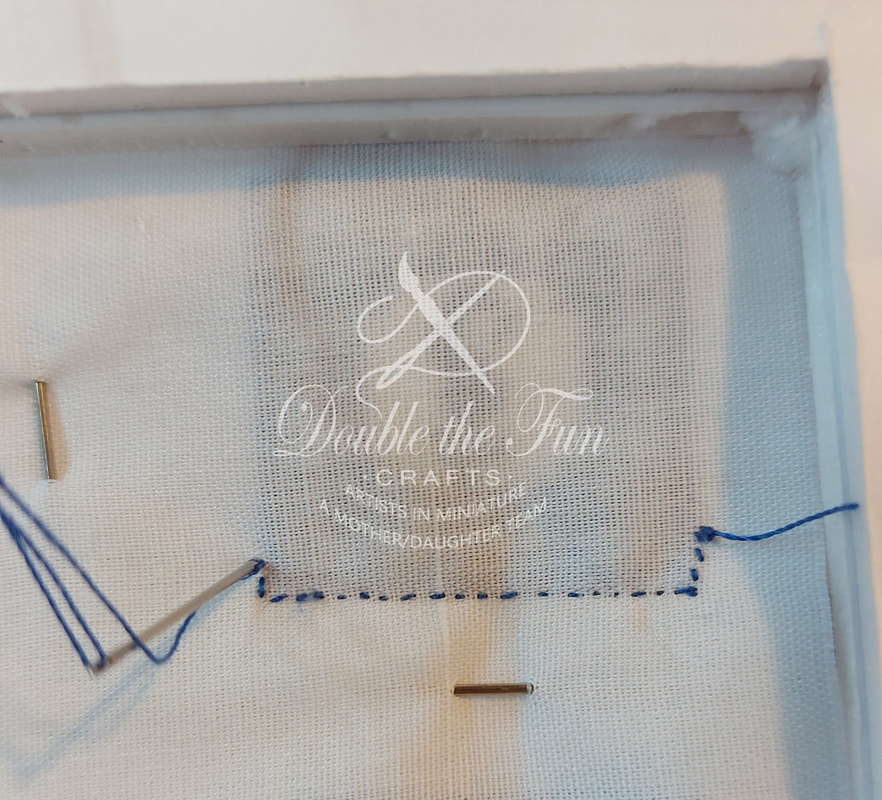
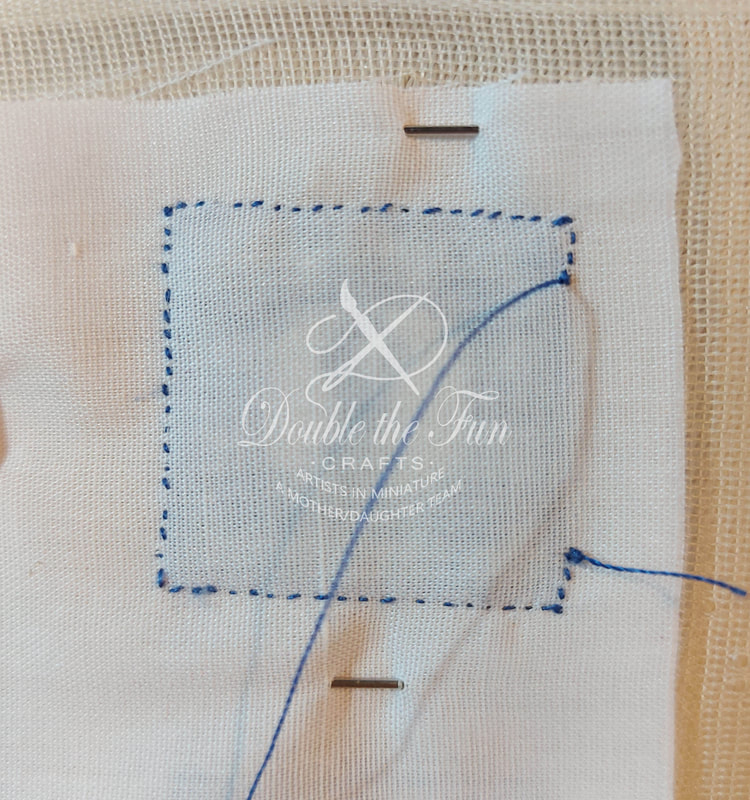
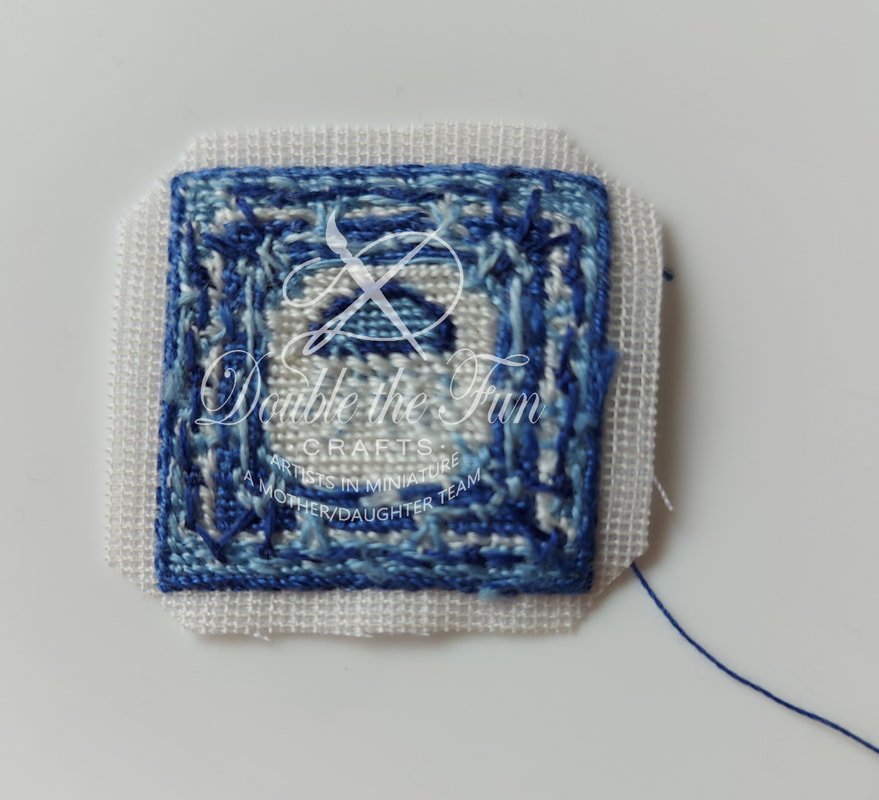
In this example, I have stitched several pillows together on a piece of gauze, leaving approximately 1.2 cm (1/2”) between each one. You may leave more space if you wish, when you are stitching more than one cushion. If stitching only one, this method will still work for you. Without taking your stitching off the frame, pin your backing fabric to the right sides together, leaving the wrong sides visible. Tie a knot in your thread (I use a single strand), and begin stitching, having your stitched work facing you. This will ensure you are following your cushion edges perfectly. Stitch into the same hole that the last stitches of your cushion were made in. Begin stitching approximately 0.3 cm (1/8”) from one corner, then stitch towards that corner. (See photo of the back further down to see what I mean) On the left side of this photo, you will see the tacks that I use to secure my gauze to the frame, then the straight pins around it that I used to secure the fabric. I use a fine linen or silk to back my cushions. |
|
|
Place your stitches across the cushion, going down through one hole and coming up in the hole beside it (running stitch). I found the gauze helped me keep the stitches small and even, so that I wouldn’t lose my stuffing when I finish. Continue stitching around your cushion, leaving one side open to turn it and stuff with whatever filling you have chosen. Do not cut your thread if you have a long section still left. If you have little thread, cut it off and start a new thread in the last stitch you made. I use this to sew the last side once I have turned it. |
|
|
These two photos above show the back of my work. The photo on the left shows how I started my stitches a little bit in from the corner of the cushion then worked my way towards the corner. The second shows the stitching completed, finishing just past the last corner of the cushion. I do this so that when I turn my cushion, all four corners can be precise and the fabric on the open side will naturally turn inwards.
|
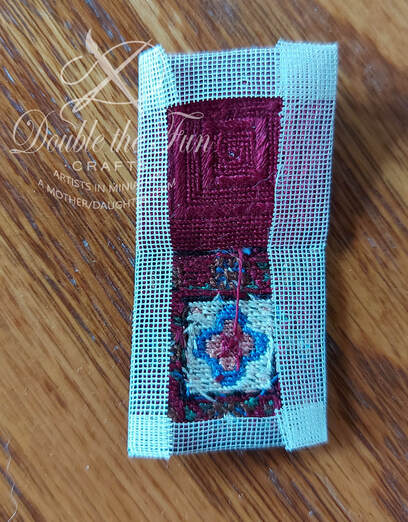
Remove your cushion from the frame and trim the edges close to the cushion, leaving approximately 0.4cm (1/4”) fabric all the way around. (An alternative is to leave a 1.27 cm (½”) wide section of fabric on the open edge only. This can help with tucking the edge in to stitch up once turned and stuffed.
Cut your corners on a diagonal all shown, but not too close. If you cut it too close to your corner, the cut threads may pull through when you turn it. Carefully turn your cushion to the right side. This part is a bit fiddly, so take your time. I turned mine by inserting a pair of fine-tipped tweezers through the opening, then tucking a bit of the cushion fabric into them and carefully pulling it through the opening. Once you get a bit of the fabric through, you can carefully turn the open edges of the cushion over this and continue working it over the remaining cushion until it is completely turned. Unfortunately, I did not take a photo of this step, so do not have one to show you. |
|
When you have it completely turned, use something blunt like a small ball tool or, in my case, a small strip of cardboard (like you get from a cereal box) to shape your corners. Do not use anything sharp as this may push through your corner and ruin it. If you wish, press lightly with an iron on medium setting to help make your cushion edges smoother. This step is not necessary as your filling should help keep your edges square.
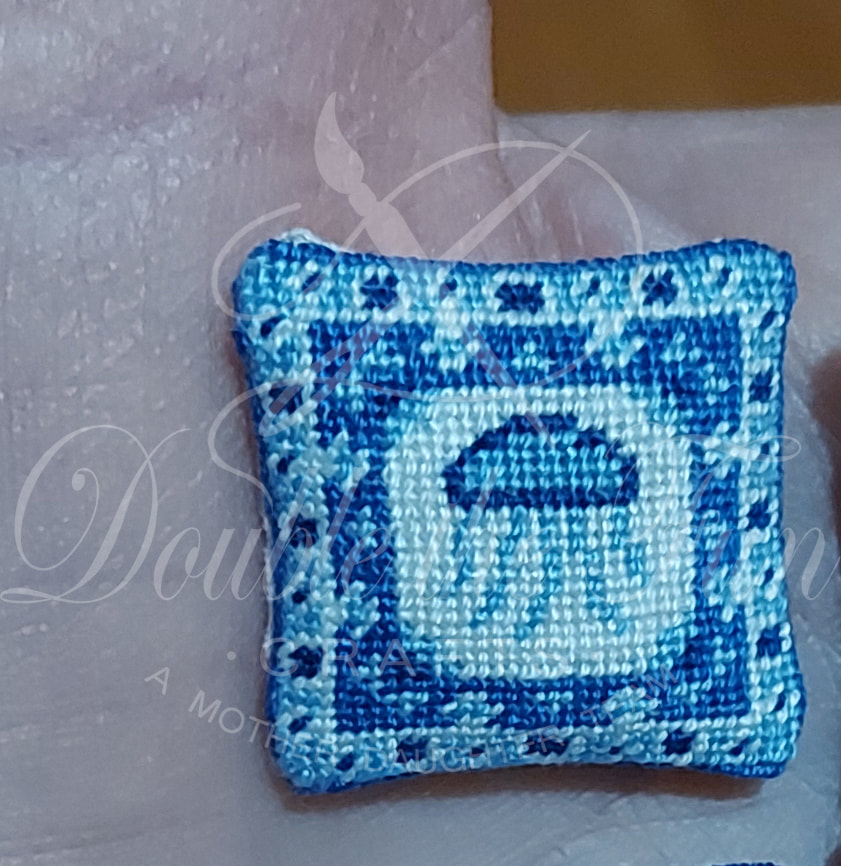
Fill your cushion with the medium of your choice. A tiny bit of stuffing fibre pushed into the cushion and smoothed out with a small ball tool works but be careful not to overfill. You generally do not want your cushion to be overstuffed as they look un-natural.
Another filling (which I prefer) is to use small no-hole beads. (Shown in Tutorial 4). These create a more realistic looking cushion that you can then position on your mini furniture and shape to make it look as if someone just got up and left the room. Recently, I have been finding no-hole beads in my local dollar store and have been purchasing lots. It doesn’t matter what color these are unless your backing fabric is white or very thin. In that case, use a white bead.
Finishing your Cushion:
Once you have filled your cushion with the desired amount of stuffing, thread the piece of thread you left attached back onto a needle and tuck the extra fabric inside the cushion. Hold the edges closed and carefully stitch it closed, placing your stiches into the same hole as the last stitches of your cushion. I used an overcast stitch when doing this step. Once the edges are closed, end off your thread and your cushion is done!
|
Most often people take it one step further and add a tiny braid or twisted rope of thread around the cushion to finish the edges and hide any imperfections. I like to make a twisted rope of thread. I then carefully glue it to the edge of my cushion using a fabric glue that dries clear. See Tutorial 4 for pictures of this step.
To Make a Twisted Rope:
It is quite simple to make your own twisted rope by using long strands of thread. I like to use two strands of thread in two of the colors I use in my cushion. In order to determine how much thread you need for your project, measure around the outside of your project, add another inch (or two if you wish), then double it. Cut your thread this length then fold it in half. Tie the threads together with a knot close to each end, separate the threads and place one knot over a nail (or cupboard door handle, etc), then tucking a pencil or other straight stick into the other end, hold it straight and begin twisting. You have to twist it a LOT, (some like to clamp it into the end of a power drill to make the twisting go faster) until it begins to twist on itself if you slacken your pressure a bit. This tells you it is ready to complete the next step. Still holding your twisted thread straight, place your other hand at the halfway point, then move the two ends together. Grasp the two ends in one hand and let go of the other hand. Your thread will immediately twist together. You will have to smooth it out to get a straight twist and not have your twist bunch up. Tie the two knotted ends together and your twist will stay twisted.
|
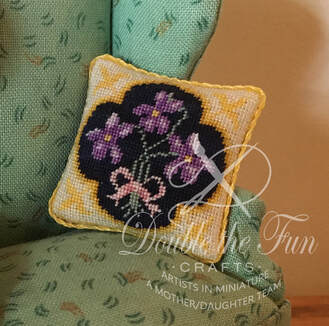
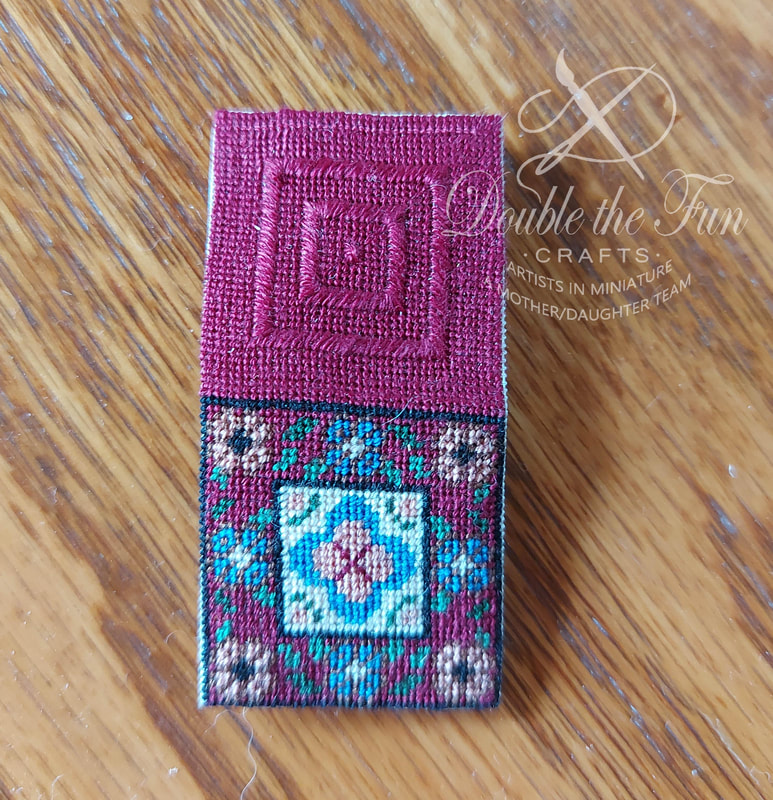
This is an example of one with a twisted rope. When attaching the rope, I put the beginning and end of the rope at the bottom of the cushion, where it won’t be seen. I used one strand of cream and one strand of yellow to make this twisted rope. This cushion was designed as a footstool by Sue Bakker. I adapted it into a cushion and stitched it, changing some colors. |
|

|
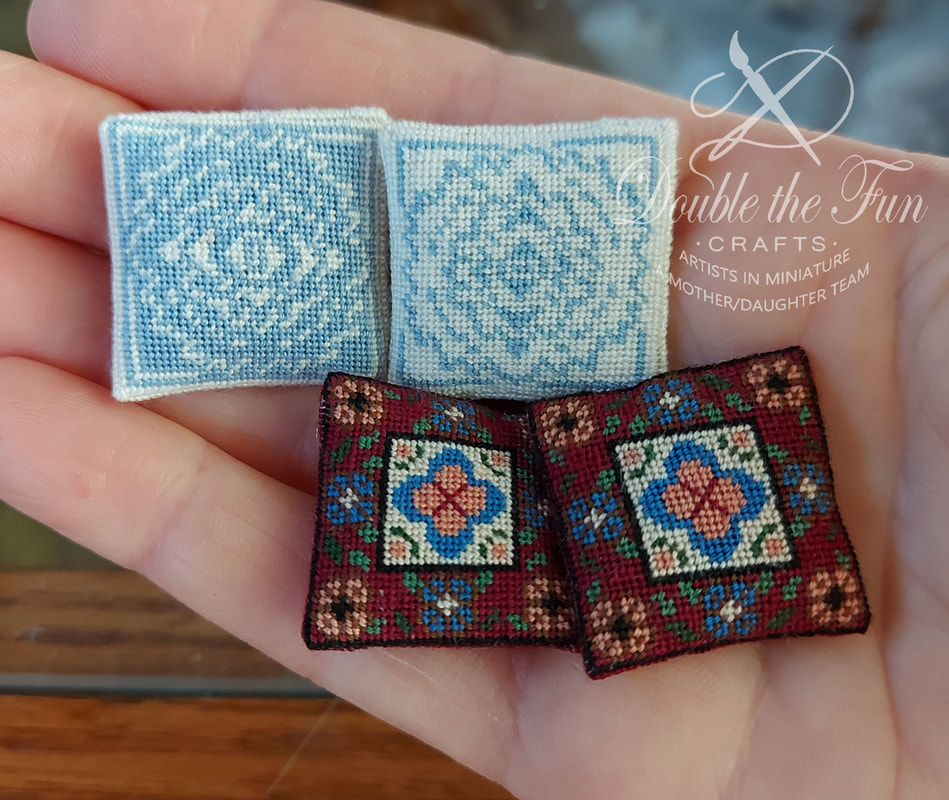
Method 2:
This method is great for getting very square corners. Sometimes, you would like to see stitching on both sides of your cushion, or you do not wish to turn your cushion as in Method 1. If you do not have enough gauze to stitch the two sides on one piece as I have here, you could stitch the two sides individually and use Method 1 or this Method to finish your cushion. However, I would like to show you how I finished one that I stitched on one piece of gauze. In this example, I stitched the second side in the reverse colors so that I could change my décor easily when needed. When stitching the second side, I began the stitching directly above the other side, leaving two strands (or one hole) between the two sides. In future, I will leave 2 holes between, so that is what I will recommend you do. This will leave the perfect space available to do an overcast stitch along that side of the cushion. |
|
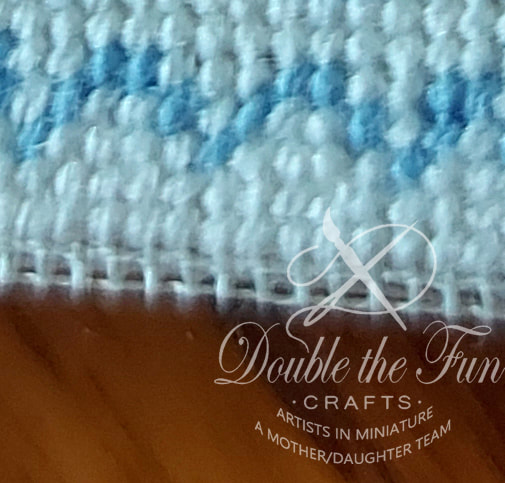
When you have finished your stitching, remove the cushion from your frame, then trim the edges to approximately 0.6 cm (1/4”). Press the excess gauze towards the back of the cushion, leaving two strands (one hole) of gauze visible from the front. This can be a bit tricky to do, but it is worth it in the end. (An alternative is to stitch the two sides directly touching each other and ironing the gauze towards the back leaving no gauze visible from the front. This can be seen in the two photos below. If only stitching one side and attaching fabric to the back, without having to turn it to the right side, this would be a method you could use.) |
|
|
|
|
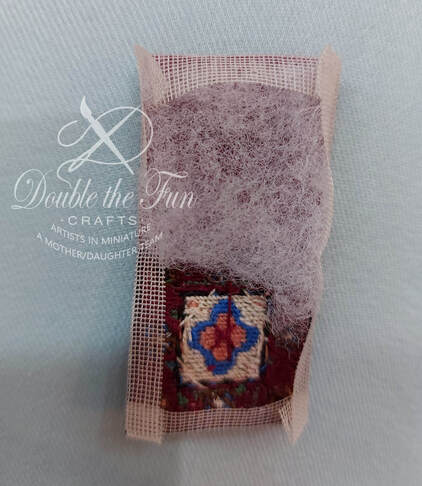
If using a fibre stuffing, I suggest you insert it at this time by tucking it under the ironed edges of the gauze. In this way, you would not have to try and stuff it later and can get right into the corners. If using no-hole beads, pour them in using a tiny funnel just before you finish stitching the last side together. (You can see this in Tutorial 4). |
|
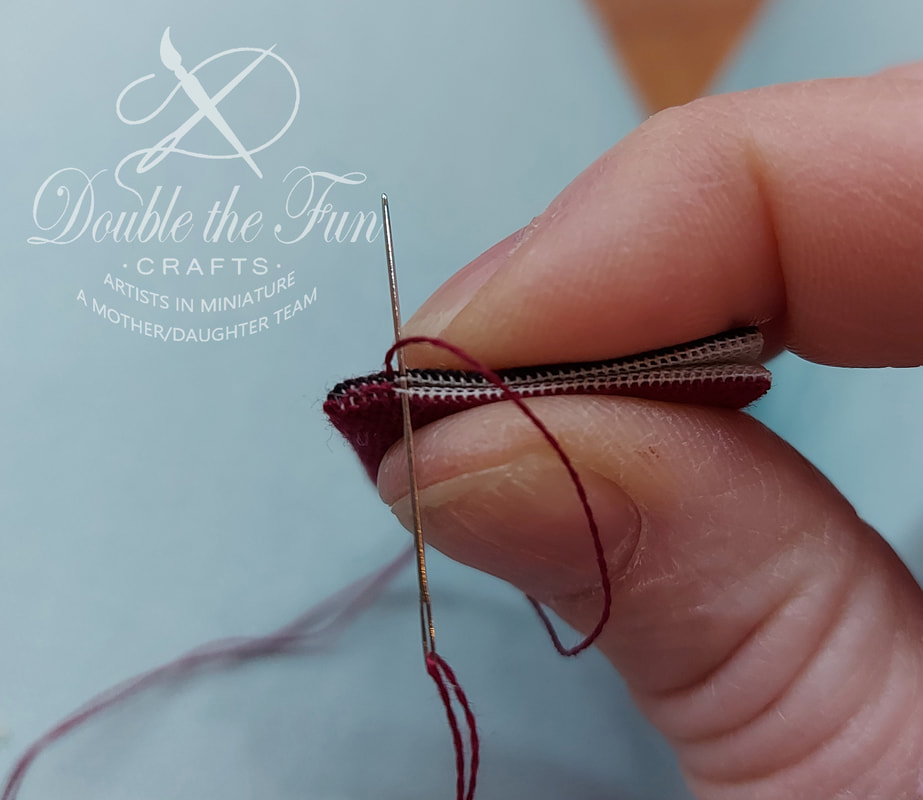
Fold the cushion with wrong sides together, line up your holes to match and pinch the sides to hold your gauze in place.
For the cushion example I have shown to the left, begin your stitching at the corner closest to the fold where one side is attached to the other. When simply stitching two pieces together (as when stitching a fabric to the back or a separate stitched cushion), or if you leave a space between when stitching two sides, you may begin stitching at any point around the cushion. If not planning to cover your seam with a braid or twisted rope, use one long strand of thread, thread your needle then fold over so that you now have two strands. In this photo I am using only one strand as I intend to put a twisted rope around it. Place your stitches into the SAME hole as the last stitches of your cushion. Begin your stitches by running your thread |
|
under a few stitches on the wrong side of your fabric and coming up in the first hole you intend to start with. (In this case, I came up through a hole on the back of my cushion then pushed my needle through from front to back into the same hole.)
Push the needle through from one side to the other, making sure your needle goes into the correct hole directly across from each other. Carry your thread back over the gauze and repeat (overcast stitch made), making your way across the side of the cushion. Continue around the cushion until finished, taking time to fill with stuffing if you haven’t already done so, before finishing the last side.
If you have stitched two patterns touching each other for your cushion, you need only stitch three sides as your fourth side is already completed. If you have left a space between your sides, or you are stitching two individual pieces together (whether fabric or another stitched cushion), you will need to stitch around all four sides.
|
Here are both cushions completed. As you can see, the corners are much sharper. In this photo, I have not yet put the twisted rope onto them. I hope you enjoyed the tutorial and that it helps you to finish your cushions nicely. If you should have any questions, please do not hesitate to contact me at [email protected] . Below, you will find the free downloadable PDF. Simply select "Download File" then save to your computer. |
| tutorial_7_-_alternate_ways_to_finish_a_cushion.pdf |
This concludes our seventh tutorial. We hope it was helpful to you and clarified our method for you. If you would like to move to the eighth tutorial, you may do so using this link.
|
Thank you so much for visiting our site. We hope you come back soon!

|
We promise not to spam you with emails and will only send out the occasional email. We promise not to share your email address with anyone and it will only be used by Double the Fun Crafts for the purpose of promoting our products or letting you know of a sale.
|