We have shown this tutorial in long form for you to read on the site and also have a free downloadable PDF version for you to keep for future reference. Please do not copy, sell or post this tutorial on your own website, but you may mention it and link back to it here if you wish.
Tutorial #6 - My Experiment using Gauze around a Project
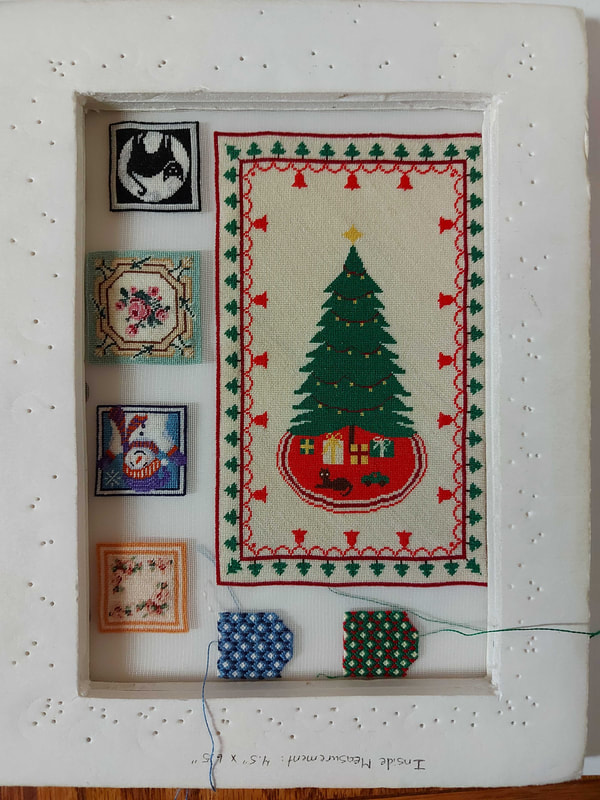
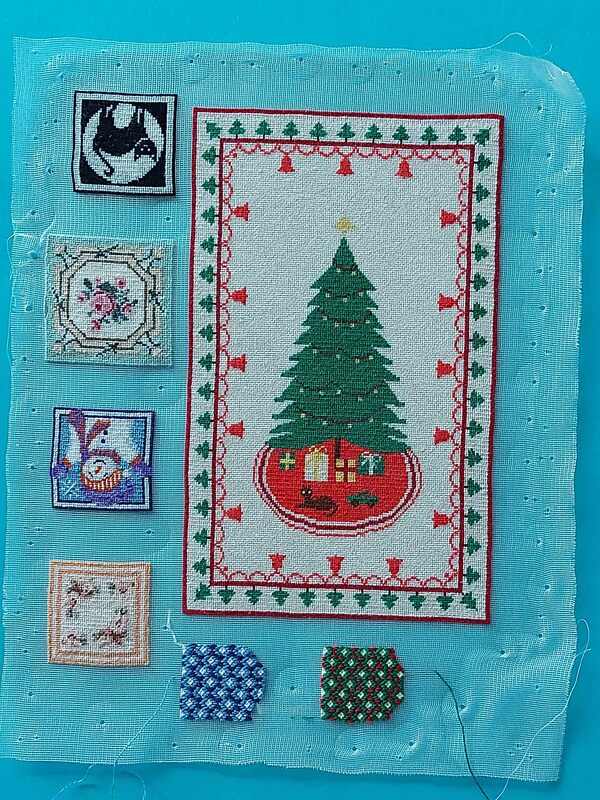
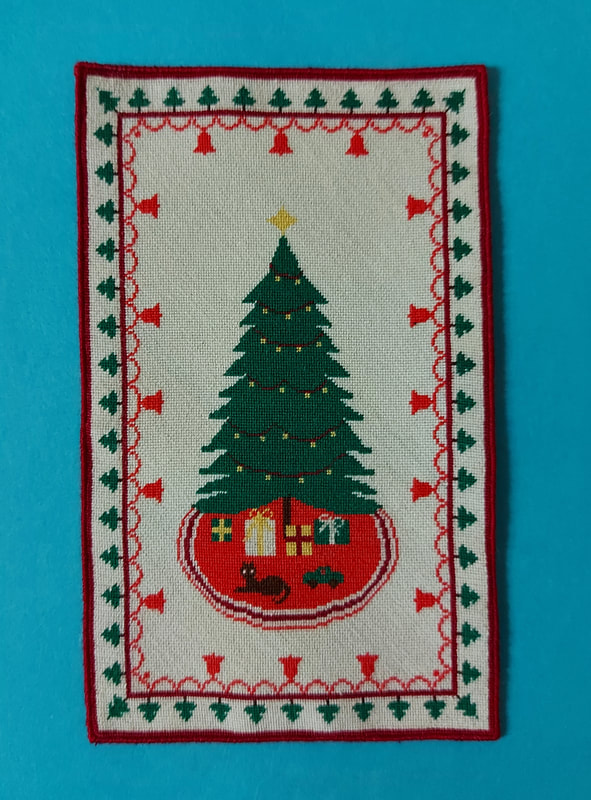
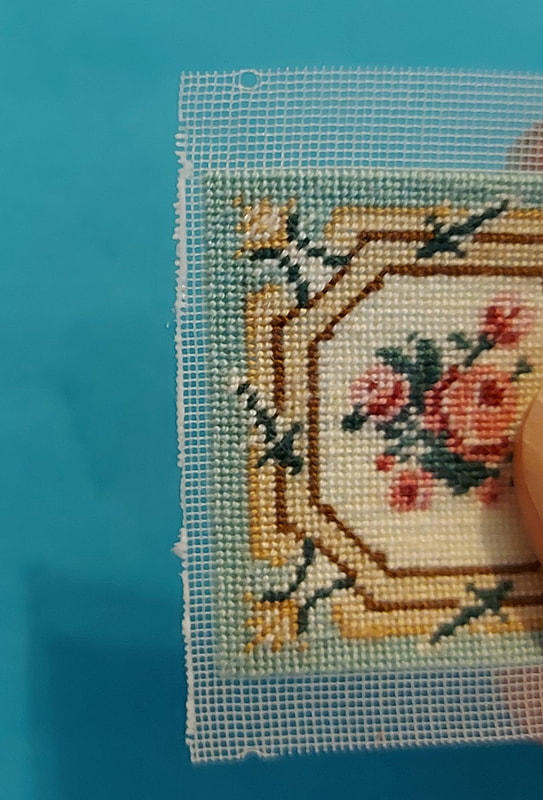
When stitching my Christmas rug, I noticed that I had accidentally mounted 48 count gauze in my frame instead of 40 count gauze. While this was not a big issue because my rug would just come out a little smaller, I now had quite a bit (in my mind) of gauze left over on one side and the bottom of the rug. The strip of gauze would be enough (I hoped) to stitch some pillows on.
I began this as an experiment and would like to say at this time that although I do not recommend this, it can definitely be done but is not for the faint-hearted or beginner. This is the account detailing my experiment and how it turned out.
I began this as an experiment and would like to say at this time that although I do not recommend this, it can definitely be done but is not for the faint-hearted or beginner. This is the account detailing my experiment and how it turned out.
|
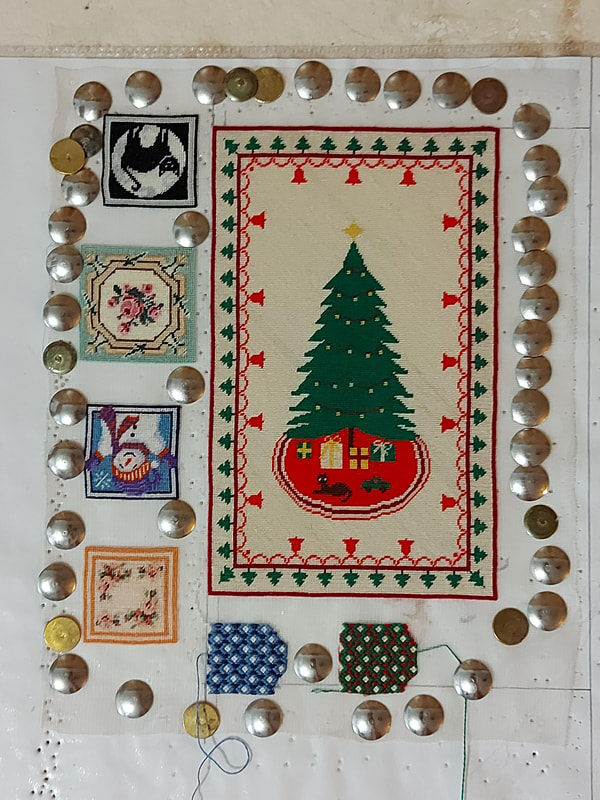
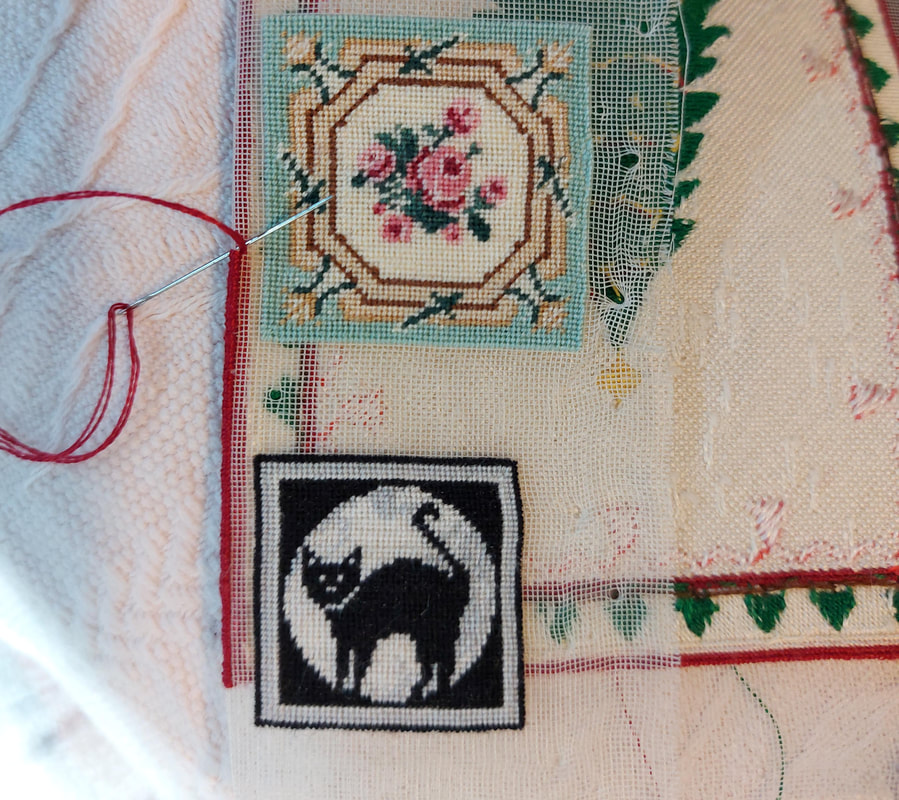
My first step with this project, as with all of my projects was to block it. As you can see here, I left the extra projects attached to the whole project and blocked everything together. This allowed me to get the rug as straight as I could. I wasn’t too worried about how straight the cushions came because I could always gently pull them straight as I was stitching them to the backing fabric, but after several blocking steps they were fairly straight as well. |
|
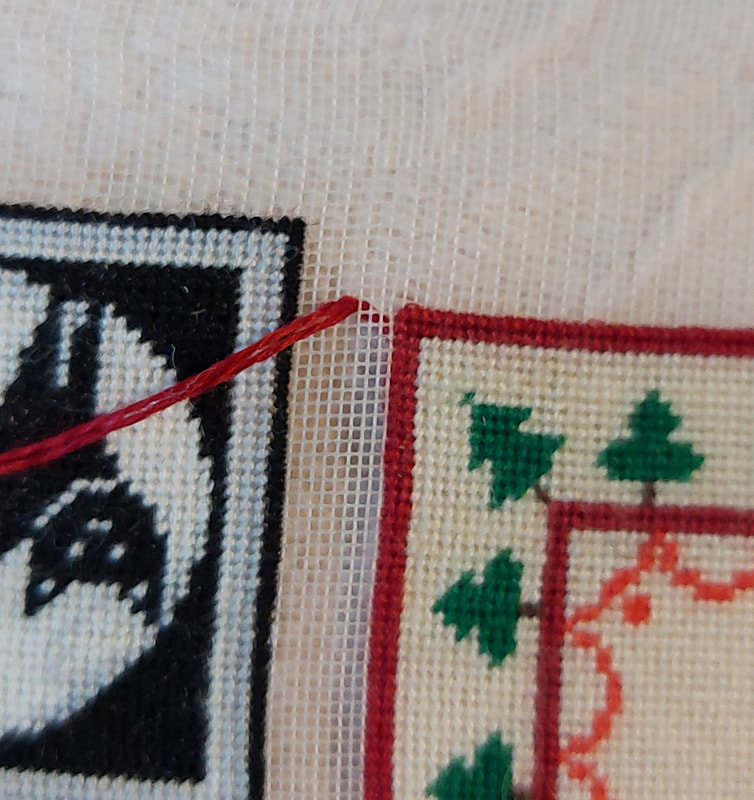
Now, for the beginning of my experiment. For me, the rug was the most important item I had on this piece of gauze, so I began with hemming the rug. I left the other projects attached to the gauze and began at one corner of the rug on the same side that the little pillows were stitched. It takes 4 rows to hem the sides of a rug, so I ran my thread under some stitches near that corner on the back of the rug, then turned the rug over. I brought my needle up in the 4th hole from the last stitches on the side of the rug, as shown in this photo. |
|
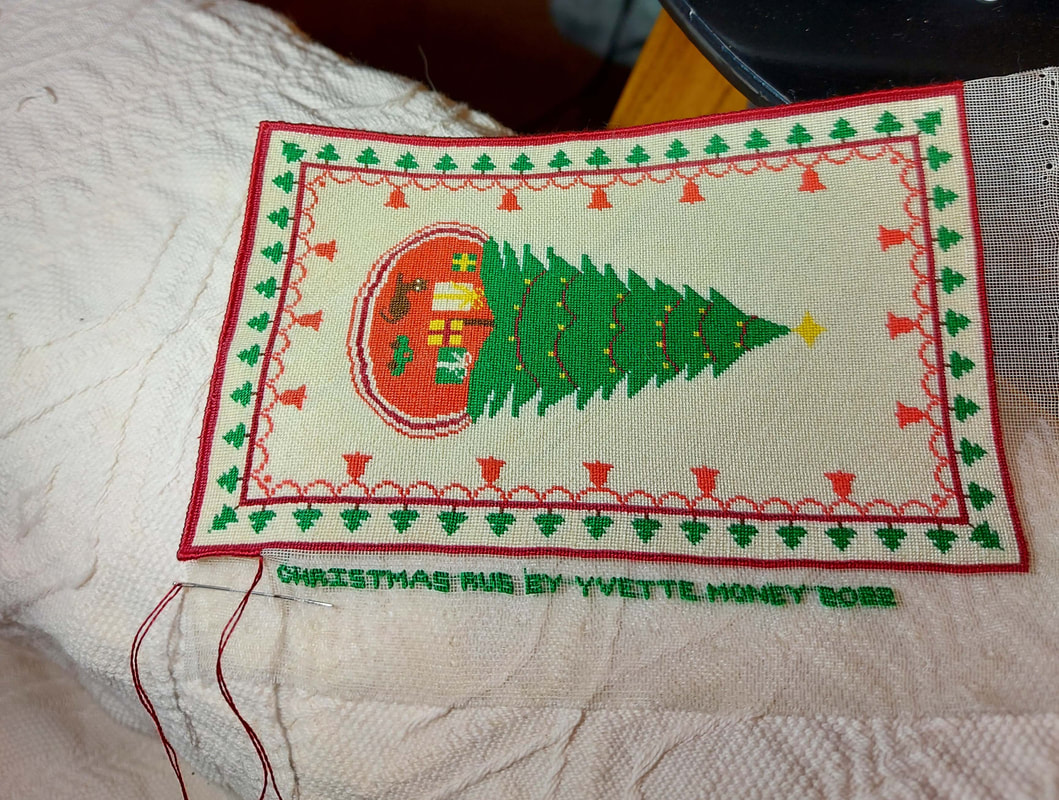
I then folded the gauze so that two rows were visible and began stitching the hem with the front side towards me. Here is a photo showing the back of the rug with part of the hem stitched and the cushions still in place. Once that side was hemmed, I carefully cut my cushions off the rug by cutting the gauze as close as I could to the hem of the rug. I did this under bright light with good magnification so that I wouldn’t accidentally cut any of the hem stitching. This left me with one side finished and a strip of gauze with the cushions on it. The Ruby-Green now had 4 rows only of gauze on one side. The gauze at the hem will not unravel because it has been “locked” under the hem. |
|
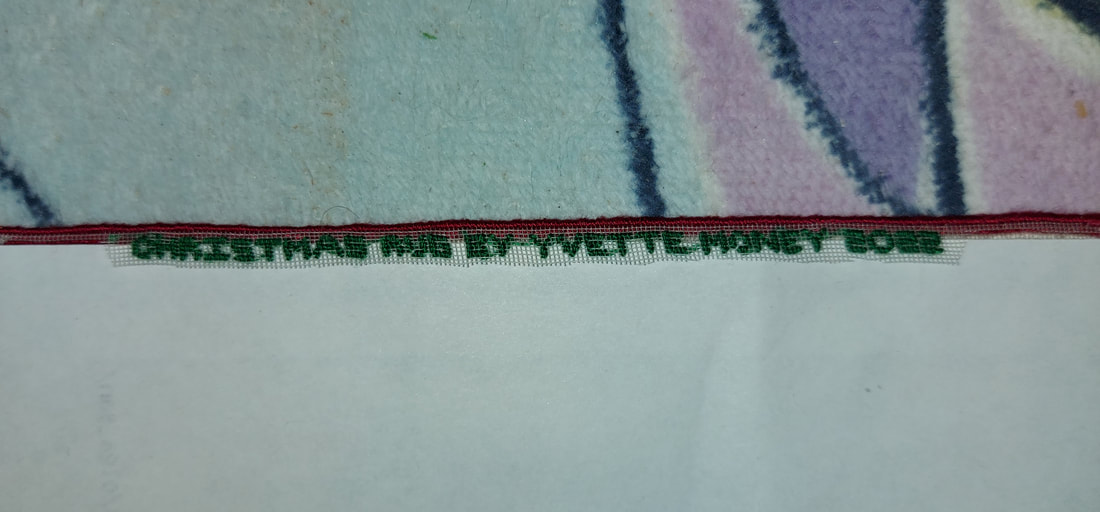
I continued stitching my hem as per my Blocking and Finishing Tutorial and when I got to the second long side, I decided to sign my rug. I graphed out the words and numbers 6 stitches high so they would be small on the back of the rug. I did this before I hemmed that side so that it was easier for me to stitch. I like to put the name of the rug, my name and the year I stitched it when signing. If doing someone else’s pattern, I would try to fit the designer’s name along the top or bottom of the rug, saying something like “designed by” and the name. |
The above two photos show how I finish the hem when I have a signature on it. I fold the side towards the back and hem the same as I hemmed the other sides. Then I trim the gauze back so that it is close to the stitching. Since it is not held firm by the hem, I place a piece of paper under it on the back of the rug and run a line of clear-drying fabric glue along the length of the signature line. I spread the glue carefully to lock in the gauze fibers, taking care not to get any on the hem of the rug, then removed the paper. Allow to dry.
|
Now my rug is finished, and I could turn my attention to the second part of my experiment. I am sure you are now wondering if I was able to finish the Ruby-Green cushion when I only had 4 rows of gauze available to me on one side. I am very happy to say that I was able to do it without too much difficulty and will briefly show how I did it below. If you would like to read about it in more detail, please see my Finishing a Cushion and Making a Braid Tutorial. |
|
I put a line of clear-drying fabric glue onto some paper then dipped the short edge into it to coat the ends of the gauze fiber and set it aside to dry. I then stitched it to my backing fabric with right sides facing each other along 3 sides, leaving the side opposite the skimpy 4 rows of gauze open. After turning and pressing it, I filled it with no-hole beads to give it a realistic look and sewed up the last side. |
|
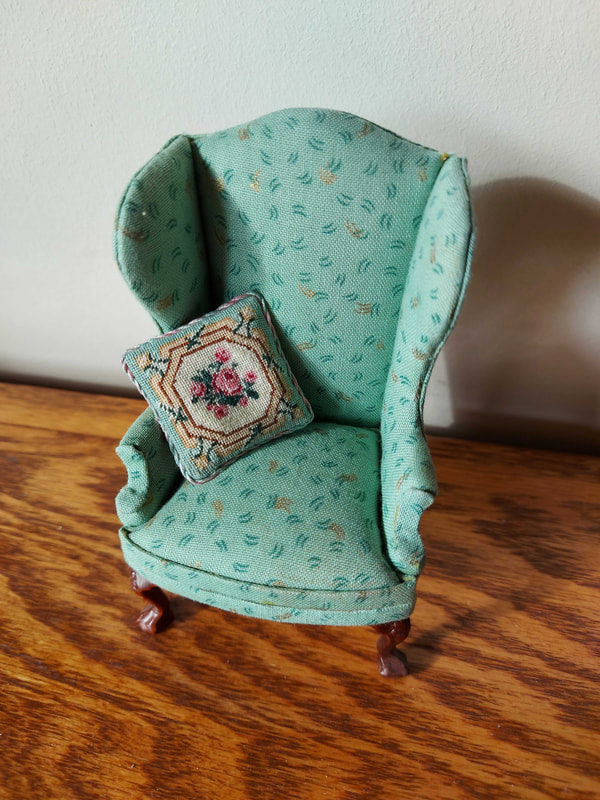
Here is my adorable little cushion finished and sitting on a chair. I couldn’t be happier that my experiment worked out but, as you can see, this is not for the faint-hearted. I had confidence in my abilities for sewing and made sure not to put any undue stress on either the rug or the cushion when sewing them up so there was never any pulling on the gauze. Now that I have finished one pillow and the rug, I know for sure I will be able to finish the other projects easily using the same method. Neither of these items will have pulling or tugging on them now that they are finished, so they will hopefully last a long time. |
Below, you will find the free downloadable PDF. Simply select "Download File" then save to your computer.
| my_experiment_using_gauze_around_a_project.pdf | |
| File Size: | 1276 kb |
| File Type: | |
This concludes our sixth tutorial. We hope it was helpful to you and clarified our method for you. If you would like to move to the seventh tutorial, you may do so using this link.
|
Thank you so much for visiting our site. We hope you come back soon!
|
We promise not to spam you with emails and will only send out the occasional email. We promise not to share your email address with anyone and it will only be used by Double the Fun Crafts for the purpose of promoting our products or letting you know of a sale.
|
