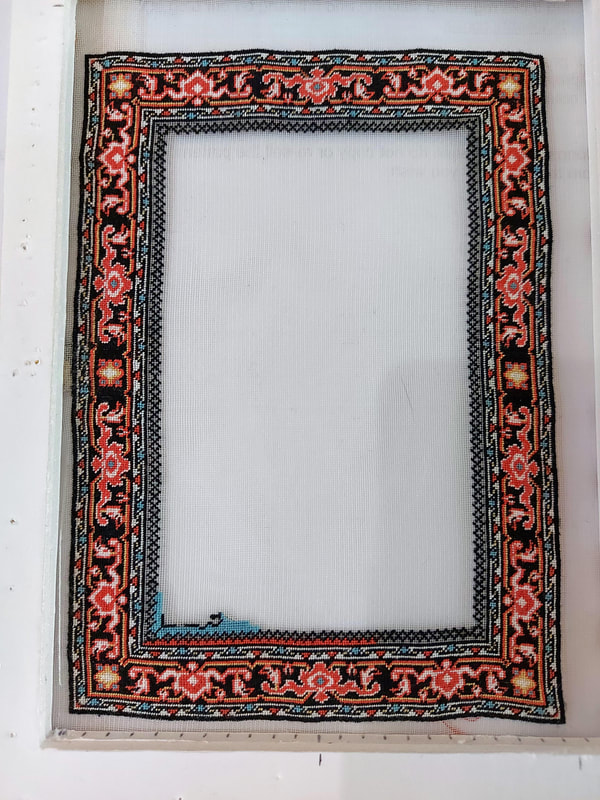
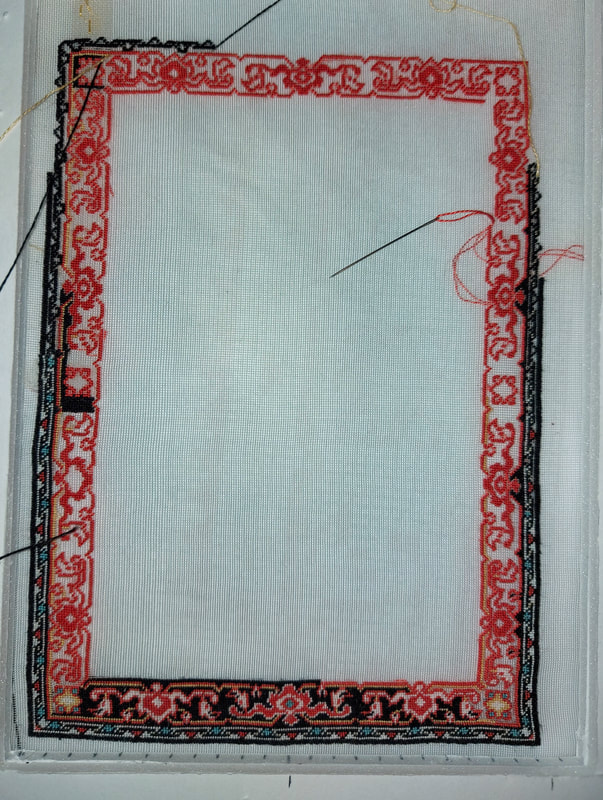
 This past week I completed the first of the inner two borders and am now working on the last border before I begin the center pattern. These last two borders are going so much easier now and I am becoming excited to start on the middle! As you can see, I couldn't resist doing a little bit of the outlining for the first motif in the corner. I did this mostly because I was using up some black thread that I still had a length of when I finished the last diamond. I didn't want to end it off and restart later so I continued on.
Now that I see it there I can see how it will help me with the blue section of the inner border, so I have decided I will continue outlining motifs close to the border so that I know where to put the blue and will hopefully prevent mistakes in counting. For now, I will continue the red then fill in the diamonds.
0 Comments
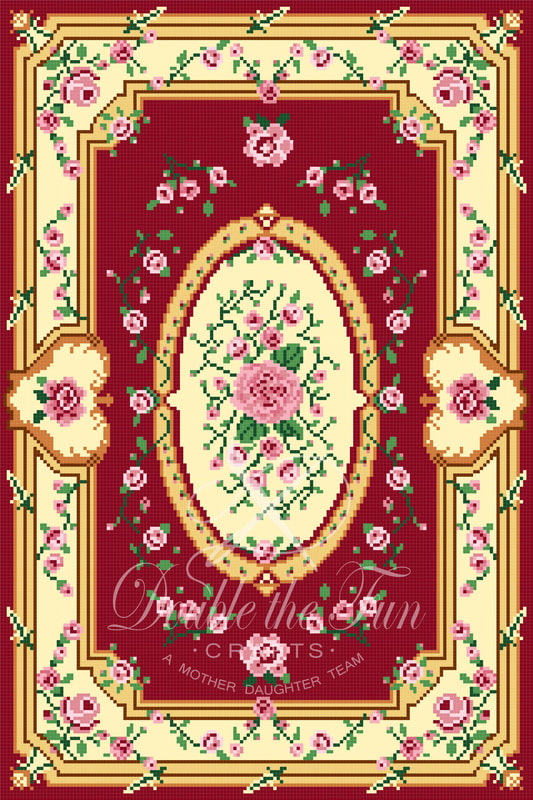
Today, I wanted to post about one of my first designs when I was learning about color and pattern. I saw the original picture of a life-sized Aubusson style rug and really wanted to design and stitch this rug. The original had a dark red background.
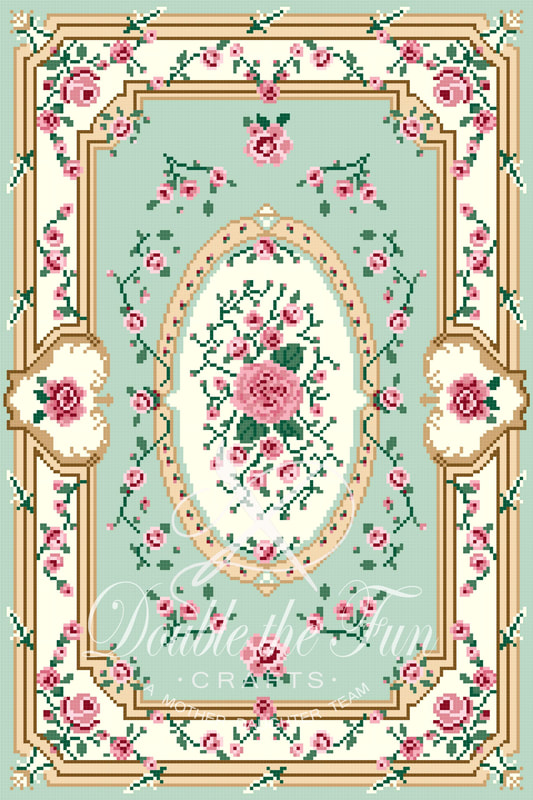
At this point I was still learning how to use my design program and quickly found out that it didn't work to allow the program to do the work and design the rug. The program used way too many colors and many of the colors were either too dark or not suitable for the rug. Therefore, I found out how to import the photo of the original under a clear grid and designed the rug by hand, choosing the colors I wanted and creating the patterns myself. I found it very difficult to create the flowers and when I was finished designing the rug, I still wasn't happy with it. I set it aside but never really forgot about it. This year, after a 2 year break, I got out the old pattern and began to re-design practically everything about it. Finally, I was happy with the results! The first rug on the left is the design I worked with. The red thread is a dark red but it doesn't so up that way on the computer. Once I had the original pattern designed to my satisfaction, I tried creating it in other colors. As I love blue rugs, I, of course, had to design a blue one. This one was a challenge because I couldn't figure out what accent colors to put with it. I finally decided on a pallet of greys and they worked well with the dark blue I had chosen. Next, I thought a pale color would look good since I often see pale Aubusson style rugs and love the way they look. Peach, pink and pale blue did not work at all with the flowers I had in the rug, so I turned my eyes to a green pallet. Green is a very difficult color to work with as there are greens with a blue tone to them and greens with a yellow tone to them. All of the other colors around them have to blend correctly with the tone you have chosen or it will look terrible. After much agonizing about the colors, I was finally able to choose a green and accent colors that worked well for this rug. In the past, I was able to directly substitute one color for another in the original pattern but I was unable to do that with this rug. Therefore, each pattern had to be completely separate items as the graphs wouldn't line up from one to the other. Now, after a long time on the virtual drawing board, my patterns are now ready for listing! Check them out in my Etsy store: Double the Fun Crafts. 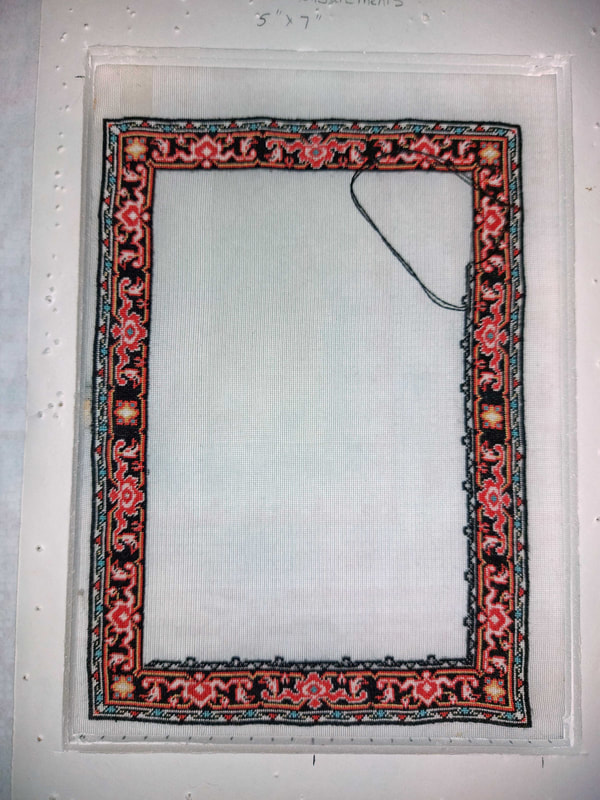 At long last, after many, many re-starts of areas, my outer two borders are finally complete! This is a celebration day for me. 🙂 There is one tiny spot that isn't completed in the wide part of the border (can you see it?). Hint: it is in the wider part of the left border. I will fill that in when I am working with that color doing the next border rather than fill it in now.
After I have finished a section, I go over it visually to see if I have missed any single stitches and fill them in. I found a couple of black stitches I had missed and a few whites which I fixed. The last section I had missed consisted of several stitches that I knew I could see easily so I decided to wait until I was once again working with that color. Now I am working on the next border, as you can see on the bottom and right side, and it will be the same elements as are in the outer border. I began it last night and still found I was having difficulty counting it out properly. However, this time, unlike last time, I caught the mistakes early since I had the wide border to use as a positioning reference. Hopefully, by next week I can have the next two borders either done or well on their way to being done. Then I can start on the fun center. There are less black stitches in the center so I hope it will go quicker. Despite my new glasses (which are working wonderfully) I find it very difficult to see the individual stitches when I am looking at the black ones, whereas I can see every single individual stitch in any of the other colors. Not sure if this is just me or if others have this difficulty. For me, it makes stitching this quite a challenge, but a welcome one since it gives me such a sense of accomplishment when I complete an area correctly! During these last 5 days, I have been filling in the border a bit and it is coming along quite nicely. My first photo was taken against a light background, as I generally do and then I realized I couldn't see all of the work I had done on filling in the white outlines. Therefore, I took the photo again on a dark background. In filling in the borders, I alternate between doing easy no-count sections inside areas I have already outlined, and doing outlining where I have to pay attention more. I do this, firstly to make sure I am alert when doing the counted parts and, secondly to relieve boredom of filling in sections. This way I can get all of it done without getting too bored. (I tend to get bored if I do too much that is easy and like the challenge of creating new motifs in the pattern) Hopefully by next week I will have more of the black filled in so that the borders will look more completed. I find it interesting that borders seem to take so long and it feels as if you haven't accomplished much and then all of a sudden they are done! I look forward to that day. 😉 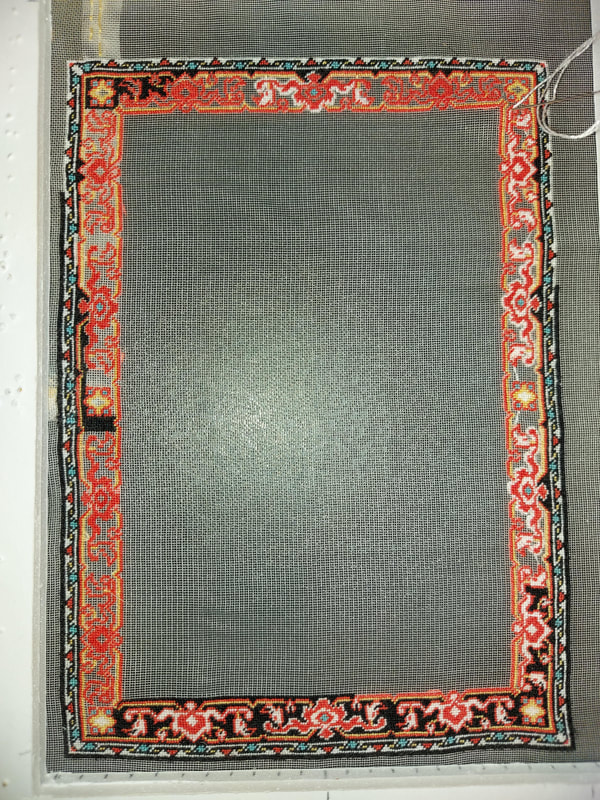 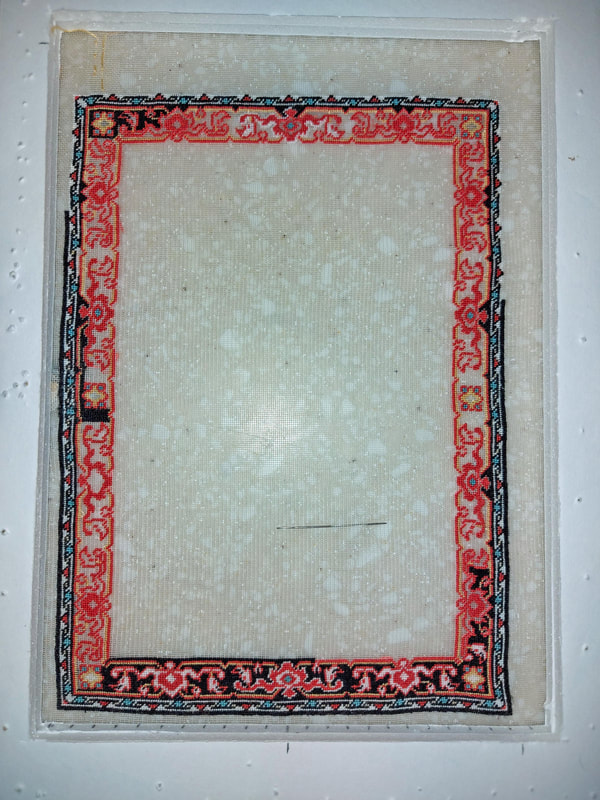 Hot off the press! Here is my most current photo, taken this morning. I feel I am finally making significant progress now that I have both outer borders laid down correctly.
I have been having some difficulty counting the 48 count gauze correctly and have decided my glasses were to blame. Currently, I use my prescription readers along with a pair of cheater glasses on top. It helps but isn't perfect as I can't seem to get the correct magnification of cheaters to complement my readers. I went to my Optometrist last week and took my petitpoint in with me. I asked him to prescribe a second pair of bifocals with the exact magnification I needed to work on my petitpoint more comfortably. He obliged and I now have both pairs of glasses on order. I specifically wanted bifocals because I like to look up from my work and watch TV in the evenings. I am looking forward to seeing if these help my issues. My goal over the next week or so is to get the two outer borders completed so that I can begin work on the inner two borders. Once I get all of the various whites, blues and yellows finished on the red border, I will be able to fill in background without having to study the pattern so intently. I always love this step as it gives me a bit of a break from intense counting before starting the next element of a rug. Now to go and have more fun stitching! Stay safe everyone. 🙂
of un-picking it all over again, so I took a scary plunge and carefully cut off the top half of the left black border and added a patch of gauze. The patch overlapped the red section (underneath before the upper half of the red was stitched) along with about 1/4" of the black border and allowed me a clean slate to stitch it again without taking the risk of putting holes in the gauze if I un-picked again. I tack-stitched it into place and stitched the red part of the border in one and a half inch increments and the black border in the same increments afterwards. To make the transition of the black border seamless near the center, I un-picked about 1/4" of the black border, then re-stitched it to catch the patch in it as well. As I completed parts of the red border, I removed the tack stitches so that I wouldn't have to try and stitch over top of them.
This time, the black border went without difficulty and I was able to reach the upper corner. Finally!! The patch that I put in is not visible now that I have stitched it in place with the red and, since it overlaps about 1/2 inch, it is good and strong. In this photo, it is only visible above the left corner, where you can still see the tack stitches. The black stitching across the middle of the red border are to hold the bottom edge of the patch in place so it wouldn't move as I stitched the red border. When I complete the rug and do the overcast stitch at the end, you won't see it at all, either from the front or the back. Doing this patch saved me hours of un-picking and frustration as well as saving me from having to start the rug over again. I still seemed to make mistakes regularly along both sides of the border but was able to catch them very quickly and fix them before I got too far. Once my two upper corners were in place, I was able to work the top red border fairly easily and, miracle of miracles, I didn't make a mistake across the top!! I am hoping the rest of the rug goes smoothly now that I have completed the worst of the borders. Looking back, I have been wondering how I made so many mistakes when I have never done so to such an extent before. Part of it, I think, is that I am using 48 count gauze for the first time after getting used to 40 count. This can make it difficult to see the individual holes. Another part, I think, is that I need new glasses. Luckily, I have an optometrist visit coming up in 3 days so this should be fixed soon. The last part of the problem, I believe, is the fact that my Grandmother died just before I started this rug and I was emotionally and physically exhausted. Note to self: Don't do any complicated patterns when exhausted! I put it aside for a few weeks to work on some less demanding miniature projects and came back to it feeling much better and was able to problem solve and stitch it with much less difficulty. I have learned a lot with the stitching of this rug so far and am now back to loving stitching it. |

AuthorMy name is Yvette, and I will be writing this blog to tell you about the creative process that has gone into the creation of my Petitpoint patterns along with showing the stitching I have done of some of the rugs. Archives
July 2024
Categories
All
|

 RSS Feed
|
Thank you so much for visiting our site. We hope you come back soon!
|
We promise not to spam you with emails and will only send out the occasional email. We promise not to share your email address with anyone and it will only be used by Double the Fun Crafts for the purpose of promoting our products or letting you know of a sale.
|