|
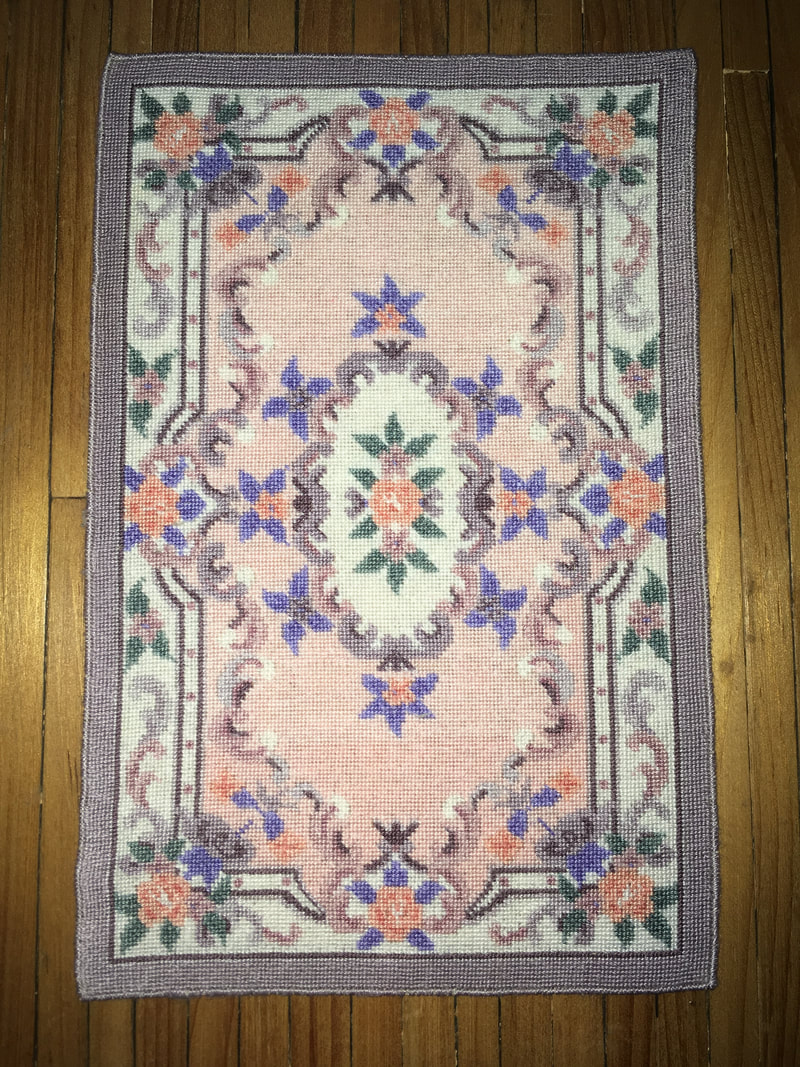
Here is the finished rug. Once I was done the edging, I washed it to get the lines out. Luckily, the pencil was true to it's description and washed out easily. The rug took me approximately 3 months to complete the stitching, blocking and finishing of it. It measures 4" x 6" (10 cm x 15.2 cm) and has 38,400 stitches! That is a lot of stitches.
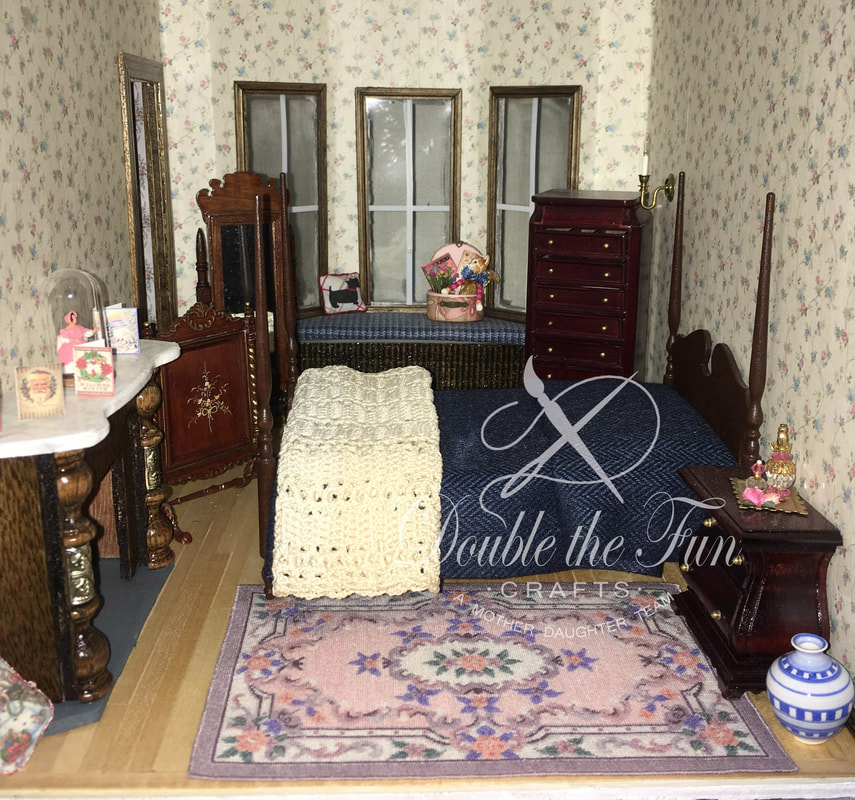
I decided not to put a fringe on this rug because there wouldn't be enough room for a fringe where I intended to put it in my dollhouse. This rug went into my Tennyson dollhouse and as you can see, the room isn't very wide. The colors of this rug went very well with the wallpaper I put onto the dollhouse.
0 Comments
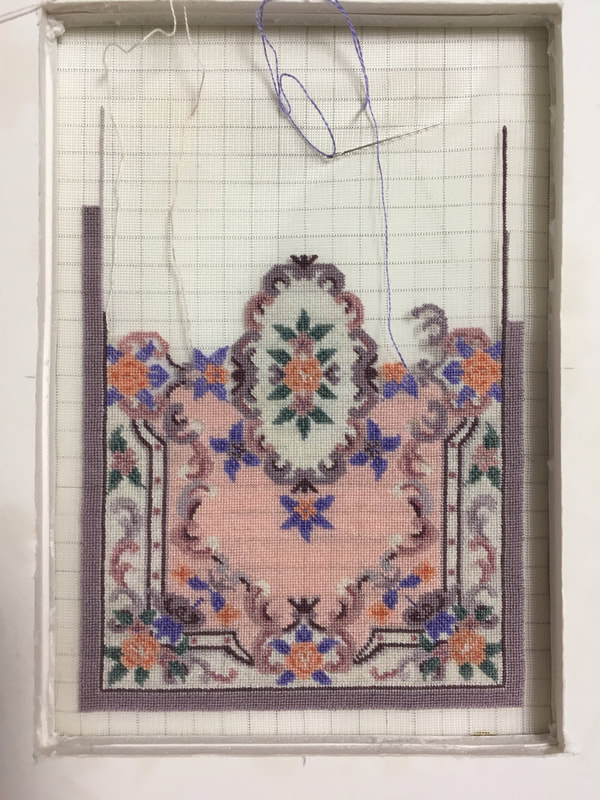
I am now a little over halfway done the rug and I love the way it is looking! I had quite a time doing the center medallion. I miscounted the position of the first bottom leaf and didn't notice until I was up to the center of the flower. Very frustrating that, even though I put the grid on, I had ignored it and made a mistake. I had to remove quite a bit of the center medallion and start again. When starting it again, I chose to fill in the background rows up to the point where the leaf was to start and then I couldn't count it wrong. It worked much better that time. One thing I have found with any craft is that I am always learning. I try not to let any of my mistakes get me down because I learn from them. Since this post is on Christmas Day, I want to wish everyone a wonderful holiday season, no matter what holiday you celebrate. I hope everyone has a wonderful, peaceful season with your loved ones, if able.
Yvette After completing the Isobel Rose rug, I decided that I simply had to start on the Amanda rug. This rug had been calling to me ever since I designed it and I was so excited to finally be starting it!
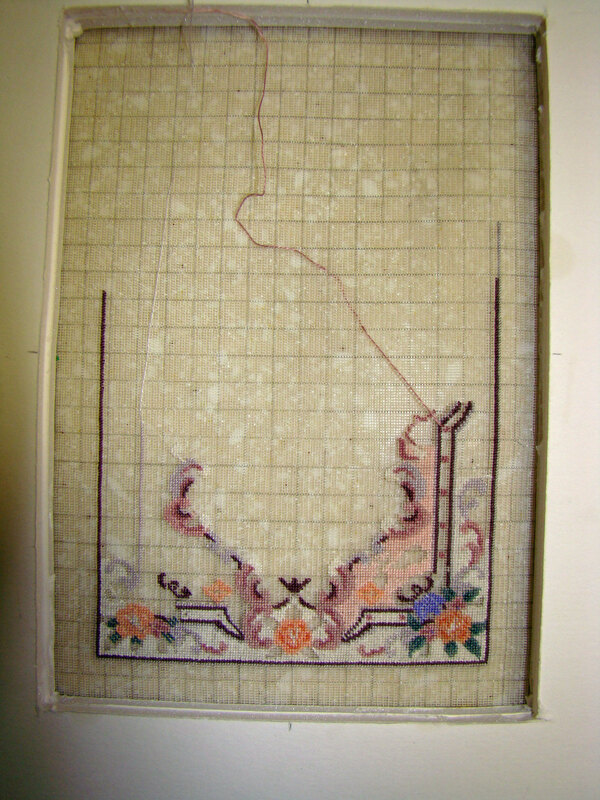
You will notice that there is a grid on the fabric I am using. The fabric did not come with a grid on it and I felt that it would help me to know immediately if I went wrong when stitching my rug. Many times in the past, I have been happily stitching along, only to find I had made a mistake quite a ways back and had to unpick so much! Not a fun feeling but necessary if you want your project to look right. I added the grid myself using a quilter's pencil (one that says it washes out) and a ruler. I put a line every 10 rows both vertically and horizontally. I like to start stitching in the bottom corner of the rug instead of the center and the grid also helps me to find my starting point. Here is the start of the rug. I learned not to stitch around the entire border after stitching my Butterfly rug because it is very hard to count that many stitches correctly and if you are off even one stitch, your border doesn't line up. When stitching the Colorful Amalgam rug, we didn't get enough of the pattern to stitch the whole border at once and I found this was a much easier way to stitch it. Therefore, I now work from corner to corner across the bottom then work my way up. |
AuthorMy name is Yvette, and I will be writing this blog to tell you about the creative process that has gone into the creation of my Petitpoint patterns along with showing the stitching I have done of some of the rugs. Archives
July 2024
Categories
All
|
|
Thank you so much for visiting our site. We hope you come back soon!
|
We promise not to spam you with emails and will only send out the occasional email. We promise not to share your email address with anyone and it will only be used by Double the Fun Crafts for the purpose of promoting our products or letting you know of a sale.
|

 RSS Feed
