in the pattern. With my threads parked, I could easily pick one up, thread it into my needle, and continue with the next motif in that color once I had stitched more of the background. In the photo on the right, you can see a few of my threads that have been parked off to the side. I try to put them in a place where I will not be stitching so that I don't accidentally stitch over them. I do sometimes have to move them before I am ready to use them again, but that isn't very often.
As I worked my way around the border, I stitched enough of the pale background to outline 1 of the motifs and one green line, then filled in the blank areas with the correct colors. I also continued the blue line around the outside. After I decided to stitch in this fashion, the border went quickly and smoothly. I was also able to determine very quickly if I had made a mistake and fix it before I stitched any other colors around it. Now, I will be starting the next border, which has a dark background, so I can stitch the motifs first and not have to worry that my threads will show through the background if I carry threads across from one motif to another.
0 Comments
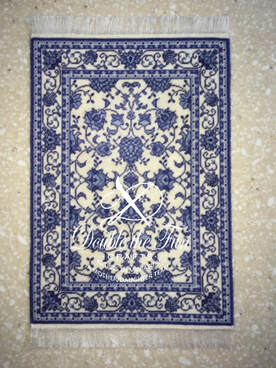
Have you ever seen a pattern you like but don't like the colors of it? I know I have! It is very common and not insurmountable. Changing colors to ones you like better and match your own color scheme makes the design feel more like your own and can go a long way towards making your scene fit your own vision. Several of my patterns include different color schemes, simply because I kept thinking of other colors that could work. But how do you go about making a pattern match your vision? Recently, a fellow stitcher by the name of Martha S, chose one of the rugs that I have several schemes for, in yet another color scheme, showing that the pattern can be changed to almost anything to suit your own scheme. She has given me permission to discuss her journey into choosing colors to go with her vision. She chose the Sonja rug for her scene.
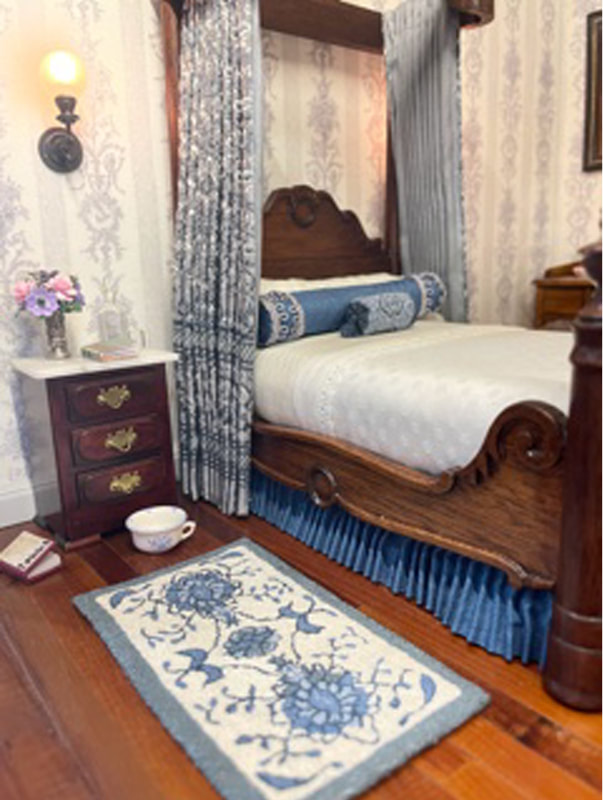
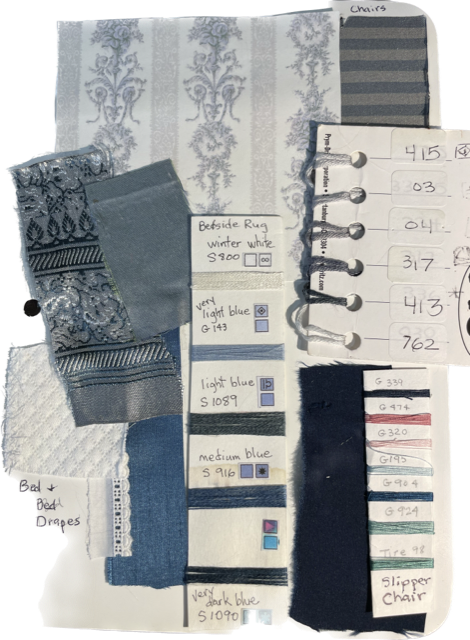 Above is Martha's storyboard. On the storyboard, she has samples of the fabrics and wallpaper that she eventually ended up using. There are 3 floss color cards that she has placed on the board. The one in the center shows the colors she chose for the smaller, French knot version of the rug she placed in the bedroom. The floss card showing the various shades of grey shows the colors she eventually chose for the larger version of the Sonja and the smaller floss card at the bottom right shows samples of threads she used in other stitching she placed around the room. This gave Martha an excellent way of matching colors to her current color scheme. As you can see, the shades of grey floss that she chose complement the greys she has in her fabrics and wallpaper perfectly. Martha asked another stitcher (Peggy B) to stitch the rug for her once she decided upon the colors and this is the finished product in place in Martha's dollhouse. 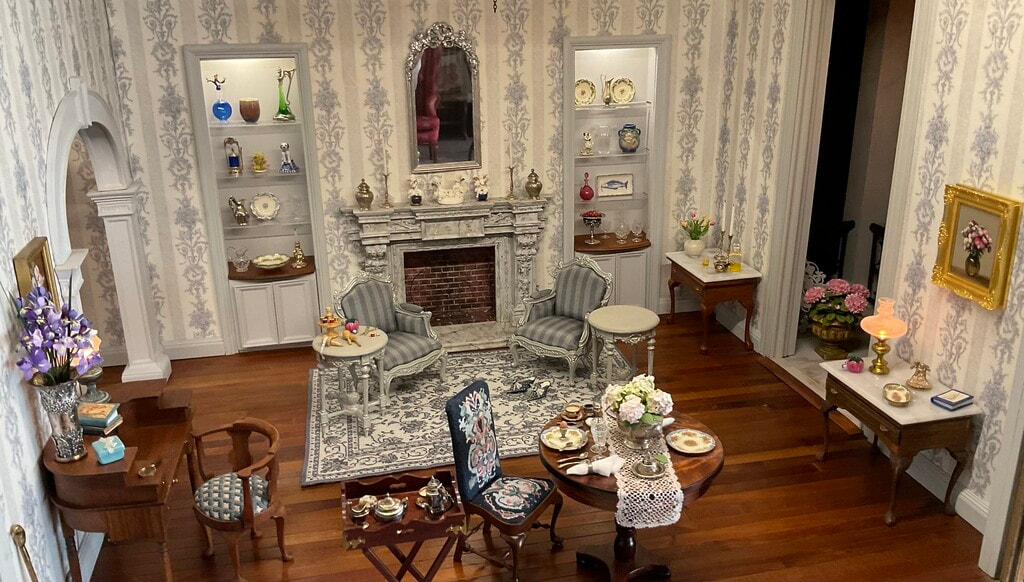 If you wish to change colors in one of my patterns, you could apply Martha's technique to help you decide upon colors. Make note of the number of colors in the pattern and be sure to choose the same number of colors for your pattern. You may decide to change only one or two colors to better match your scene, or you may decide to change all of them as Martha did. Changing the colors doesn't have to be hard and you can let your imagination soar using this method.
If any of you have stitched one of my rugs and changed the color schemes, I would love to see them. It is always fun to see what everyone has done with my designs. I hope this helped you and until my next post - happy stitching!
This post is only intended to show you that, with planning, it can be done. There are definitely more steps and effort to do this, but I honestly don't mind.
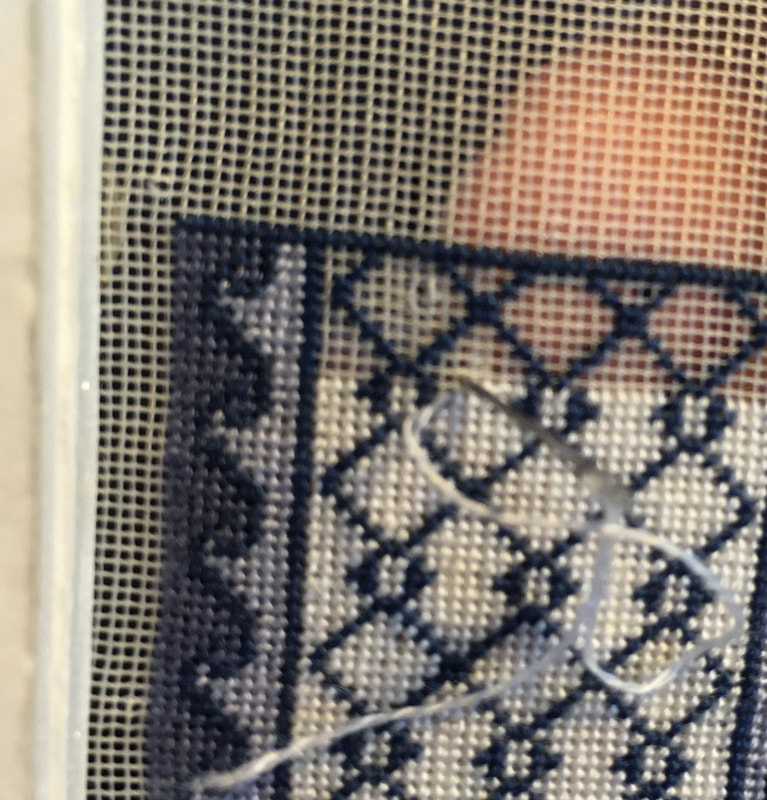
Now, on to the other end of the rug... 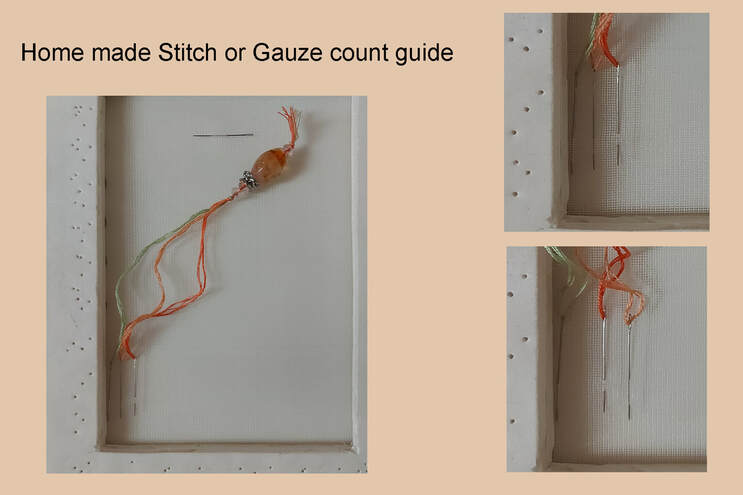 About a week ago one of the members of the Petitpoint group that I belong to posted a photo of a counting device that she had found. It was such an interesting idea that I decided to make my own. It is made up of either two or three needles that were secured on a long piece of thread and held together with some cute beads. I decided to make mine with 3 needles because I wanted the first needle to stay in the first line of squares on my gauze. In this way I could tell where I started counting.
To make it I used some number 28 tapestry needles then cut some floss double the finished length that I wished. I used 3 strands of each color and threaded them through each of the 3 needles until the needles were at the halfway point of the thread. Once I had all 3 needles threaded, I then folded the threads in half, tied them all together with a small knot and threaded them through some beads. Once I had the beads threaded, I secured them with another knot. I use it to count 10 squares at a time and "leap-frog" the 2 needles across the gauze, first to determine the count of the gauze if I am unsure, and second to count across to see where the second corner of my rug will be. In the past I had to keep re-counting to make sure I had the right number of stitches so I think this will make my life easier. I can also use it to count the stitches I have done already or mark the correct number of stitches that I need to make before changing to another color in a row that I am stitching.
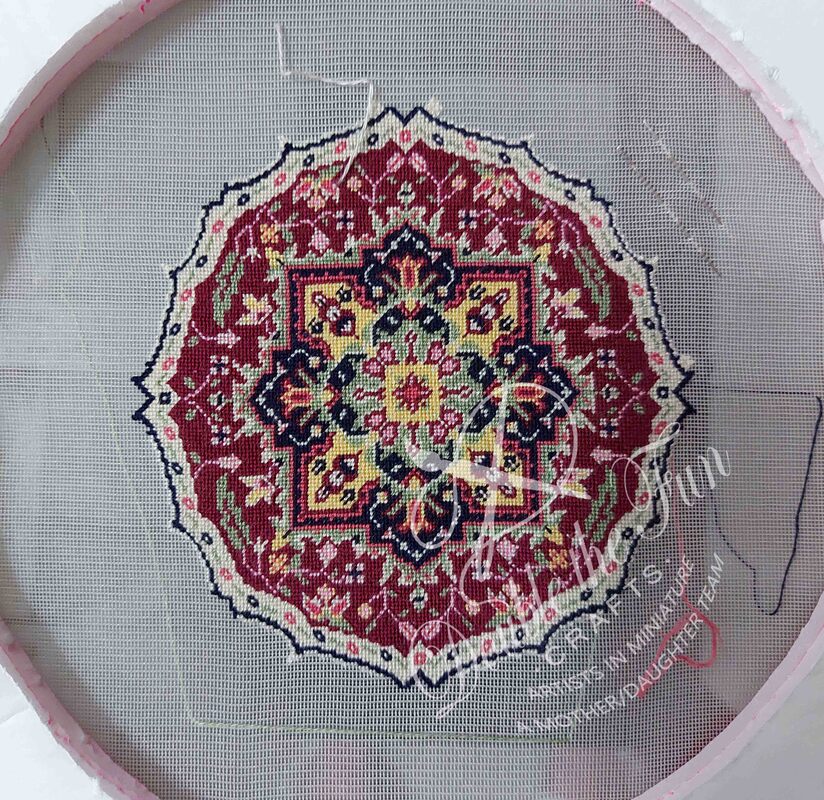
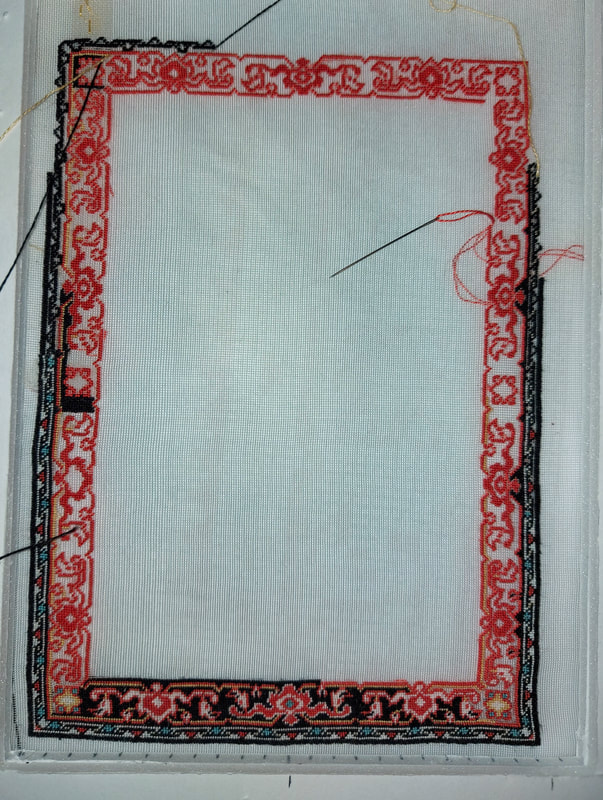
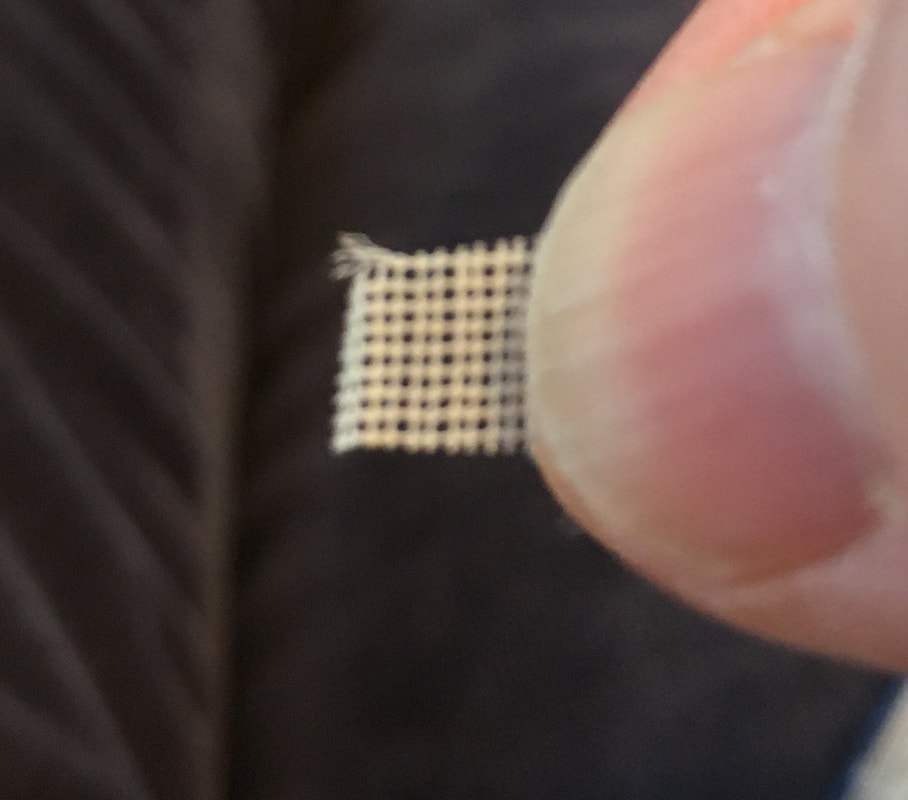
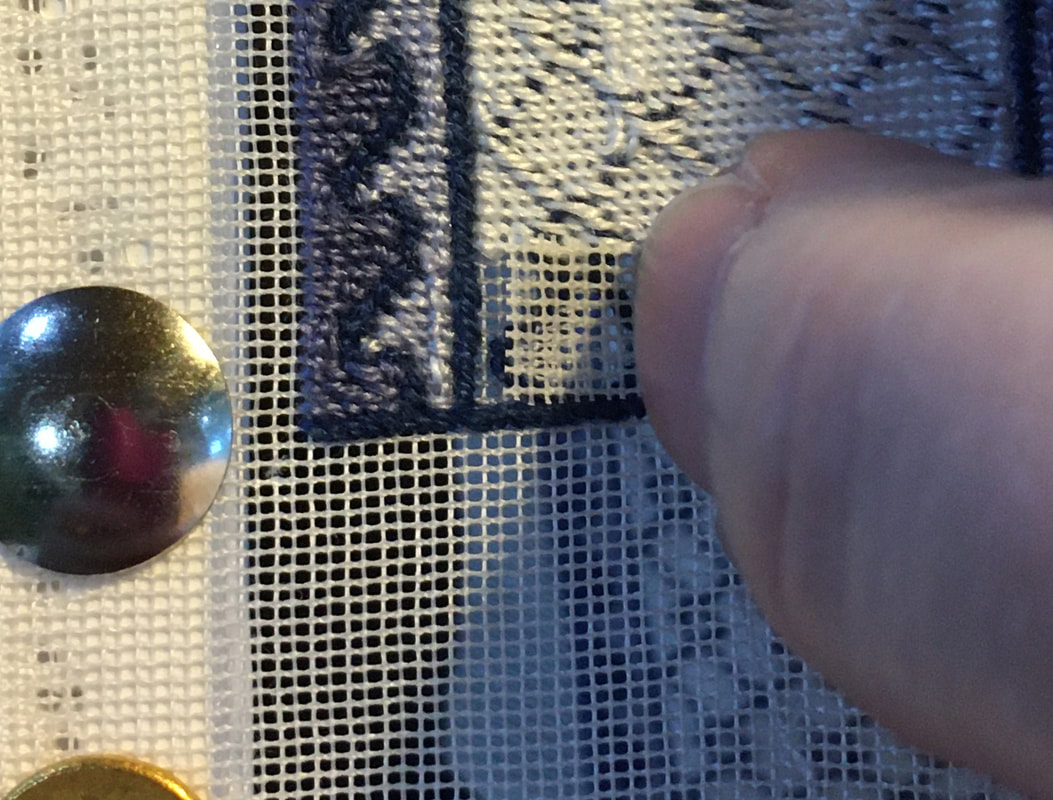
of un-picking it all over again, so I took a scary plunge and carefully cut off the top half of the left black border and added a patch of gauze. The patch overlapped the red section (underneath before the upper half of the red was stitched) along with about 1/4" of the black border and allowed me a clean slate to stitch it again without taking the risk of putting holes in the gauze if I un-picked again. I tack-stitched it into place and stitched the red part of the border in one and a half inch increments and the black border in the same increments afterwards. To make the transition of the black border seamless near the center, I un-picked about 1/4" of the black border, then re-stitched it to catch the patch in it as well. As I completed parts of the red border, I removed the tack stitches so that I wouldn't have to try and stitch over top of them.
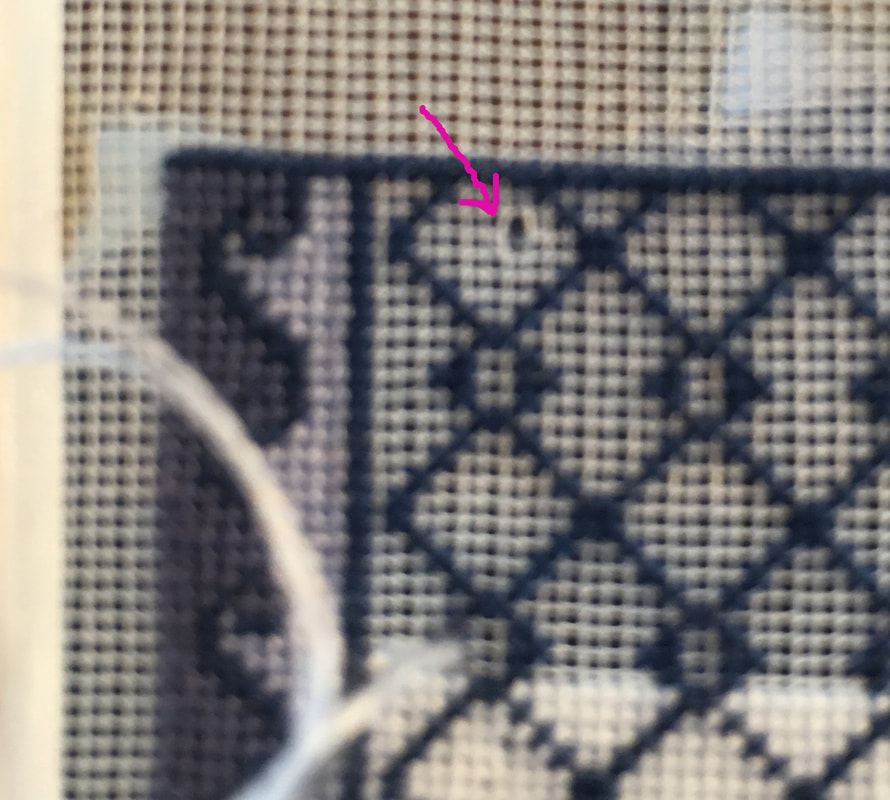
This time, the black border went without difficulty and I was able to reach the upper corner. Finally!! The patch that I put in is not visible now that I have stitched it in place with the red and, since it overlaps about 1/2 inch, it is good and strong. In this photo, it is only visible above the left corner, where you can still see the tack stitches. The black stitching across the middle of the red border are to hold the bottom edge of the patch in place so it wouldn't move as I stitched the red border. When I complete the rug and do the overcast stitch at the end, you won't see it at all, either from the front or the back. Doing this patch saved me hours of un-picking and frustration as well as saving me from having to start the rug over again. I still seemed to make mistakes regularly along both sides of the border but was able to catch them very quickly and fix them before I got too far. Once my two upper corners were in place, I was able to work the top red border fairly easily and, miracle of miracles, I didn't make a mistake across the top!! I am hoping the rest of the rug goes smoothly now that I have completed the worst of the borders. Looking back, I have been wondering how I made so many mistakes when I have never done so to such an extent before. Part of it, I think, is that I am using 48 count gauze for the first time after getting used to 40 count. This can make it difficult to see the individual holes. Another part, I think, is that I need new glasses. Luckily, I have an optometrist visit coming up in 3 days so this should be fixed soon. The last part of the problem, I believe, is the fact that my Grandmother died just before I started this rug and I was emotionally and physically exhausted. Note to self: Don't do any complicated patterns when exhausted! I put it aside for a few weeks to work on some less demanding miniature projects and came back to it feeling much better and was able to problem solve and stitch it with much less difficulty. I have learned a lot with the stitching of this rug so far and am now back to loving stitching it. Today, I added a tutorial to my Tutorial section found Here
I have three tutorials there that deal with Mounting the gauze, adding a Tabby weave and fringe, and Blocking your finished project and wanted to bring your attention to their availability. These tutorials are available for free download for your personal use. Please do not copy, reprint, or sell these tutorials. If you can think of any other tutorials that you would like to see, please email me at [email protected] with your request.
|

AuthorMy name is Yvette, and I will be writing this blog to tell you about the creative process that has gone into the creation of my Petitpoint patterns along with showing the stitching I have done of some of the rugs. Archives
July 2024
Categories
All
|
 RSS Feed
|
Thank you so much for visiting our site. We hope you come back soon!

|
We promise not to spam you with emails and will only send out the occasional email. We promise not to share your email address with anyone and it will only be used by Double the Fun Crafts for the purpose of promoting our products or letting you know of a sale.
|