|
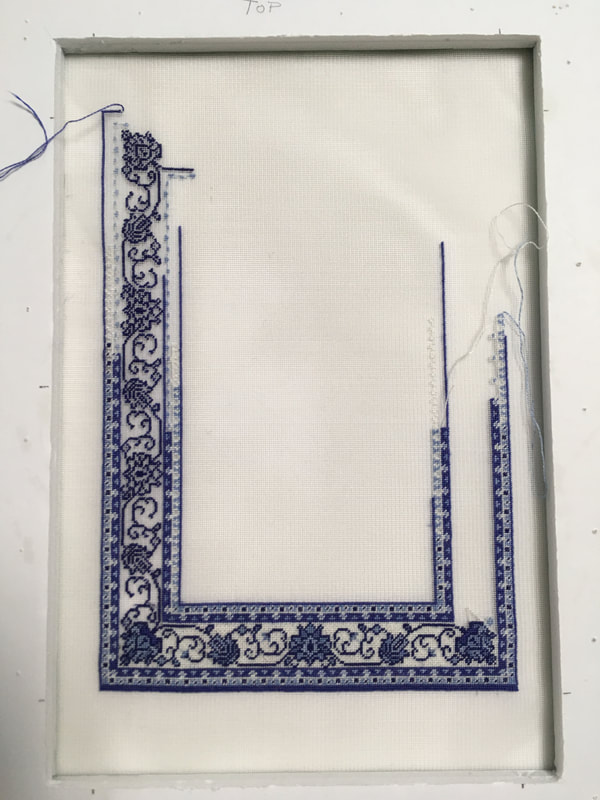
I have been able to make some great progress this past week and was able to finish the inner and outer border. I am now working my way around the middle border by doing the outline of the motifs first. It is progressing well towards the finish and now I only have the right side to complete before I begin filling in the motifs.
So far, it has been fairly easy to do the outlines and not get off track but I must confess, I did have some difficulty doing the top left corner motif. For some reason, I kept mis-counting my stitches and it didn't line up with the corner. I must have been tired when stitching it because I had to re-do it three times! Once I was able to stitch it correctly, I put it aside and went to do something else for awhile so that I didn't make any other mistakes. I have found it is never a good idea to stitch when you are tired!!
0 Comments
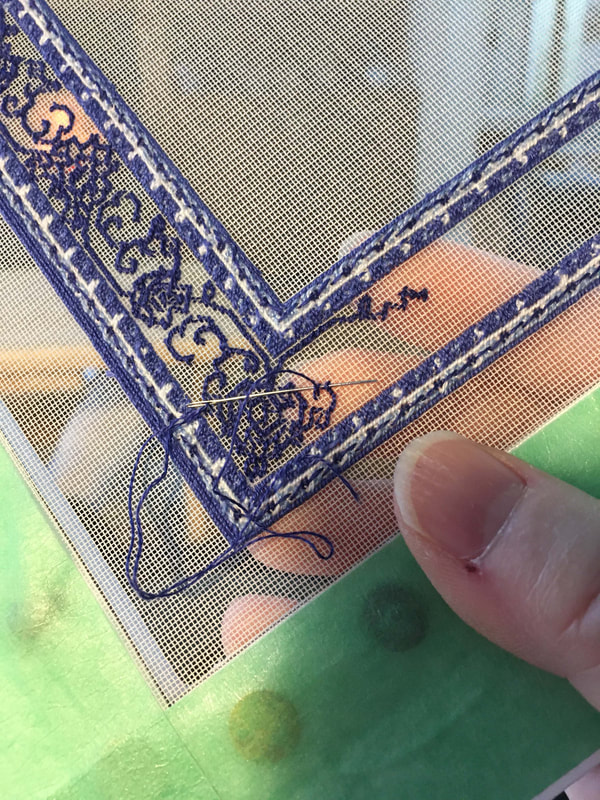
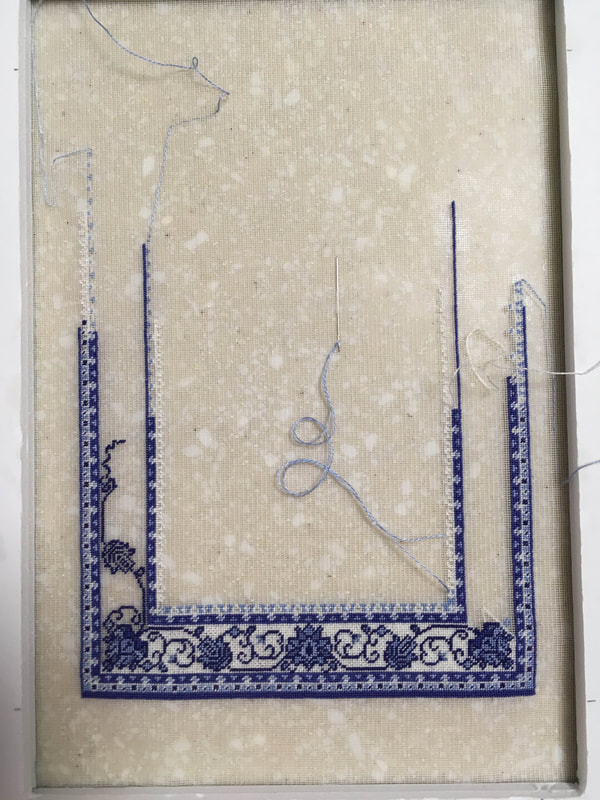
I wanted to take a little bit of time tonight to show you how I have been stitching the outlines of my motifs on the Sonja rug. This rug has a white background so I can't have any dark colors cross under the light colors. Therefore, when I am stitching my outlines and lines of the patterns in this rug, I have been running my thread back under the stitches of the same color when I come to the end of a swirl and still have more to stitch somewhere else. The photo below shows me running the thread under the stitches to get to the next area I have to stitch. The next area I have to stitch is starting about halfway down the small vertical section of the swirl. The only places I have allowed the thread to travel over an un-stitched area is when I know the color going there is darker. This is the back of the rug.
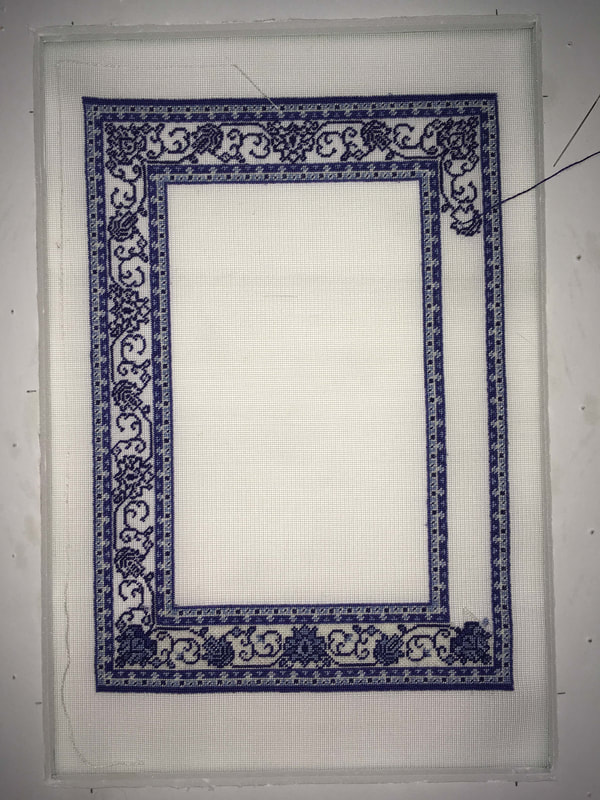
This past week I focused on the border of my rug and have managed to get the outline of the borders done. As you can see from the picture, I have the inner and outer borders in place and just have to fill them in. Once that is done, I get to have fun doing the rest of the fancy, middle border. I am looking forward to continuing it but want to finish the inner and outer one first.
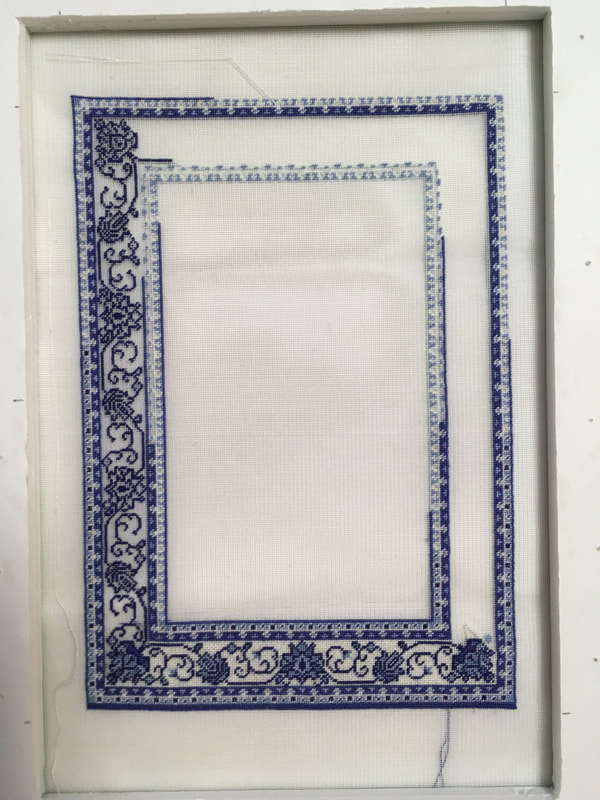
I used the outlines of the middle border to work my way up the left-hand side of the rug and therefore was able to place the corner of the inner border correctly. After that, it was easy to continue across the top and up the right-hand side to join them together. I did the same with the outer border and everything lined up perfectly. I am always surprised (but shouldn't be) at the length of time it takes to stitch a petitpoint project. I started this rug on November 27th, 2019 so it is almost 2 months so far. Here is my progress picture as of yesterday. I have been spending quite a bit of time working up the left side of the rug. I wanted to get to the top corner so that I could rough in the top of the border. I like to make sure all of my edges match, so I often work from corner to corner and leave sections open until I reach an easier area to count. The worst thing to do (which I have done) is to work a row around the entire border then find out you mis-counted by one stitch! After having done that once, I now work towards the end of the border a bit at a time.
Some people like to work from the center outwards and I used to do that all the time. For some reason, I have switched and now like to work from one corner to another. I just measure on the frame and put a little pencil mark where the edges should go. This way, I know I will have enough fabric to stitch the rug without running out. If I am off center by a stitch (or few), it doesn't matter since I make sure the pattern will fit within the area I am using. For the most part, I am now caught up with my last year of stitching and designing so I won't be putting up posts as often, but plan on posting at least once a week to show my progress on each design as I stitch it and will post anytime I have a new rug design to show you. I hope you will continue along this journey with me and will enjoy reading along as I journal about my fun with stitching. If you purchase one of my designs and would like to post a picture of your project when you finish it, please email me at [email protected] and I would love to post a picture in our Gallery along with credit to you for stitching it. Work is progressing nicely on my Sonja rug. I have been able to get a nice amount of the bottom edge done and am working the border up the sides. I love the way the blues are blending and am very pleased with the way this rug is turning out. I think it will look great in my Beachfront Mansion when it is done.
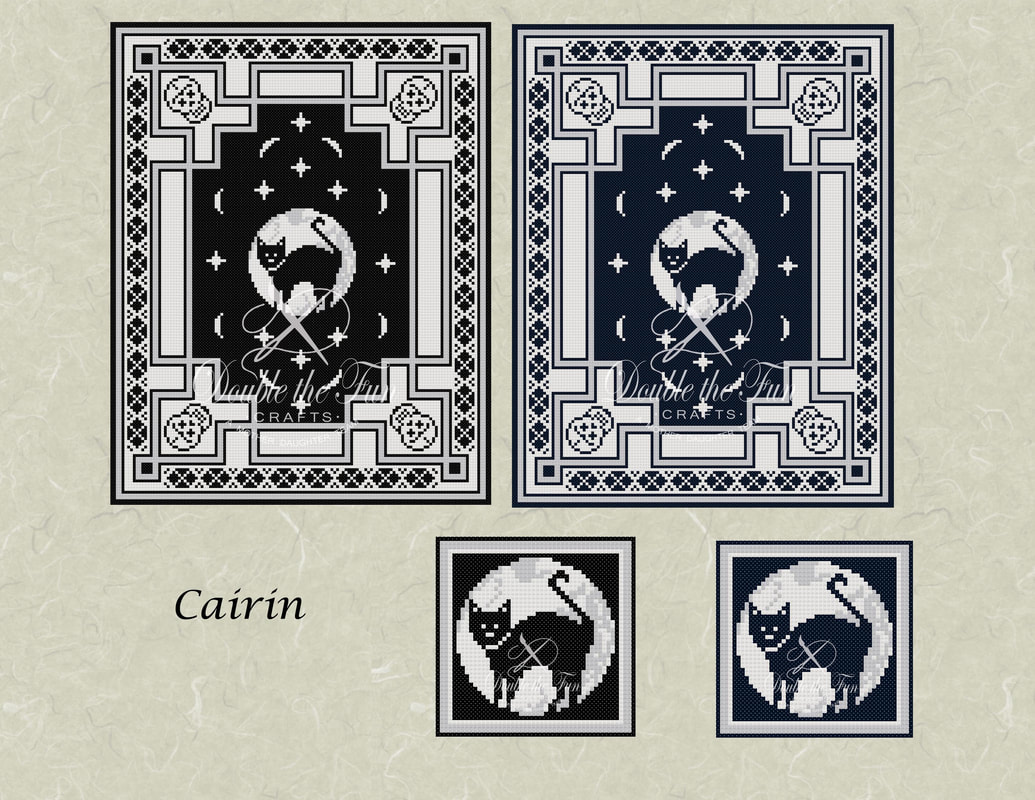
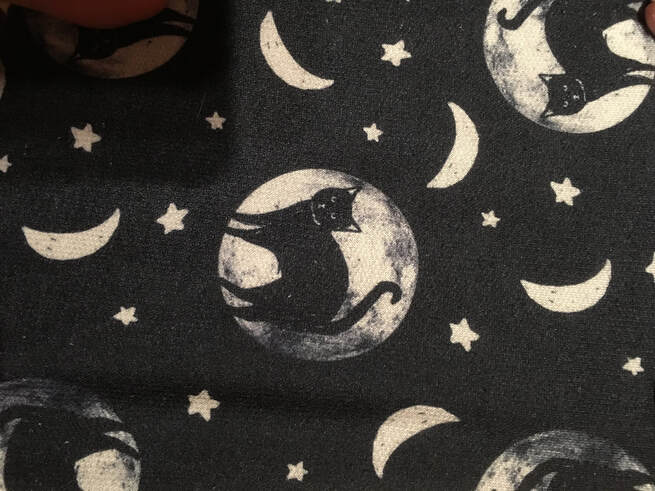
For this rug, I am using a combination of Tent stitch and Basketweave stitch. I have to be very careful that no dark threads cross under light ones as they will show through so after I lay the foundation of the dark outline, I have been working from light to dark when filling in the color. That way I can't accidentally cross a dark under the light color. Since the white is the background, I have been stitching it in basketweave stitch rather than tent stitch. I work around the larger motifs rather than bring my thread across them. This helps the back not be too thick once finished. My Cairin rug was requested by my sister-in-law after a pair of Pyjamas that were favorites of my niece, Cairin. My niece had finally grown out of them and wanted the pattern remembered. I took a photo of the fabric and designed the rug and cushions around them. The center of the rug is the pattern of the Pyjamas and the border is one I made up to complement the pattern. I couldn't decide if I liked it better in dark blue or black so I included both in the pattern. The perfect companion to a spooky room!
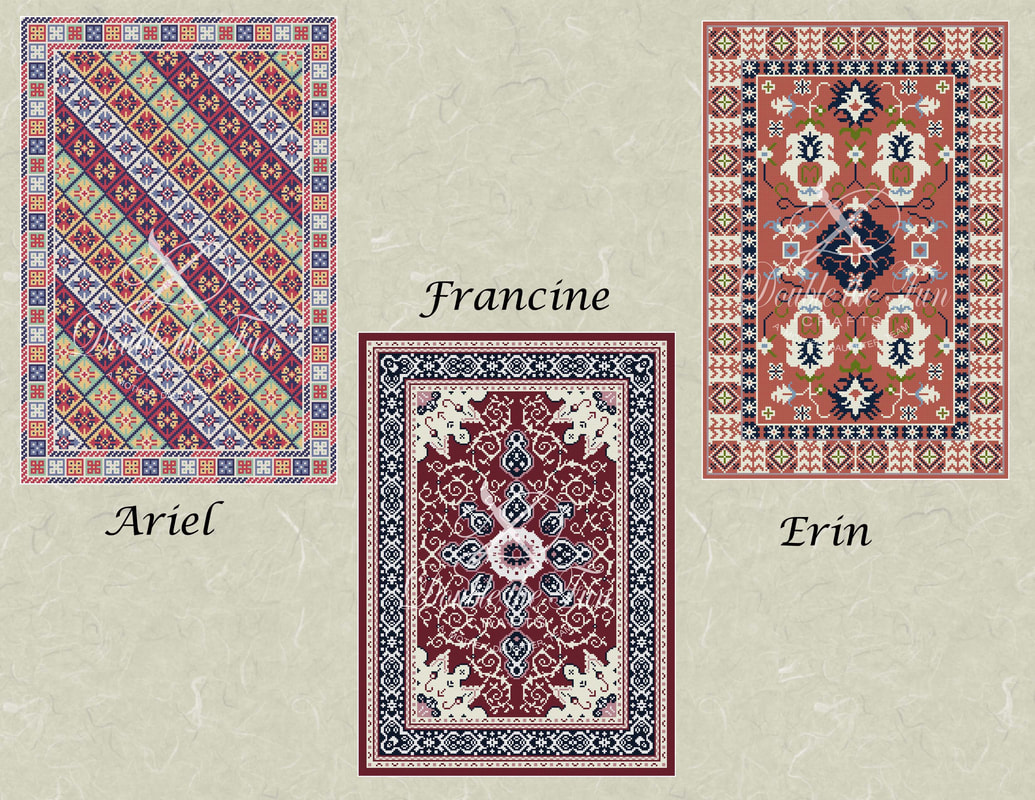
The above three rugs were worked on while experimenting with color. All three were also fashioned after photos of antique rugs but I modified the patterns to make them fit in a miniature setting. Francine needed quite a bit of modifying and now when I look at the original photo, it is hard to tell that it was what inspired this rug. That is what I find fun about designing. I may start with one idea and it soon morphs into something different entirely. I love to see what I end up with in the end. Ariel used the idea of diagonal lines that I saw in a rug photo but the motifs I used are my own and seemed to fit the rug well. Erin looks the most like the original antique rug that I used for my inspiration.
I had a great time working on these three designs as they were a bit out of my comfort zone when it comes to colors. I generally like pastel colors but so many rugs use reds that I decided to try my hand at them.
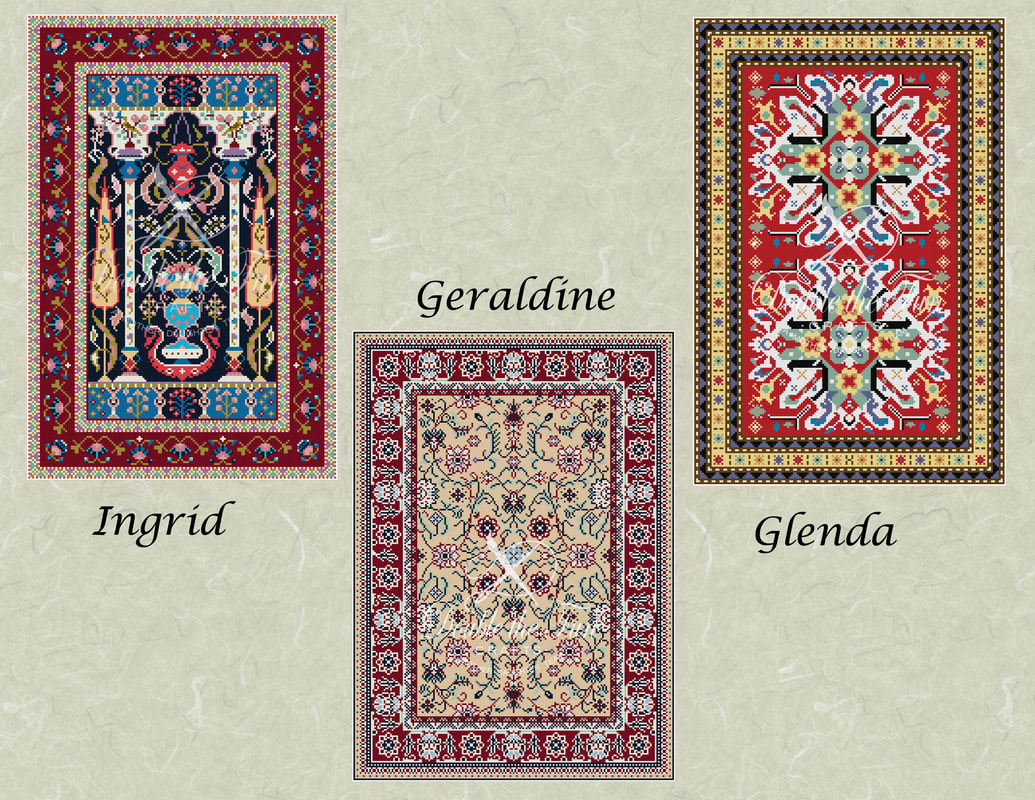
The Ingrid rug was designed after a 100 year old Persian Kashan rug. I liked the many elements that this rug included. This rug truly showed a picture instead of only having repeated elements. Geraldine was also inspired by an antique rug photo that I found. There was so much going on in this rug that I had a great time trying to re-create it in miniature. It incorporated some of the lighter colors that I love with the darker reds that are so common in antique rugs. Glenda was fashioned after a traditional Azerbaijani carpet. The bold pattern is very indicative of this style of carpet and was a joy to work on. With these three rugs, I explored using softer colors instead of some of the bolder colors I have used in the past.
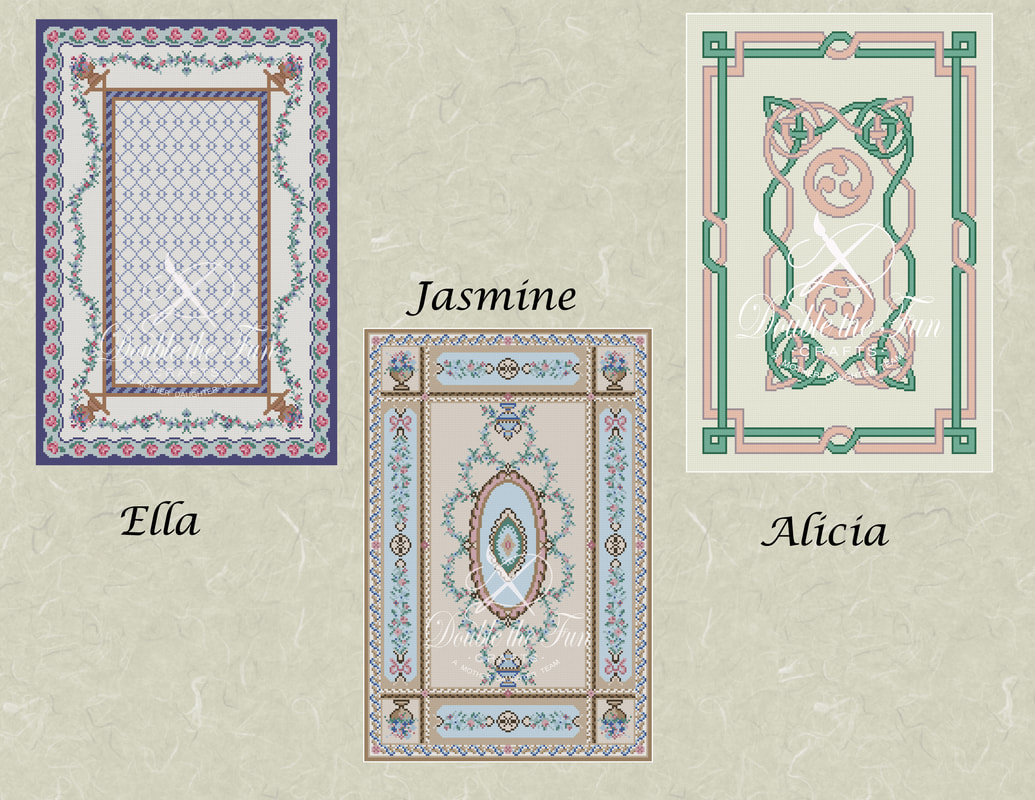
The Ella rug has been made up completely in my imagination. I was out for lunch one day with my Grandmother and noticed a knitted sweater she was wearing. One of the patterns on it inspired me to create the flower border. I started this rug with the border first and worked my way inwards. I find I often do this so that my rug will be the dimension I have chosen and I make the center fit the border size I have chosen. Because I created a flower border for the outer one, I also used flowers on the next inner border. This border represents flowers on a table in each corner with the trailing flowers connecting to the next flowerpot. Since the borders were so ornate and will be a challenge to stitch, I chose to create a fairly simple center. I wanted to have a diamond-style pattern but once I had put the diamond shapes in, felt it needed "a bit more". Therefore, I modified the diamonds and came up with this final pattern. It was interesting to design and I look forward to stitching it someday. Jasmine was inspired by another Aubusson style rug that I saw. I wasn't able to incorporate all of the elements I saw in that rug and changed some others to suit my fancy. It is designed in very soft shades as well. Alicia was first inspired by an embossed design on the cover of a book for the border. I also found an interesting Celtic knot design that I liked and decided to play around with it to create the center motif. Once I finished the center Celtic design, I felt it looked a little sparse so I created the circular motifs from a Celtic circular tattoo that I once saw. My original design used softer colors but I included other color ideas in the chart as well. While stitching my rugs and working on my current dollhouse, I have been continuing to design rugs. Sometimes the creative juices start flowing and I stop everything else for days while I design something. I often see a photo of a rug on Pinterest that sparks my interest in design and I have to get my ideas down before I forget them.
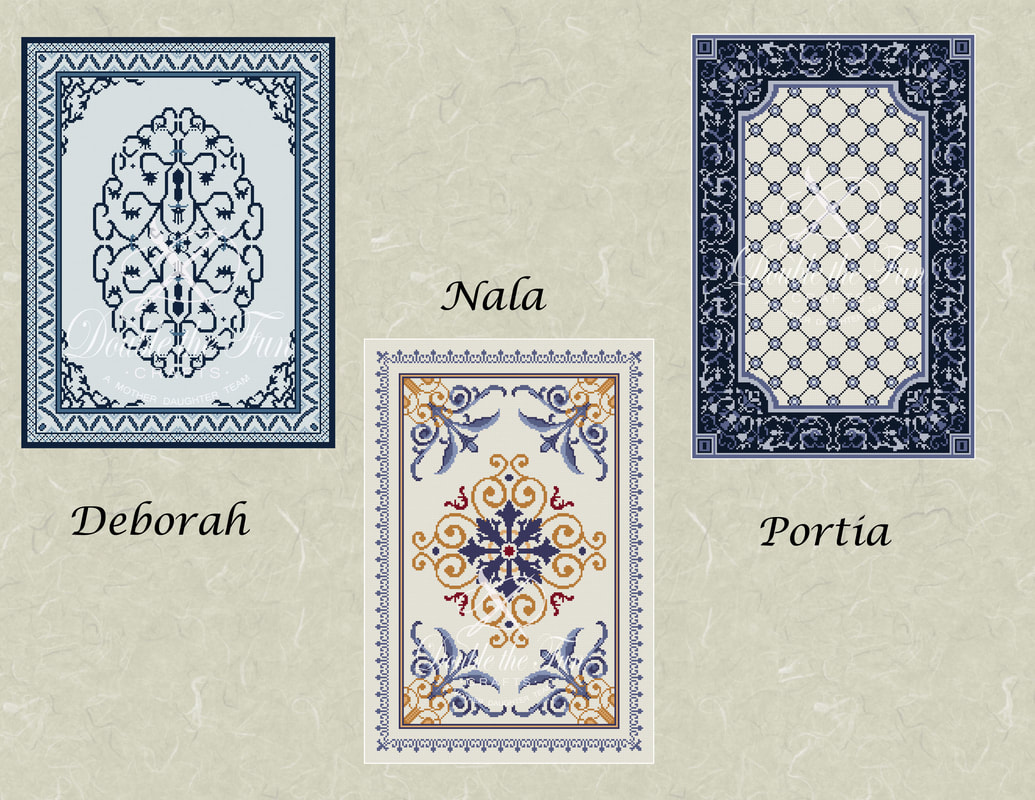
The Deborah rug is based on a Chinese rug idea. I found a photo of a small Antique Chinese Nazimal rug and stretched it out to make a larger, more rectangular rug. Since the original colours were shades of blues, they fit in with my current obsession for blue and white. The Nala rug was inspired by a Marble Mosaic floor picture that I saw. I couldn't believe it was done in marble and felt it would make a perfect rug. I found out through research, that the marble floor was designed from a rug so I have just re-designed it as a miniature rug! I didn't change anything on this design as the lines flowed so well and everything was so well laid out. It was a joy to work on. Getting back to my obsession with blue and white, I couldn't resist working on the Portia rug. It too, is a fairly accurate rendition of an antique rug that, when I researched it, said it was an example of an Arraiolos rug made in Arraiolos, Portugal. |
AuthorMy name is Yvette, and I will be writing this blog to tell you about the creative process that has gone into the creation of my Petitpoint patterns along with showing the stitching I have done of some of the rugs. Archives
July 2024
Categories
All
|
|
Thank you so much for visiting our site. We hope you come back soon!
|
We promise not to spam you with emails and will only send out the occasional email. We promise not to share your email address with anyone and it will only be used by Double the Fun Crafts for the purpose of promoting our products or letting you know of a sale.
|

 RSS Feed
