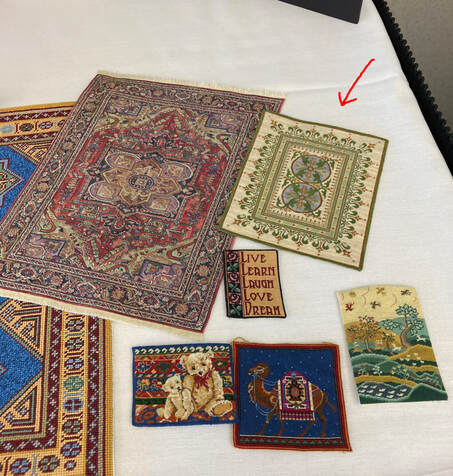
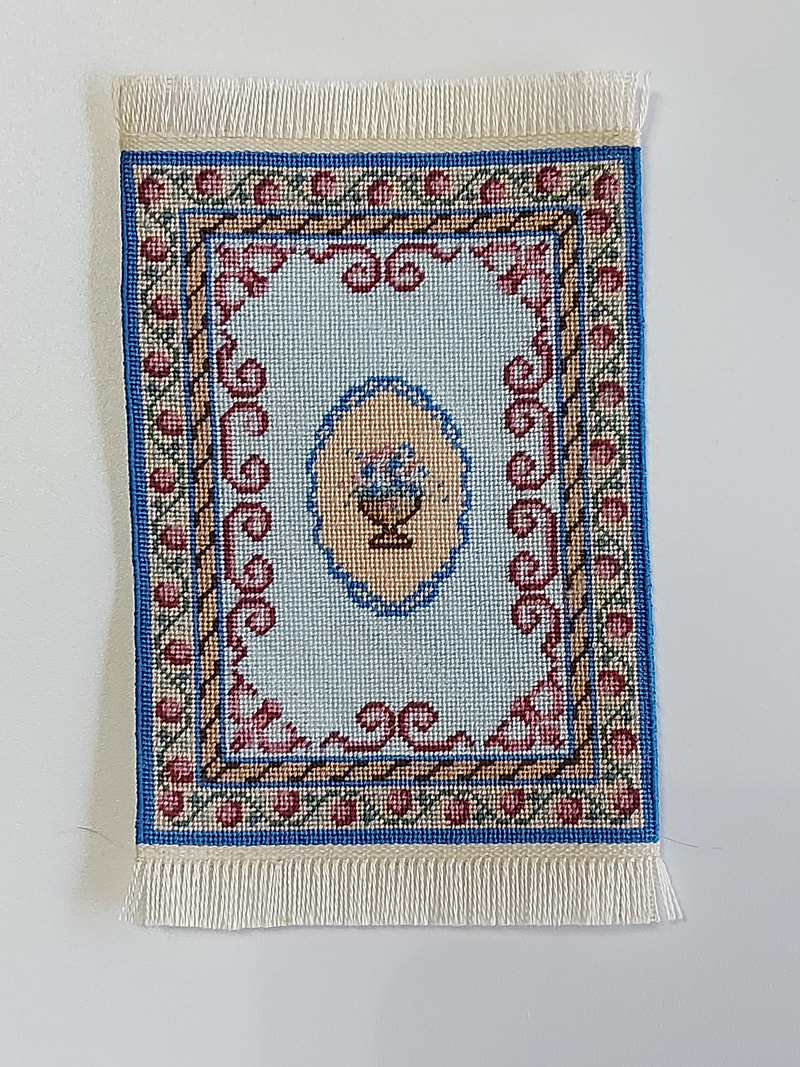
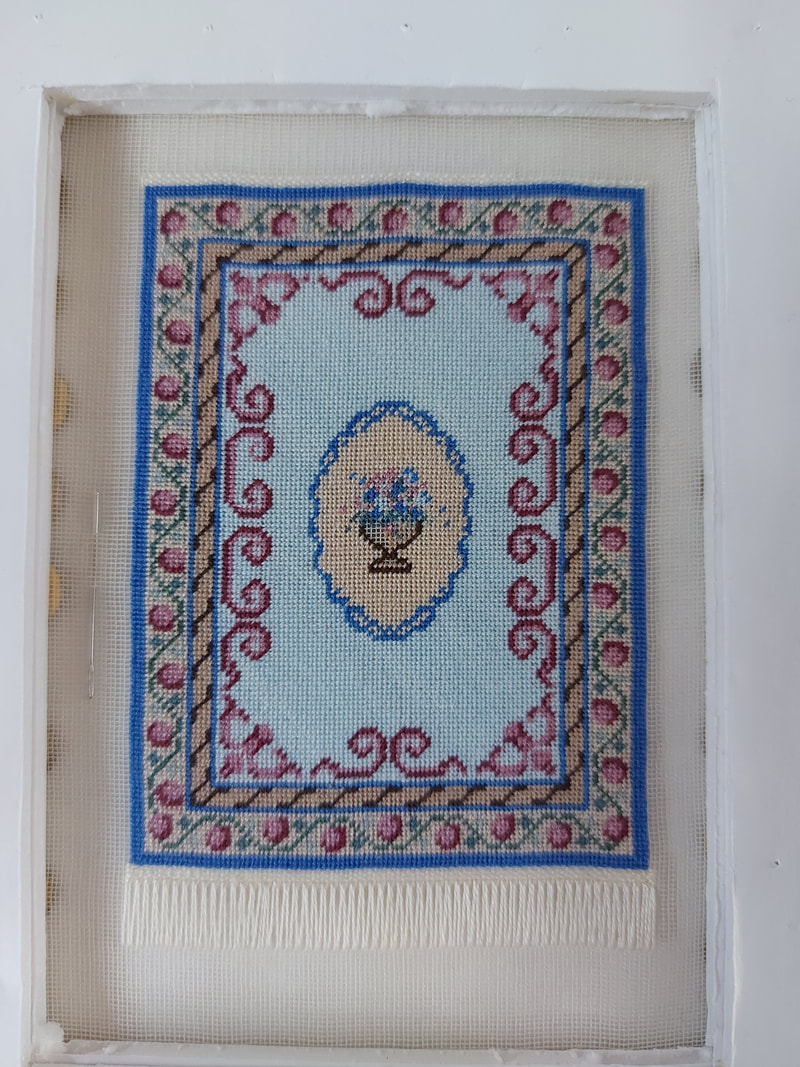
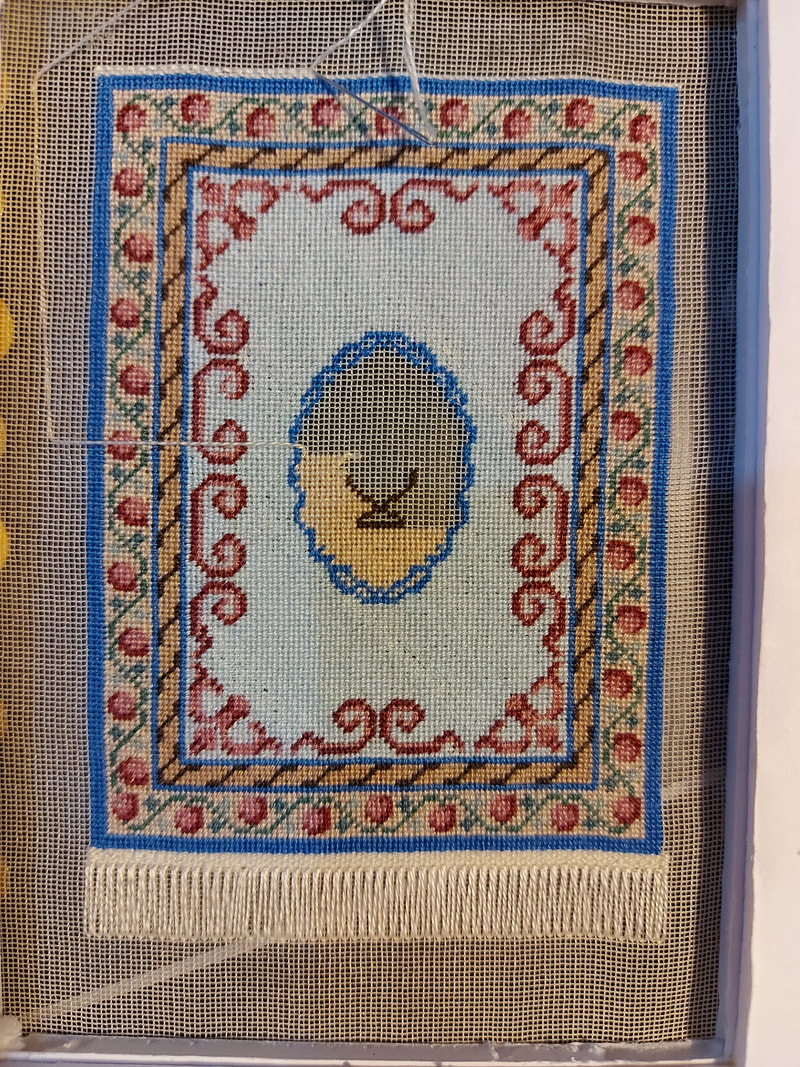
I received permission from the person who took the photo to post it here and I have marked my design with the red arrow. This rug is called the Roosevelt New Orleans and was stitched by Roni. It is one of the rugs that Roni put into the "Now" side of her display.
This rug is one of the free patterns I offer on the site and may be found here: Roosevelt New Orleans. If you decide to stitch this rug, I would love to see photos of it and post them in our Customer Gallery.
0 Comments
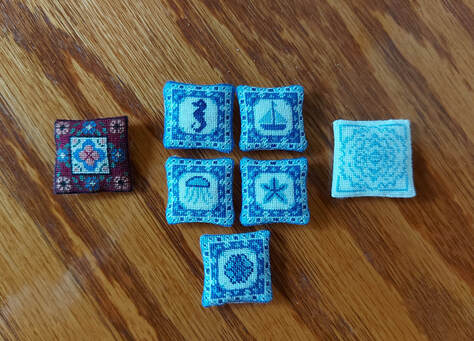
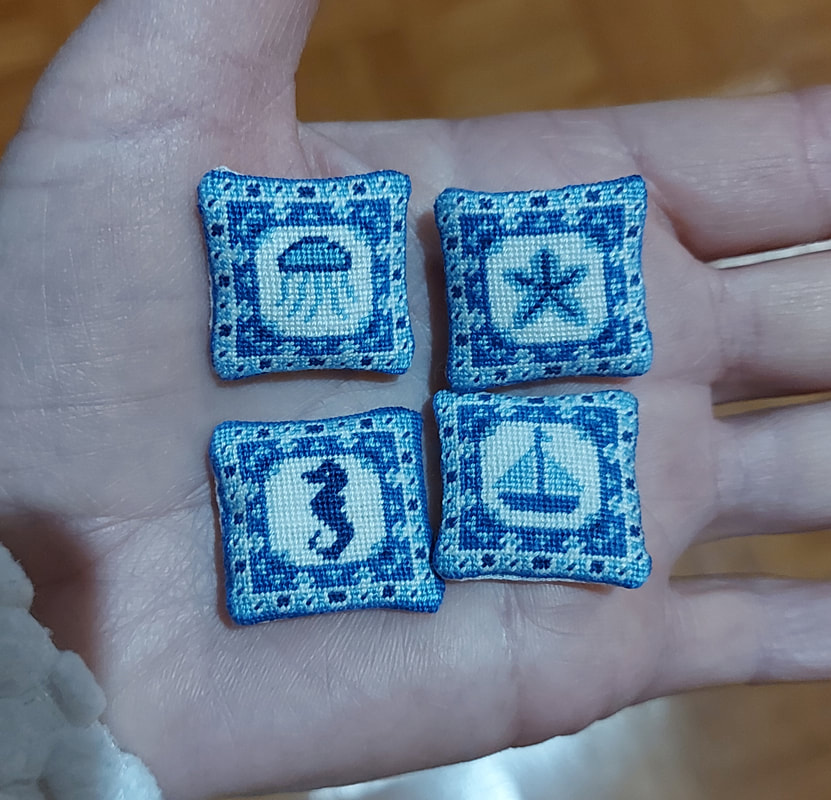
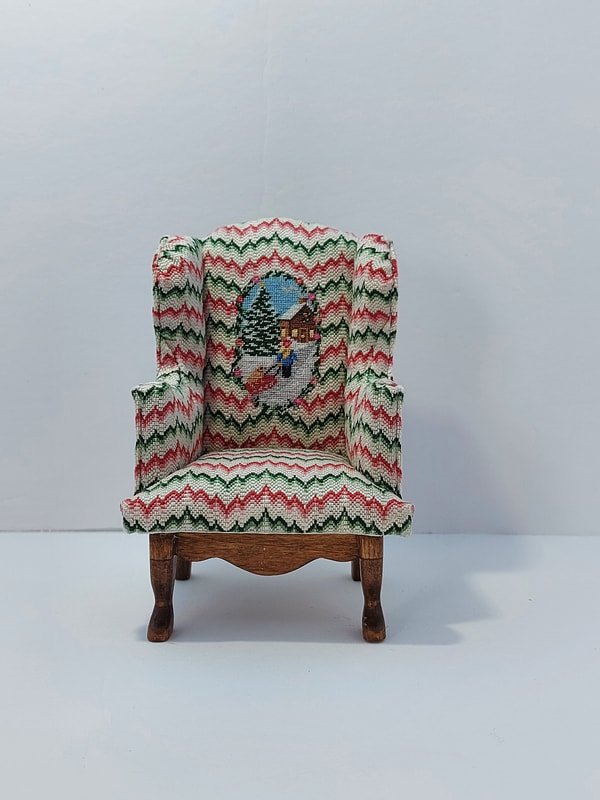
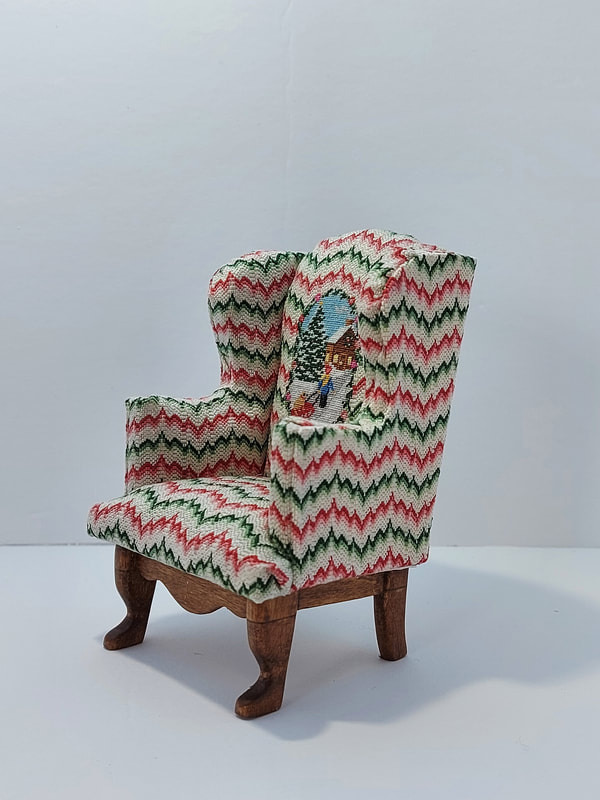
on the frame. I then trimmed the fabric so that approximately 1/8" or more remained, clipped the corners, then turned the pillows inside out so that the outsides of the pillows showed. They were very easy to stitch together but it was a challenge getting the pillow turned and they are smaller than the others. I will most likely make a braid using the colors in the pillows and put it onto them to make them appear larger.
The pillow on the left was finished by stitching a front and a back for it, then folding the trimmed edges back right to the stitching, ironing them then folding the pillow in half and stitching it together using a running stitch. This one had much sharper corners, was easy to stitch together but because I used a running stitch, I can see a bit of the white threads of my silk gauze if I look closely. For this reason, I will also be putting a braid around it to finish it off. The pillow on the right was finished by stitching a front and back like I did for the pillow on the right but this time I folded the fabric back leaving one row visible just like I do for my rugs. I folded the pillow in half then stitched it together using an overcast stitch just like I do on my rugs. This pillow also ended up with nice, sharp corners but unlike the one on the left, I do not need to put a braid around it to finish it off. All three methods of finishing have merit depending on what look you are going for in your finished pillows but the easiest one is the one on the right. I will be writing a tutorial later that details each of the finishing techniques, along with photos so that you may also see clearly how I did each one.
I have returned from my vacation and am happy to say it was very relaxing and therapeutic. I have come back with more ideas for rug and possible tapestry designs. While there I was able to complete the stitching of the 4 pillows shown below plus 2 more on a separate piece of gauze. I also started my Petunia rug and anticipate it will be finished in the not to distant future. I am in the process of deciding whether to put a fringe on this rug or not. I would love to hear your comments and opinions regarding this. Before I can fully finish this rug, I need to go out and purchase 2 more colors which I am hoping to do this coming weekend. These 4 pillows, once finished will go into my beachfront mansion and I will be offering the Petunia for sale. 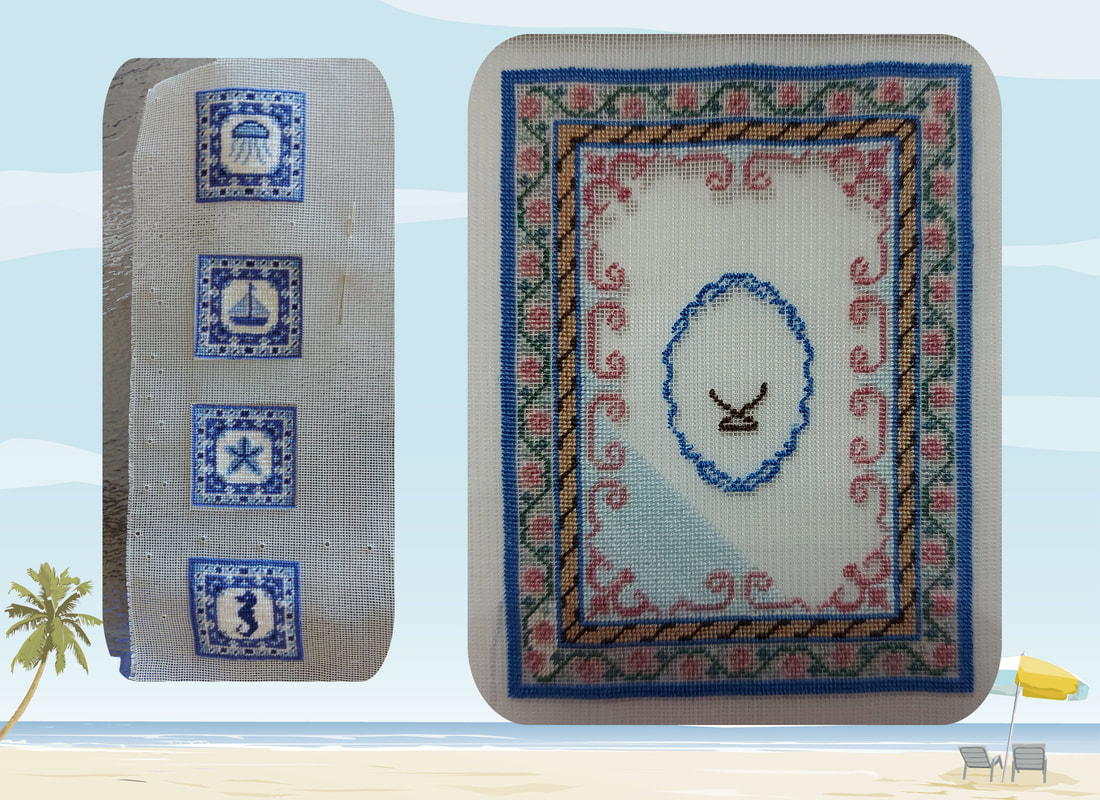 My husband and I have decided to travel back to Antigua this year, and we are greatly looking forward to it. In preparation for the trip, I have chosen some small projects to do while away as I can never sit idle for too long. I have decided to do a bunch of cushions that all use the same colors.  I have mounted the gauze, pulled the colors I need, and have packed a little case of stitching to take with me on the plane (no scissors). I have also packed a small rug (The Petunia) in my checked luggage (with small scissors) in case I finish the cushions early. The Petunia doesn't take up much room and will be a perfect small project for me.
I know I had mentioned starting the Christmas rug in one of my earlier posts but felt this would be too large to take with me as it won't fit into the little box I have made for my travel kit. I guess it will have to wait for a while for me to start that one. I purchased a small wooden box at my local dollar store that was a perfect size to fit a small project. The box isn't very deep and will only fit a frame that is about 3.5" x 2.5" but will suit my needs. My next post will be after we return, when I will have some photos of my stitching to show you.
stitching some little Christmas stockings that I have designed so that I can offer the patterns for sale on the website. Stay tuned for more Christmas projects coming up!
|

AuthorMy name is Yvette, and I will be writing this blog to tell you about the creative process that has gone into the creation of my Petitpoint patterns along with showing the stitching I have done of some of the rugs. Archives
July 2024
Categories
All
|


 RSS Feed
|
Thank you so much for visiting our site. We hope you come back soon!
|
We promise not to spam you with emails and will only send out the occasional email. We promise not to share your email address with anyone and it will only be used by Double the Fun Crafts for the purpose of promoting our products or letting you know of a sale.
|