|
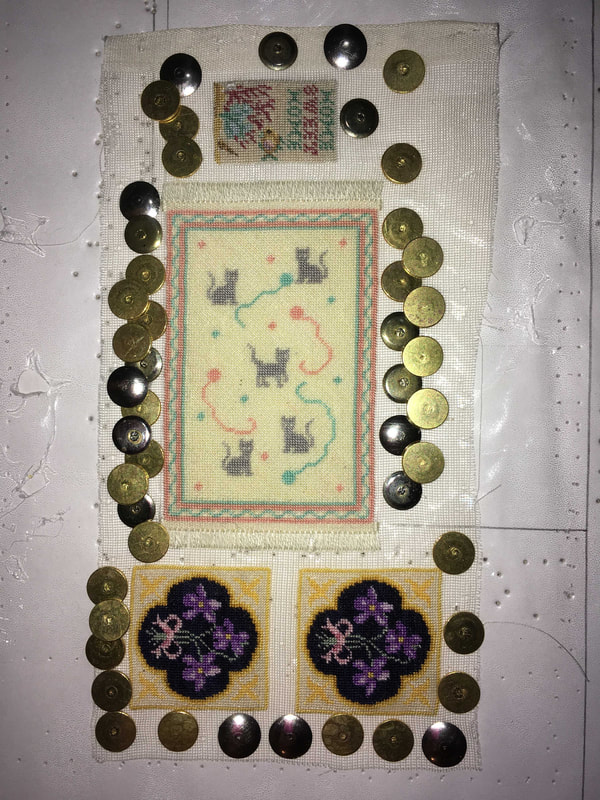
Once a rug or project is finished it must be blocked. Above is the Jane rug plus a few other projects I stitched to use up the leftover fabric to the best advantage.
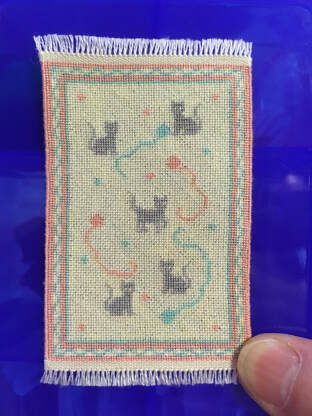
To block a rug, I use a piece of grid paper or a paper with straight lines on it that I have placed inside a clear plastic sleeve. I pin it to a firm background that I had left over from my younger days when I did macrame. It is some sort of firm fibre that holds thumb tacks easily. I start with one edge of the rug and firmly tack it down, using one of the grid lines for a guide. Once the first side is tacked down, I tack one of the ends. All of the tacks are placed on the extra silk gauze that is around the rug, not the rug itself because the tack will create a hole similar to the one you can see near the upper right-hand side of the picture above. While tacking, I stretch the rug a bit, keeping the rug on the line. The next side and end are tacked in the same way, trying to keep it as straight as possible, using the lines as a guide. Once all sides are tacked down, I steam the rug with the steam setting of my iron, without touching the rug. I let the rug dry, then add more tacks to straighten the edges, as needed. I often use a ruler against the edge to make sure I am straight. I repeat this several times until the edges are as straight as I can get them. This process can take several days to weeks depending on how much straightening the project needs. After the blocking, I cut the fringe along the outer edge and fold the gauze under towards the back of the rug. I press the edge down and cut it off short (leaving two rows of gauze). I will put small dots of fabric glue to hold the gauze down and press with the iron. Then I carefully work on the sides. I roll the rug up carefully and turn the long edge under, leaving 2 rows visible. I finish the sides using an overcast stitch and two strands of floss. I overcast over the two rows and through the folded gauze. After the overcast is done on the edge, I cut the gauze as close to the stitching as I can. Here is the finished Jane rug:
0 Comments
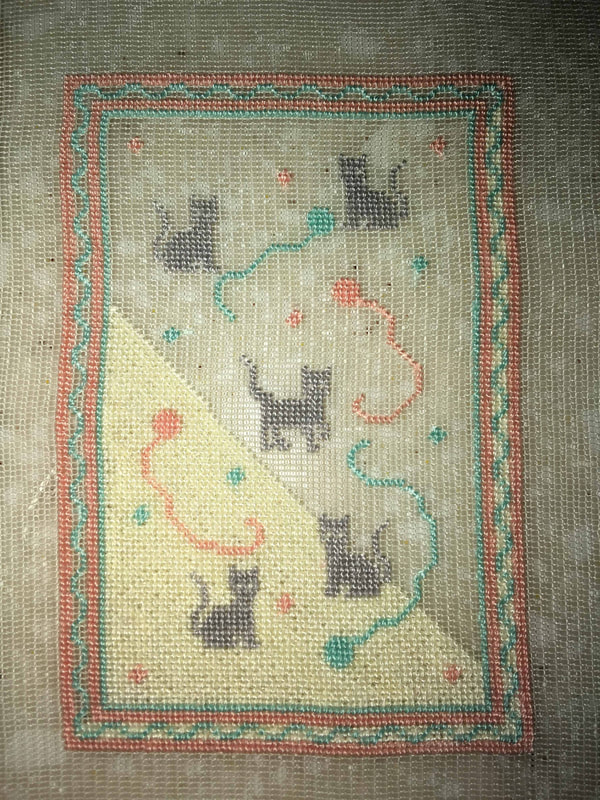
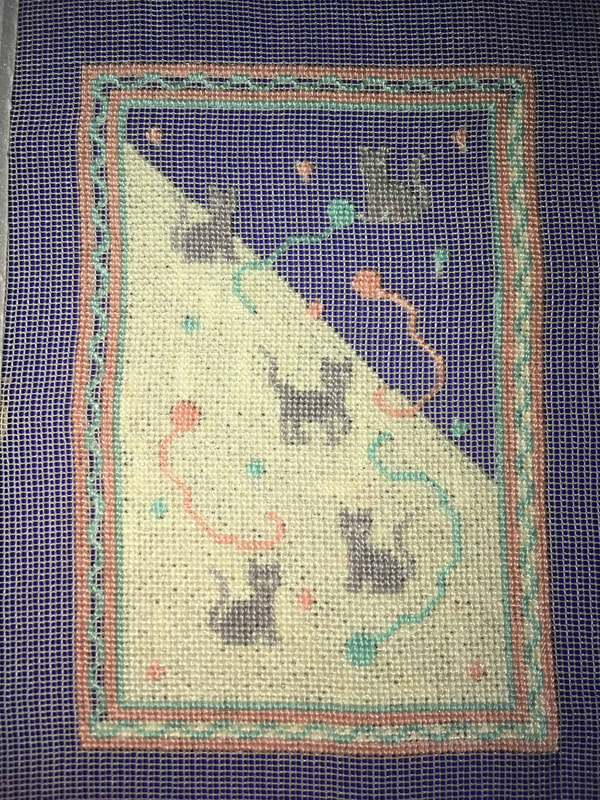
After my first granddaughter was born in January 2019, I designed a little rug that I named after her. I decided it would be perfect for a nursery and began stitching it in July 2019 as a little project that fit perfectly onto a piece of leftover gauze that I had. It stitched up quite quickly and was a great small project to do. You may notice that the background is being stitched on a diagonal. I used the basketweave stitch (which is done on a diagonal) because it is supposed to help keep the rug square if you use different stitches. I used the tent stitch on the border to be my different stitch. When the background is a solid color this works. However, if the background is going to be done in an overdyed floss (as I used in my Heather rug), you must do the background in the tent stitch so that the "abrash" effect works properly.
I wish to take this moment to wish a Happy New Year to everyone as we say goodbye to this year and usher in a new decade. This past year has been a very exciting one for myself and family and I hope to enjoy many years of stitching and miniatures. Hope you and your loved ones have a wonderful 2020! |
AuthorMy name is Yvette, and I will be writing this blog to tell you about the creative process that has gone into the creation of my Petitpoint patterns along with showing the stitching I have done of some of the rugs. Archives
July 2024
Categories
All
|
|
Thank you so much for visiting our site. We hope you come back soon!
|
We promise not to spam you with emails and will only send out the occasional email. We promise not to share your email address with anyone and it will only be used by Double the Fun Crafts for the purpose of promoting our products or letting you know of a sale.
|

 RSS Feed
